Category Archives: Uncategorized

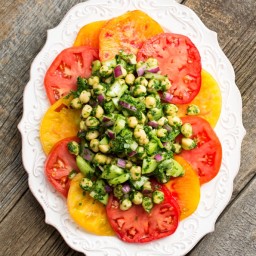
Eat Your Greens Chickpea Medley

{“head_note”:””,”instructions”:”

    \r\n \t

  1. To cook chickpeas: Soak 2 cups dried chickpeas in a large bowl of water overnight (I find around 12 hours or a bit longer is ideal). Soaking beans makes them digest easier and it also cuts down on cooking time. Drain and rinse the beans in the morning and add to a large pot of water. Bring to a boil, reduce heat to medium, and simmer, uncovered, until fork tender, about 40 minutes (this will vary depending on how fresh your dried beans are). Feel free to set the timer, walk away, and go about your business!<\/li>\r\n \t
  2. Rinse and drain the spinach and cilantro (or parsley). Spin until dry in a salad spinner.<\/li>\r\n \t
  3. In a food processor, add the spinach and cilantro and pulse until chopped very small. You can do this in a couple batches if your processor is smaller. Add the processed spinach and cilantro, drained cooked chickpeas, and chopped onion into a large bowl and stir.<\/li>\r\n \t
  4. In a small jar, whisk together the lime juice, olive oil, minced garlic, cumin, maple syrup, and salt.<\/li>\r\n \t
  5. Pour the dressing on top of the spinach chickpea mixture and stir well. Let stand for about 10 minutes (or overnight) to let the flavours develop. Will keep for a few days, or longer, in the fridge.<\/li>\r\n<\/ol>“,”foot_note”:””}
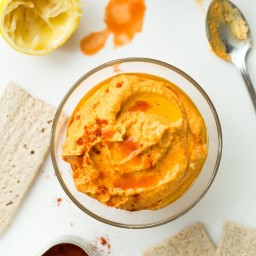
No Meat Athlete Buffalo Hummus

{“head_note”:”Matt\u2019s note:\u00a0Of all the foods I missed when I went vegetarian, buffalo chicken was number one. It wasn\u2019t so much the chicken I craved as the tangy, burn-your-lips spiciness of buffalo sauce. For a while, I just bought bottles of it and put it on anything and everything, but because most buffalo sauce is made with butter, that stopped working once I went vegan. Fortunately my sister Christine came up with this variation, which combines my favorite flavor with one of the foods I eat most often (hummus). Booyah. As with other hummus recipes, substitute the liquid from the can of chickpeas if you wish to avoid oil.<\/em>“,”instructions”:”

    \r\n \t

  1. Combine all the ingredients except the oil (or water) and cayenne. in a food processor. Pulse a few times to combine and then scrape down the sides. With the motor running, stream in the oil (or water) through the feed tube.<\/li>\r\n \t
  2. Continue to run the motor until you reach the desired consistency; I like to let it for for 5 minutes to get it really smooth.<\/li>\r\n \t
  3. Add more salt, lemon juice, or hot sauce, to taste, and then sprinkle with cayenne pepper before serving. Angela\u2019s note: I also sprinkled it with cumin, smoked paprika, and more hot sauce.<\/li>\r\n<\/ol>“,”foot_note”:””}
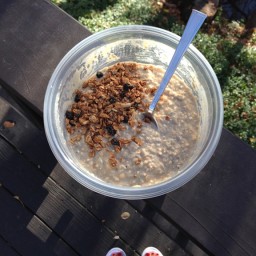
Protein-Packed Vegan Overnight Oats

{“head_note”:”Just a word of caution: The protein powder in this recipe is not for everyone and it\u2019s a taste and texture I got used to with time. My advice is to start off with a small amount of protein powder and gradually add more as you get used to it. The flavour will differ dramatically based on the brand you use. Try something quite neutral. I use Sunwarrior Warrior Blend Natural. The other option is just to omit the protein powder all together. Also, feel free to add sweetener if the oats aren\u2019t sweet enough for you. I did a rough calculation and my bowl has almost 25 grams of protein and it keeps me going all morning long!”,”instructions”:”

    \r\n \t

  1. In a medium bowl, mash the banana until mostly smooth.<\/li>\r\n \t
  2. Stir in chia seeds followed by the protein powder (if using) and oats. It will resemble a very thick paste.<\/li>\r\n \t
  3. Whisk in the water\/almond milk with a fork, until smooth and no clumps remain.<\/li>\r\n \t
  4. Place in the fridge overnight or for at least 1-2 hours, until the oats are soft and the mixture is thick.<\/li>\r\n \t
  5. Serve with a sprinkle of granola and fresh fruit, if desired.<\/li>\r\n<\/ol>“,”foot_note”:”This breakfast is the perfect healthy fuel for hiking trails, climbing mountains, and early morning sunrise adventures. I love knowing that I start off the day with a balanced breakfast just in case we end up having a late lunch.”}

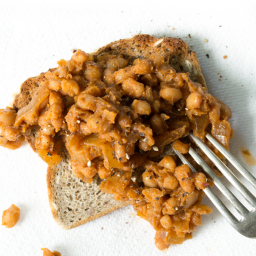
Cheater’s Maple Baked Beans on Toast

{“head_note”:”This is a quick, high-protein meal that doesn\u2019t require slow baking the beans for hours. Just 10 minutes on the stove top is all you need!”,”instructions”:”

    \r\n \t

  1. In a medium pot or skillet, saut\u00e9 the onion in the oil for 6-7 minutes over medium heat until soft and translucent.<\/li>\r\n \t
  2. Add the rest of ingredients, stir well to combine, and cook over low-medium heat for another 5 minutes or so. Adjust ingredients to taste if desired.<\/li>\r\n \t
  3. Serve over toast.<\/li>\r\n<\/ol>“,”foot_note”:”The beauty of this recipe is that you can play around with the condiments and adjust them to taste. You might like yours on the sweeter side, tangier, etc. so feel free to use my recipe as a starting point.”}

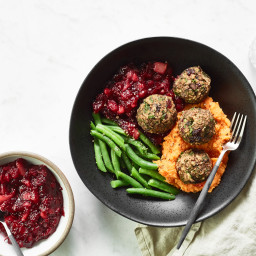
Bread-Free Stuffing Balls

{“head_note”:”My recipe tester Nicole likes to call these \u201cbread-free stuffing balls,\u201d and I think I would have to agree! These festive bites have all the flavours of traditional stuffing, but they\u2019re protein-packed, bite-sized, and gluten-free as well. This is a new and improved version of my popular Lentil Mushroom Walnut Balls<\/a> recipe. I’ve streamlined the procedure and provided a make-ahead version in the Tips below. This recipe moves quickly using quite a few components, so my advice is to gather all of the ingredients and do as much prep as you can before you begin. If you aren’t a cranberry sauce fan, my Vegan Mushroom Gravy<\/a> is a nice option too!”,”instructions”:”

    \r\n \t

  1. Preheat the oven to 350\u00b0F (180\u00b0C) and line a baking sheet with parchment paper.<\/li>\r\n \t
  2. Add the oil to a large pot and turn heat to medium. Finely chop the mushrooms until they\u2019re roughly the size of peas. Add chopped mushrooms to the pot along with minced garlic and a pinch of salt. Stir until combined. Saut\u00e9 for about 6 to 8 minutes, until the water from the mushrooms cooks off, reducing heat to low if necessary to prevent burning.<\/li>\r\n \t
  3. Meanwhile, tear the kale into large pieces and place into a food processor. Pulse (do not process) the kale until finely chopped (pieces roughly the size of almonds), being careful not to overprocess it. Remove and place into a bowl for later.<\/li>\r\n \t
  4. To the processor (no need to clean it out!), add the rolled oats. Process the oats until they\u2019re finely chopped and resemble coarse flour, about 30 seconds.<\/li>\r\n \t
  5. Add the drained lentils and walnuts to the processor bowl with the oat flour. Pulse the mixture, stopping to check on it every few pulses, until it\u2019s coarsely chopped. Be sure not to overprocess it into a paste as you still want a lot of texture and crunchy walnut pieces. Set aside.<\/li>\r\n \t
  6. To the pot with the mushrooms and garlic, add the herbs and saut\u00e9 for 30 seconds until fragrant. Stir in the kale and chopped dried cranberries, then turn off the heat.<\/li>\r\n \t
  7. Stir the flax and water together in a small cup (no need to let it sit). <\/li>\r\n \t
  8. Now add all of the food processor contents, vinegar, and flax mixture to the pot. Stir until thoroughly combined. The dough should be heavy and dense. Add salt and pepper to taste.<\/li>\r\n \t
  9. With lightly wet hands, shape and roll about 14 to 15 balls, roughly 3 to 4 tablespoons of dough each. Place them on the prepared baking sheet about two inches apart.<\/li>\r\n \t
  10. Bake for 22 to 24 minutes, until golden on the bottom and firm to touch. Remove and let cool for 5 minutes.<\/li>\r\n \t
  11. While the Bread-Free Stuffing Balls are baking, make the Cranberry-Pear Sauce. Add the cranberries, pear, maple syrup, and salt to a medium pot. Bring to a low boil over high heat and then reduce to medium. Simmer uncovered for 10 to 20 minutes until thickened. Use a potato masher to mash up the pear near the end of cooking, if desired.<\/li>\r\n \t
  12. Leftover balls can be refrigerated in an airtight container for a few days. To reheat, add oil to a skillet and fry over medium heat, tossing occasionally, until heated through.<\/li>\r\n<\/ol>“,”foot_note”:”* You can save a tiny bit of chopping time by buying sliced mushrooms instead of whole. You\u2019ll still need to dice them up finely, but it\u2019ll go a little faster with the first chop already done for you!\r\n\r\n** You can toast the walnuts beforehand, but this step is optional. Preheat the oven to 325\u00b0F (165\u00b0C) and toast the walnuts on a baking sheet for 9 to 12 minutes, until lightly crisp and fragrant.\r\n\r\nMAKE-AHEAD OPTIONS: You can store the uncooked balls in the fridge (tightly wrapped up on a plate) for up to 36 hours before baking so there’s less fuss the day of a big meal. The uncooked balls can also be frozen in a freezer-safe zip bag for 1 to 2 weeks. To bake, simply pop the frozen balls on a prepared baking sheet and bake for 30 to 32 minutes (they need roughly 7 to 9 minutes more bake time when baking from frozen). The Cranberry-Pear Sauce can also be made 1 to 2 weeks in advance and frozen until ready to use.”}

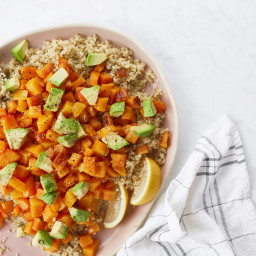
Simple Roasted Butternut Squash Salad

{“head_note”:”This is my favourite method for cooking butternut squash\u2014chopping it into small cubes and roasting until it’s tender and slightly caramelized. I have to exercise some serious restraint not to eat the whole pan straight from the oven! The squash cubes are layered on a base of fluffy quinoa and topped with creamy chopped avocado, sea salt, and a squeeze of lemon or lime juice. It’s super simple, but delightful. My best tip is to make sure you season this salad properly. Quinoa and roasted squash will fall flat without a generous seasoning of sea salt, so don’t be shy. I also like to keep some Herbamare on hand when serving so others can season with additional salt if desired. Be sure to see my Tips below on the many ways you can change up this salad! Thank you to my friend Karly for inspiring this recipe. She brought this salad to a recent get-together and I knew I had to try recreating it at home.”,”instructions”:”

    \r\n \t

  1. For the squash: Preheat the oven to 400\u00b0F (200\u00b0C) and line two large baking sheets with parchment paper.<\/li>\r\n \t
  2. Spread the chopped squash onto the baking sheets and drizzle 1 tablespoon of coconut oil (or olive oil, if using) over each sheet. Toss to coat. Spread the squash into an even layer (being careful not to overcrowd the squash) and sprinkle with a few pinches of sea salt.<\/li>\r\n \t
  3. Roast the squash until the bottoms are just starting to brown in some spots, about 40 to 50 minutes I don\u2019t bother flipping the squash halfway through roasting, but you can if you\u2019d like. <\/li>\r\n \t
  4. For the salad: Once your squash are about 25 minutes from being done, begin preparing the quinoa. Rinse the quinoa in a fine mesh sieve and transfer to a medium pot. Add 1 3\/4 cups water and bring to a simmer over medium-high heat. Reduce heat to low-medium, cover with a tight-fitting lid, and cook for 12 to 14 minutes, until the water is absorbed and the quinoa is tender and fluffy. Once cooked, fluff with a fork and remove from heat. Season the quinoa with salt and pepper to taste (I recommend a generous amount) and stir to combine. Keep the lid on until ready to use so it stays warm.<\/li>\r\n \t
  5. Just before assembly, pit and chop the avocado so it\u2019s ready to go.<\/li>\r\n \t
  6. When the squash is finished cooking, spread the warm quinoa onto a platter or spoon it into a large bowl. While the squash is still hot, spoon it on top of the quinoa before adding the chopped avocado. Garnish with a couple more pinches of salt and a small amount of fresh lemon juice (or lime juice) drizzled over top (you can also try lemon or lime zest for a twist). I use a light touch with lemon juice as it can quickly overwhelm the other flavours. Serve immediately with lemon wedges on the side.<\/li>\r\n<\/ol>“,”foot_note”:”Want to change this recipe up? Here are some fun ideas for how you can create a new dish!\r\n\r\n- Add some minced garlic to the cooked quinoa for a subtle garlic flavour\r\n\r\n- Sprinkle some garlic powder or nutritional yeast on top\r\n\r\n- Boost the protein by adding black beans, chickpeas, or any bean of choice\r\n\r\n- Try experimenting with spice combinations like cumin + chili powder + cayenne; cinnamon + nutmeg; curry powder + coriander, etc.\r\n\r\n- Finish with fresh minced herbs such as parsley or cilantro\r\n\r\n- Sprinkle my Pecan Parmesan<\/a> on top for a nutty crunch\r\n\r\n- Add finely shredded kale, chard, or spinach for a boost of green power”}

One Bowl Pumpkin Pie Spice Cookies

{“head_note”:”One cool fall night after dinner I found myself craving cookies\u2026soft, tender, warm cookies made with a simple oat flour base and flavoured with deliciously festive pumpkin pie spice. I began throwing ingredients into a bowl and mixing as I went. Well, after tasting my first warm cookie out of the oven, I realized I had made the perfect easy pumpkin pie spice cookies. The only catch? I hadn\u2019t measured the ingredients or bothered to write anything down…gulp! <\/i>After enjoying my third cookie, I desperately began to jot down ingredient estimates so I could attempt to make these delicious cookies again. Thankfully my guesses weren\u2019t too far off and it only took me two trials before I felt like I had nailed the same cookie! Whew. Crisis averted.<\/i> You can thank me later. This recipe is good to have on hand for those cozy fall or winter nights when you don\u2019t want to make a huge batch of cookies (this recipe makes 8 cookies) and are just craving something light to nibble on as a snack.”,”instructions”:”

    \r\n \t

  1. Preheat the oven to 350\u00b0F (180\u00b0C) and line a medium baking sheet with parchment paper.<\/li>\r\n \t
  2. In a medium mixing bowl, stir together the ground chia seed and water and let it sit for a minute.<\/li>\r\n \t
  3. Add the rest of the ingredients to the same bowl and stir until combined. The dough will be very wet.<\/li>\r\n \t
  4. Spoon a heaping tablespoon of dough into your hand and shape it into a ball. Place it on the baking sheet and repeat for the remaining dough, spacing the balls a couple inches apart. <\/li>\r\n \t
  5. Bake the cookies for 11 to 12 minutes (I bake for 12) until they look like thick, puffy mounds.<\/li>\r\n \t
  6. Cool for 10 minutes on the baking sheet (they\u2019ll be very delicate until fully cooled) and enjoy warm with some homemade almond milk<\/a> or tea, if you\u2019d like! <\/li>\r\n<\/ol>“,”foot_note”:”* You can swap 2 teaspoons ground flax seed for 1 teaspoon ground chia.\r\n\r\n** We also tried a version using whole-grain spelt flour and unfortunately didn\u2019t like the flavour of it, so I wouldn\u2019t recommend swapping out the oat flour for spelt flour.”}

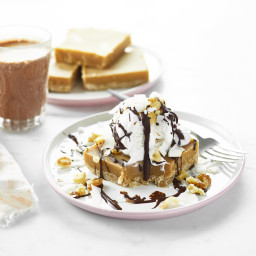
Salted Peanut Butter Crunch Torte

{“head_note”:”While dreaming up a recipe to celebrate Oh She Glows\u2019 10-year anniversary, I immediately thought of one of my all-time favourite flavour combos: salted peanut butter and chocolate! Hubba hubba.<\/i> This salted peanut butter torte (of pure sweet heaven<\/i>) is easy to throw together and only takes a couple hours to freeze. Its creative presentation will impress the heck out of your guests, and that irresistible sweet-salty flavour and creamy, crunchy texture will blow your taste buds away! I\u2019ve also tested this torte with 3 different fillings: peanut butter, almond butter, and a nut-free sunflower seed butter version! And guess what? They\u2019re all so delicious we couldn\u2019t pick a favourite! See my Tips for how to make the sunflower seed and almond butter versions.”,”instructions”:”

    \r\n \t

  1. Preheat oven to 350\u00b0F (180\u00b0C). Lightly grease an 8×8-inch square pan with coconut oil (including up the sides, too). Cut a piece of parchment paper to fit the width of the pan with a bit of overhang so it\u2019s easy to lift out.<\/span><\/li>\r\n \t
  2. For the crust: Add the almonds, oats, and salt to a food processor and process until the mixture resembles a coarse flour, about 30 seconds. <\/span><\/li>\r\n \t
  3. Melt the 1\/4 cup coconut oil in a medium pot (you\u2019ll be using the same medium pot for the filling) over low heat. Add the melted oil, maple syrup, and peanut butter to the processor and process until the mixture comes together in a heavy dough, 10 to 15 seconds. The dough should look like a wet cookie dough. If you find it a bit dry, add a teaspoon or two of water and process again until a wet dough forms.<\/span><\/li>\r\n \t
  4. Spoon the dough into the prepared pan and crumble it evenly all over the base. Lightly wet your fingers and press the dough into the base firmly and evenly. Level the edges with your fingertips. Poke the base with a fork about 12 times to allow air to escape while baking. <\/span><\/li>\r\n \t
  5. Bake the crust for 9 to 11 minutes, until it looks pale and a bit puffy. The crust might look underbaked when you remove it, but this is what we want to avoid drying it out. <\/span><\/li>\r\n \t
  6. Meanwhile, make the filling: In the same medium pot (no need to clean it!), melt the coconut oil and coconut cream over low heat. Now add the maple syrup, peanut butter, salt, and vanilla and whisk until smooth. <\/span><\/li>\r\n \t
  7. Spoon the filling onto the crust (there\u2019s no need to cool the crust first) and carefully transfer the dish to a level surface in your freezer. Chill until solid, about 2 hours. If I\u2019m not serving the torte right away, I\u2019ll cover the pan with tinfoil after a couple hours of freezing. While it chills, prepare the Coconut Whipped Cream and gather the toppings so they\u2019re ready to go. <\/span><\/li>\r\n \t
  8. Once frozen, remove from the freezer and let it sit on the counter for 10 minutes. Slide a knife around the edges to loosen the slab. Using the parchment paper, lift the slab out and place it on a serving platter. Slice into slices of your desired width. Now add the toppings: I add a large dollop of Coconut Whipped Cream on each and then top it with lots of drizzled melted chocolate, walnuts, and large-flake coconut. A pinch of coarse sea salt is nice too. If you have leftover melted chocolate, serve it on the side in a small dish so you can spoon some more chocolate over top while eating (trust me on this one!). Serve immediately\u2014the combo of cold filling and warm melted chocolate is just dreamy! But the chilled leftovers (with hardened chocolate) are totally irresistible too.<\/span><\/li>\r\n \t
  9. Storage tips: The filling softens a great deal at room temperature, so it’s best not to leave leftovers on the counter for longer than half an hour. Return it to the fridge or freezer for best results. Cover leftover slices and store in the fridge for up to 1 week, or you can freeze the slices for 4 to 6 weeks. I like to wrap frozen slices in tinfoil and then place them all into a freezer-safe zip bag.<\/span><\/li>\r\n<\/ol>“,”foot_note”:”* Chill your can of full-fat coconut milk for at least 12 hours before you begin this recipe so that the cream on top is solid. After making the torte, you\u2019ll have some leftover coconut cream in the can which can be used to make Coconut Whipped Cream for the topping!\r\n\r\n \r\n\r\n** Feel free to use store-bought coconut whipped cream instead. I like \u201cSo Delicious Dairy Free CocoWhip!\u201d\r\n\r\n \r\n\r\n*** To a small pot over low heat, add the chocolate and oil. Stir until smooth and combined.\r\n\r\n \r\n\r\n**** Of course you can use roasted peanuts instead. I\u2019m not a big fan of them so I prefer to use walnuts.\r\n\r\n \r\n\r\nMake it nut-free: In the crust, swap the almonds for sunflower seeds and in the filling swap the peanut butter for roasted sunflower seed butter. I like to add an extra tablespoon of maple syrup and a pinch of salt to this version\u2014the filling tastes like salted caramel!\r\n\r\n \r\n\r\nAlmond butter version: Swap the peanut butter for roasted almond butter.\r\n\r\n \r\n\r\nDon\u2019t have an 8×8-inch square pan? You can make this in an 8×4-inch loaf pan or standard-size muffin tin (both greased with coconut oil).”}

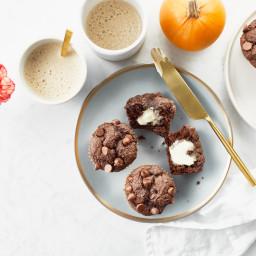
One Bowl Pumpkin Chocolate Muffins

{“head_note”:”These moist, dense, gooey pumpkin chocolate muffins are similar to that feeling you get walking through a pumpkin patch, sipping dark hot chocolate, and crunching colourful autumn leaves beneath your feet! Picture a delicious pumpkin chocolate cake or brownie\u2014but in muffin form. What could be better? How about that they take just one bowl to make!\u00a0This recipe is adapted from Beaming Baker<\/a> and my Pumpkin Gingerbread Muffins<\/a>.”,”instructions”:”

    \r\n \t

  1. Preheat the oven to 350\u00b0F (180\u00b0C) and line a muffin tin with 12 paper liners.<\/li>\r\n \t
  2. Add the rolled oats to a high-speed blender and blend on high until a fine flour forms. Set aside.<\/li>\r\n \t
  3. In a large mixing bowl, whisk together the ground chia seed and water until combined. Set aside for a few minutes to thicken.<\/li>\r\n \t
  4. To the same bowl, add the rest of the wet ingredients (pumpkin, oil, sugar, maple syrup, and vanilla) and stir until smooth.<\/li>\r\n \t
  5. Add the dry ingredients (oat flour, cocoa powder, pumpkin pie spice, baking powder, baking soda, and salt) to the bowl with the wet ingredients. Whisk until smooth (I love using my big whisk for this task!). <\/li>\r\n \t
  6. Set aside 1\/4 cup (45 g) of chocolate chips (if using) for the topping and stir the remaining chips into the batter. <\/li>\r\n \t
  7. Spoon the batter into the paper liners, filling each two-thirds full. Press the remaining chocolate chips into the tops of each muffin. <\/li>\r\n \t
  8. Bake the muffins for 20 to 25 minutes (I bake for 22), until a toothpick inserted into the middle comes out clean. <\/li>\r\n \t
  9. Place the muffin tin on a cooling rack for 10 minutes. Carefully remove each muffin and place it directly onto the cooling rack until fully cooled. Leftover muffins can be stored in the fridge in an airtight container for several days or frozen for up to 1 month.<\/li>\r\n<\/ol>“,”foot_note”:”* If desired, you can use 1 tablespoon ground flax in place of the ground chia seed. Proceed with mixing in the 3 tablespoons (45 mL) water as directed.\r\n\r\n** You can use 150 grams oat flour rather than grinding your own (this is equal to 1 cup and 7 tablespoons oat flour measured using the scoop-and-shake-until-level method). Alternatively, 1 1\/2 cups (233 g) whole-grain spelt flour will also work as a swap for the oat flour. If using whole-grain spelt flour, you will likely need to bake the muffins for a couple extra minutes (until a toothpick inserted in the middle comes out clean).\u00a0Please keep in mind that spelt flour is not gluten-free.\r\n\r\n*** If you’re a big pumpkin spice fan, you can use up to 1 tablespoon of spice mix in this recipe.\r\n\r\n**** Try chopped walnuts or pecans for a crunchy, healthy twist!\r\n\r\nYou can make these muffins into a loaf instead. Simply pour the batter into a 9×5-inch loaf pan and bake for 45 to 50 minutes (I bake for 46) at 350\u00b0F (180\u00b0C) until a toothpick comes out clean.”}

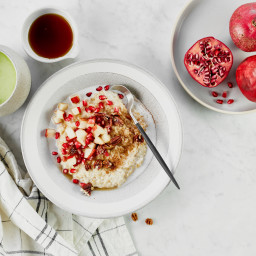
The Creamiest Steel-Cut Oats

{“head_note”:”My goal was to create the creamiest bowl of steel-cut oats using just a few ingredients…and this is it! This luxuriously chewy steel-cut oatmeal is the perfect base for all of your favourite topping combinations. I love adding pure maple syrup, cinnamon, seasonal fruit, toasted walnuts, and chopped dates or raisins. It doesn\u2019t get much cozier on a cool fall or winter morning! I\u2019ve also provided cooking instructions using both the stovetop and Instant Pot<\/a> (I prefer the Instant Pot method as it’s so easy). For the Instant Pot method, please see the Tip section.”,”instructions”:”

    \r\n \t

  1. STOVETOP METHOD: Pour the can of coconut milk and 1 cup (250 mL) water into a medium pot and bring to a low boil over high heat. <\/li>\r\n \t
  2. Add the steel-cut oats to the pot and stir to combine. Immediately reduce the heat to low (low heat is important or they\u2019ll burn) and gently simmer, covered, for 30 to 40 minutes, stirring four to five times during cooking and reducing heat if necessary to prevent burning. This method produces a thick pot of oats. For a porridge-like consistency, stir more water in to your liking. I like to stir in about 1\/2 cup (125 mL) water after cooking.<\/li>\r\n \t
  3. Portion into bowls and top with your desired garnishes\u2014I love the combo of pure maple syrup, toasted walnuts, seasonal fruit, fine sea salt, cinnamon, and raisins or chopped dates, but feel free to get creative and change it up depending on the season. Leftovers will keep in an airtight container in the fridge for 5 to 7 days or you can freeze them for up to 1 month. I store cooled single portions in freezer-safe bags and lie them flat in the freezer for easy stacking. Reheat refrigerated or thawed leftovers on the stovetop in a small pot along with a splash of water or milk over medium heat. <\/li>\r\n<\/ol>“,”foot_note”:”INSTANT POT METHOD:\r\n\r\n \r\n
      \r\n \t

    • 1.Add the coconut milk and water to the Instant Pot, followed by the oats. Stir to combine.<\/li>\r\n \t
    • 2.Secure lid in the lock position and check that the Steam Release Handle is pointing to the \u201cSealing\u201d position.<\/li>\r\n \t
    • 3.Press the \u201cPressure Cook\u201d (or \u201cManual\u201d) button and set the cook time to 7 minutes on high pressure. After 5 seconds you\u2019ll hear a couple beeps and the screen will say \u201con\u201d. The cooking process has begun!<\/li>\r\n \t
    • 4.Once finished, you\u2019ll hear a few beeps letting you know that cooking is over. Now let the Instant Pot do a \u201cNatural Pressure Release\u201d\u2014I wait 10 minutes for most of the the pressure to release on its own.<\/li>\r\n \t
    • 5.Carefully release any remaining steam before removing the lid. Stir the oatmeal until combined, adding more milk or water if you\u2019d like to thin it. It\u2019ll be oh-so-creamy and continue thickening as it sits!<\/li>\r\n \t
    • 6.Portion into bowls and top with your desired garnishes\u2014I love the combo of pure maple syrup, toasted walnuts, seasonal fruit, fine sea salt, cinnamon, and raisins or chopped dates, but feel free to get creative and change it up depending on the season. Leftovers will keep in an airtight container in the fridge for 5 to 7 days or you can freeze them for up to 1 month. I store cooled single portions in freezer-safe bags and lie them flat in the freezer for easy stacking. Reheat refrigerated or thawed leftovers on the stovetop in a small pot along with a splash of water or milk over medium heat.<\/li>\r\n<\/ul>“}