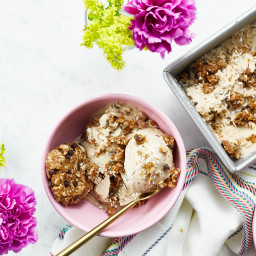
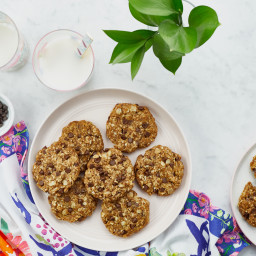
{“head_note”:”This is my favourite kind of summer indulgence! My reader-favourite Flourless Peanut Butter Cookies<\/a> meet my dreamy homemade peanut butter and coconut milk ice cream in this cooling summer treat. Chewy coconut, snappy chocolate chips, and tender bites of soft peanut butter cookies blend perfectly with a creamy vanilla and peanut butter vegan ice cream. If I\u2019d known how simple it was to make my own vegan ice cream (only 5 ingredients!), I would\u2019ve invested in an ice cream machine long ago. Well, I\u2019m making up for lost time now!”,”instructions”:”
- \r\n \t
- Chill the ice cream bowl in the freezer overnight, or for at least 12 hours. This step is very important to ensure the ice cream thickens properly.\u00a0<\/li>\r\n \t
- Prepare the Flourless Peanut Butter Cookies<\/a>. After baking, cool the cookies for 10 to 15 minutes, then transfer each one to a plate. Place in the freezer on a flat surface for a minimum of 25 minutes. As soon as you transfer the cookies to the freezer, get started on the ice cream.<\/li>\r\n \t
- Add the ice cream ingredients (entire cans of coconut milk, sugar, peanut butter, vanilla, and salt) to a blender and blend for about 8 to 10 seconds, until smooth (be sure not to blend longer than 10 seconds, as it may effect the final texture of your ice cream).\u00a0<\/li>\r\n \t
- Place the frozen ice cream bowl into the ice cream maker, insert the churning arm, cover with the lid, and turn on the machine (if the instructions for your ice cream maker are different, please follow the directions that came with your machine). Slowly pour the mixture into the bowl as it churns. Churn for about 22 minutes, until the mixture has thickened into a very thin, soft-serve texture.\u00a0<\/li>\r\n \t
- Once the cookies have been in the freezer for 25 minutes, chop 6 of the cookies into small, almond-sized chunks. Reserve the remaining 7 cookies, at room temperature, for later.<\/li>\r\n \t
- After 22 minutes of churning, slowly add the chopped cookies, a handful at a time, to the mixture while the machine is still churning. I like to use a fork to gently push the chopped cookies into the ice cream and help it along. Churn another 5 to 8 minutes, until the ice cream has thickened a bit more. It will have a thick, soft-serve texture when ready. There will be some hardened ice cream along the inside of the bowl…I like to think of this as the chef\u2019s extra helping (wink, wink)! Serve immediately, or for a firmer texture, transfer the ice cream to a loaf pan or airtight container and spread out smooth. At this stage, I like to crumble an extra cookie all over the top (and gently push it into the ice cream) to make it look extra-enticing, but this is optional. Cover and freeze for 2 hours for a more traditional ice cream firmness.\u00a0<\/li>\r\n \t
- To serve, scoop into bowls or ice cream cones. Or, if you’re feeling wild, make ice cream sandwiches with the leftover cookies…oh yea!!<\/li>\r\n \t
- Storage tip: Leftovers can be stored in an airtight container in the freezer for 3 to 4 weeks. Be sure to cover the ice cream with a piece of wrap to prevent freezer burn. To soften, let the container rest on the counter for 20 to 30 minutes before scooping.<\/li>\r\n<\/ol>“,”foot_note”:”* The cans of coconut milk do not need to be chilled beforehand.\r\n\r\n \r\n\r\nAlways follow the directions that come with your ice cream maker as there may be slight variations. My churning time is an estimate only; you may find you need more or less time with your machine! Watch closely during the last few minutes of churning. It it still looks too soft, feel free to let it churn a bit longer than the range I provide.\r\n\r\n \r\n\r\nThis is the ice cream maker that I use and love<\/a>. Pro tip: This machine is a bit noisy once the mixture starts to thicken, so I like to keep the machine in a nearby room with the door closed while it churns (don’t worry, my machine doesn’t seem too offended and still makes great ice cream!).\r\n\r\n \r\n\r\nNo ice cream maker? No problem! The blended liquid can be poured into popsicle molds for creamy frozen popsicle treats. Simply add the blended liquid to each popsicle mold, leaving at least an inch of room at the top. Now, carefully add some cookie chunks to each, pushing them down slowly into the liquid. If needed, add a bit more liquid to completely fill each mold. Secure the tops and freeze until solid. Run the popsicles under hot water to loosen them from the molds.”}
