Category Archives: Uncategorized

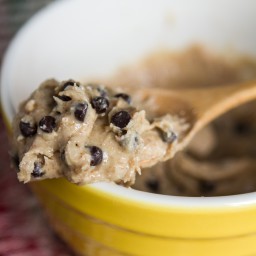
Cookie Dough Nut Butter

{“head_note”:”Nut butter that tastes like cookie dough. No, you aren’t dreaming!”,”instructions”:”

    \r\n \t

  1. Place cashews and macadamia nuts into a heavy-duty food processor and process until the mixture resembles a smooth nut butter, stopping to scrape down the side of the bowl if necessary. This can take upwards of 10 minutes of processing, so be patient.<\/li>\r\n \t
  2. Process in the sugars, buttery spread, vanilla, salt, and cinnamon, adding gradually. The sweeteners will at first thicken the nut butter quite a bit, but keep processing and the heat will eventually melt the sugar and smooth out the nut butter once again. If it still looks too thick, keep processing! You can add a touch of coconut oil to get things going if you have to.<\/li>\r\n \t
  3. Now here is the hard part \u2013 when your nut butter is finished processing, you need to pop it into the fridge to chill. If you don\u2019t chill it, the chocolate chips will melt right into the nut butter and turn everything brown. Once it\u2019s chilled enough (I simply left it in the fridge for a few hours), give it a good stir and test a few chips to see if they melt. If they don\u2019t melt proceed with stirring in the rest of the chips. Store in the fridge in a sealed jar or container for 4 weeks (or longer). The nut butter will harden slightly when chilled but will soften again at room temperature.<\/li>\r\n<\/ol>“,”foot_note”:”1) Macadamia nuts, thanks to their high oil content, create a super silky and decadent nut butter. I\u2019ve found that processing cashew butter on its own creates a fairly thick nut butter which is why I\u2019ve added mac nuts in this recipe to thin it out.\r\n\r\n \r\n\r\n2) If you don\u2019t have coconut or Sucanat sugar, organic brown and natural cane sugar may work but you probably won\u2019t need to use as much since they are a bit sweeter. I do not recommend subbing the dry granulated sugar for a liquid sweetener like maple syrup as it can produce a strange, thick texture.”}
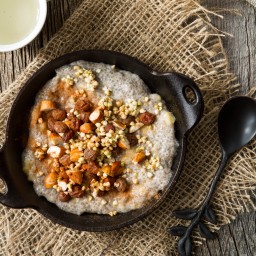
Chia Seed Breakfast Bowl

{“head_note”:”I like mashed banana in this because it thickens the mixture while adding a lot of volume. If you aren\u2019t a banana fan, you can omit it, but you might need to reduce the milk and I also suggest adding in your own sweetener or other fruit in its place. This porridge is especially creamy when made with Homemade Almond Milk. The thickness of the chia pudding will vary based on the kind of almond milk you use, so you can add more if necessary. If your pudding is too thin for you liking you can add more chia seeds and let it sit for 10 more minutes. Finally, if you aren\u2019t a fan of the tapioca-like texture of chia seed pudding, try blending it until smooth.”,”instructions”:”

    \r\n \t

  1. Mash bananas in a medium-sized bowl. Stir in chia seeds. Whisk in the almond milk, vanilla, and cinnamon until combined. Place in fridge overnight to thicken. You can add more almond milk if you want to thin it out in the morning. Or, if it\u2019s too thin, add more chia seeds to thicken it up.<\/li>\r\n \t
  2. Add buckwheat groats, raisins, and chopped almonds into another bowl. Cover in water and soak overnight in the fridge or on the counter.<\/li>\r\n \t
  3. In the morning, place your desired amount of chia pudding into a bowl. (Note: at this point, you can blend your chia pudding if a smooth texture is desired, but I don\u2019t bother). Drain and rinse the buckwheat\/almond\/raisin mixture. Sprinkle on top of chia mixture along with a pinch of cinnamon and a tablespoon of hemp seeds. Serve with a drizzle of maple syrup, if desired. Store leftovers in the fridge for 1-2 days.<\/li>\r\n<\/ol>“,”foot_note”:””}

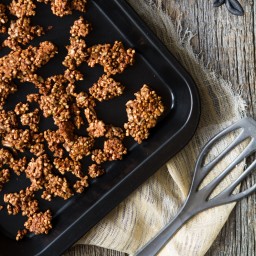
Blissfull Buckwheat Granola Clusters

{“head_note”:”This granola stands apart from the crowd with its lightly sweet, oil-free clusters of crunchy cinnamon-coated buckwheat and sunflower seeds. There isn\u2019t an oat in sight, but we hardly noticed. It’s not very sweet and a bit earthy, so if this isn’t you thing you might want to add more granulated sweetener to taste.”,”instructions”:”

    \r\n \t

  1. Preheat oven to 300\u00b0F and line a large baking sheet with parchment paper.<\/li>\r\n \t
  2. In a large bowl, mix together the dry ingredients. If using almond pulp, it will remain a bit chunky, but not to worry.<\/li>\r\n \t
  3. In a smaller bowl, mix the wet ingredients until combined. Add wet mixture to dry ingredients and stir until the dry ingredients are thoroughly coated and wet.<\/li>\r\n \t
  4. Spread granola onto baking sheet in a uniform layer. Bake at 300\u00b0F for 20 minutes, roughly flip granola, and bake for another 18-20 minutes, watching closely so it doesn\u2019t burn. Granola will be lightly golden on the bottom and will harden a lot during the cooling process.<\/li>\r\n \t
  5. Cool completely on the pan and then store in a glass container on the counter for up to 3-4 weeks (just an estimate).<\/li>\r\n<\/ol>“,”foot_note”:”I assume this recipe also works without the almond pulp, so if you don\u2019t have any still give it a shot.\r\n\r\nIf you don\u2019t have coconut nectar, feel free to use brown rice syrup. Honey would work too if that\u2019s part of your diet. These sticky sweeteners help the granola clump together. You can also use maple syrup or agave, but I don\u2019t think the clusters would hold together as much.”}

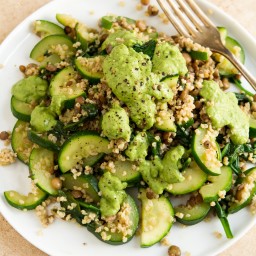
Green Powerhouse Pesto Plate

{“head_note”:”A tasty way to pack in a few servings of greens all on one plate.”,”instructions”:”

    \r\n \t

  1. Rinse and drain lentils in a fine mesh sieve. Add to a medium pot along with 3 cups of water. Bring to a low boil and then reduce heat to low-medium and simmer uncovered for 25-40 minutes. When lentils are tender, remove from heat and drain water if necessary.<\/li>\r\n \t
  2. At the same time, cook the millet. Rinse and drain in a fine mesh sieve and add to a medium pot. Add 2 cups of water or vegetable broth, bring to a low boil, and reduce heat to low-medium. Cover with tight fitting lid and simmer for about 20-25 minutes or until the water has been absorbed. Remove from heat and leave lid on to steam for another 5 minutes. Fluff with a fork.<\/li>\r\n \t
  3. Meanwhile, saut\u00e9 the zucchini in a skillet with a bit of oil, salt, and pepper for about 5-10 minutes, or until much of the water has cooked off. Add a few handfuls of spinach into the skillet and cook until wilted.<\/li>\r\n \t
  4. To prepare the dressing: Add all dressing ingredients into a food processor and process until smooth, stopping to scrape down the bowl as necessary. Adjust salt to taste.<\/li>\r\n \t
  5. To assemble: Toss the millet and lentils together in one pot and season with Herbamare and pepper. Portion onto plates followed by the zucchini and spinach mixture. Now spoon on a generous amount of dressing and serve!<\/li>\r\n<\/ol>“,”foot_note”:””}

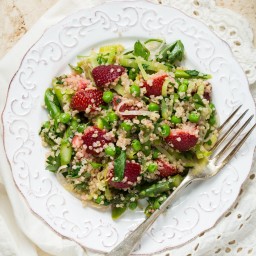
Warm Spring Salad

{“head_note”:”I\u2019m celebrating my first spring recipe of the season with this warm spring salad featuring asparagus, leek, peas, strawberries, and parsley all tossed in a simple lemon olive oil dressing. It\u2019s very light and veggie-packed with some protein provided by quinoa. If you\u2019d like to add even more protein I\u2019m sure it would be nice with some white beans, chickpeas, or French lentils thrown in too. Keep in mind that the strawberries will bleed pink juices into the salad and turn the quinoa a light pink hue once tossed. If this is a concern or if you are making this in advance, I suggest adding the strawberries on just before serving.”,”instructions”:”

    \r\n \t

  1. Rinse quinoa in a fine mesh strainer and place into a medium pot. Add 1.5 cups vegetable broth (or water) and bring to a low boil. Reduce heat to low-medium, cover with tight-fitting lid, and cook for 15-17 minutes, or until fluffy and all the water is absorbed. Fluff with fork, remove from heat, and let sit covered for 5 minutes.<\/li>\r\n \t
  2. Meanwhile, grab a very large skillet or wok. Saut\u00e9 the leek and garlic in the oil for about 5 minutes over medium heat. Season generously with salt and pepper. Add in the asparagus and saut\u00e9 for another 5-10 minutes or until the asparagus is just tender, but still a bit crisp. Stir in the strawberries (optional), peas, and parsley. Heat for a few minutes and then remove from heat.<\/li>\r\n \t
  3. Whisk together the dressing ingredients (olive oil, lemon juice, maple syrup, and 1\/4 tsp fine grain sea salt) to taste. Pour dressing onto skillet mixture and stir in the cooked quinoa. Season to taste with salt and pepper & enjoy! This would also be lovely with nuts or seeds sprinkled on top.<\/li>\r\n<\/ol>“,”foot_note”:”Oh, I forgot to mention \u2013 this is also fantastic served cold too!”}

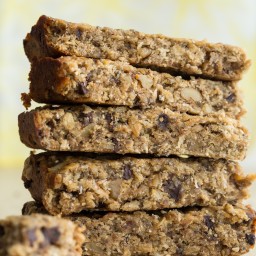
Banana Bread Protein Bars

{“head_note”:”These banana bread bars were my solution to another comfort food craving yesterday. Think of them as soft, doughy granola bars filled with crunchy walnuts, omega-3 lovin\u2019 chia seeds, and a sprinkling of dark chocolate chips. The wet batter is made up of spotty bananas, a generous scoop of protein-packed peanut butter, a splash of vanilla, and just a hint of sweetener to round it all out. I\u2019ve been enjoying them around the clock, so it\u2019s safe to say they work nicely as breakfast, snack, or even dessert. Your call.”,”instructions”:”

    \r\n \t

  1. Preheat oven to 350\u00b0F and line an 8-inch square pan with 2 pieces of parchment paper, one going each way. Tip \u2013 to get the parchment to stick to the pan, give the base a spray with olive oil and do this for the next paper too.<\/li>\r\n \t
  2. Add raw buckwheat groats into a high-speed blender and blend on high until a fine flour forms. Whisk all dry ingredients together in a mixing bowl.<\/li>\r\n \t
  3. Mash bananas until smooth and measure out 3\/4 cups. Stir together the banana and all the wet ingredients in a bowl.<\/li>\r\n \t
  4. Add the wet mixture to the dry mixture and stir well until combined. The dough should be very sticky!<\/li>\r\n \t
  5. Scoop batter into prepared pan. Place a piece of parchment paper on top of the batter and press it down to spread out the batter evenly. You can also remove the paper and wet your hands lightly and spread it out that way. Make sure it\u2019s as even as possible.<\/li>\r\n \t
  6. Bake at 350\u00b0F for 22-26 minutes, or until the edges are golden brown and the bread is firm to touch. Cool in the pan completely (I left it for 1 hour) before removing and slicing into bars.<\/li>\r\n<\/ol>“,”foot_note”:”Raw buckwheat groats are not the same as kasha or toasted buckwheat. Raw groats have a milder flavour than toasted. You can find raw groats online, in some health food stores, or the bulk bins of Whole Foods. I buy mine in bulk from Upaya Naturals online. You might be able to substitute the ground buckwheat for oat flour, but I have not tried this myself. If anyone tries it, please leave a comment and report back.”}

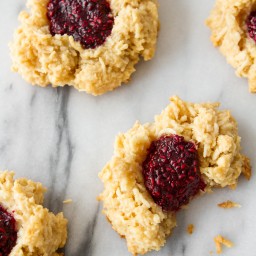
Coconut Macaroon Thumbprints with Raspberry Chia Seed Jam

{“head_note”:””,”instructions”:”

    \r\n \t

  1. For the chia seed jam: Add frozen raspberries and maple syrup into a medium pot and bring to a simmer. After 5 minutes or so, stir in the chia seeds. Continue to cook down the mixture for about 15 minutes, or until thickened. Remove from heat and stir in vanilla. Chill in the fridge for a couple hours to thicken it up even more.<\/li>\r\n \t
  2. Preheat oven to 275\u00b0F and line a baking sheet with a non-stick mat or parchment paper. If you have a non-stick mat, use it because it will help prevent browning on the bottom.<\/li>\r\n \t
  3. In a large bowl, combine the coconut, almond flour (or meal), and salt.<\/li>\r\n \t
  4. Melt the coconut butter over a very low heat. I suggest using a double boiler so it doesn\u2019t burn.<\/li>\r\n \t
  5. Add the maple syrup, softened coconut butter, and vanilla into the dry mixture and stir very well until combined. The dough will be\u00a0very\u00a0wet and sticky, but this is normal.<\/li>\r\n \t
  6. Grab a couple tablespoons of dough at a time with your hands and drop it onto the baking sheet. With a wet finger, press a well into the middle and lightly shape the outsides if necessary. Repeat for the rest. Fill each well with jam. The macaroons don\u2019t spread out so there\u2019s no need to space them far apart.<\/li>\r\n \t
  7. Bake at 275\u00b0F for 20 minutes. Rotate the pan and bake for another 10-20 minutes (I baked for 40 mins. total \u2013 but you may need less depending on your oven) until the bottoms are lightly golden and browned, but not burned. If you have a hot oven, I suggest watching it closely or even reducing the heat to 250F. Place pan on a cooling rack for 5-10 minutes and then transfer each macaroon onto the cooling rack until completely cool. The macaroons will be very soft at first, but will firm as they cool. I enjoy them the most chilled, straight from the fridge.<\/li>\r\n<\/ol>“,”foot_note”:”You can probably swap the maple syrup for another liquid sweetener of your choice. Also, if you can\u2019t have almonds, you might be able to swap the almond flour for oat flour. I haven\u2019t tried this yet myself though so be sure to report back if you try it out.”}

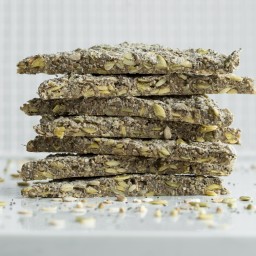
Super Power Chia Bread

{“head_note”:”Thick, hearty, and dense \u2013 this isn\u2019t your average slice of bread! Packed with 9 grams of protein and over 7 grams of fibre per slice, this bread will keep you going for hours.\u00a0Inspired by\u00a0Endurance Crackers<\/a>.”,”instructions”:”

    \r\n \t

  1. Preheat oven to 325\u00b0F and line a 9-inch square pan with two pieces of parchment paper, one going each way.<\/li>\r\n \t
  2. Add rolled oats and buckwheat into a high-speed blender. Blend on highest speed until a fine flour forms.<\/li>\r\n \t
  3. Add all dry ingredients into a large bowl and stir well until combined. Stir in the water and quickly scoop this mixture into your prepared pan. Spread it out with a spatula as evenly as possible. You can use lightly wet hands to smooth it down if necessary. Sprinkle the bread with Herbamare or fine grain sea salt before going into the oven.<\/li>\r\n \t
  4. Bake at 325\u00b0F for about 25 minutes, or until firm to the touch. Let cool in the pan for 5 minutes and then lift it out and transfer it to a cooling rack for another 5-10 minutes. Slice and enjoy!<\/li>\r\n \t
  5. This bread keeps for 2-3 days max \u2013 any longer and it gets gummy in texture. I suggest freezing it for enduring freshness. I like to toast it straight from the freezer!<\/li>\r\n<\/ol>“,”foot_note”:”1) I made a batch without sunflower seeds and it still turned out great. I\u2019m sure you can play around with the seeds (or even add nuts!) and reduce them if desired.\r\n\r\n \r\n\r\n2) A reader successfully made a batch using brown rice flour and quinoa flour- I\u2019m sure you can play around with the flours too.\r\n\r\n \r\n\r\n3)\u00a0I\u2019m not yet sure how long this stays fresh for \u2013 my guess is a couple days. However, I expect it should freeze well, but I have yet to try it. I\u2019ll update this when I do and be sure to leave your own tips in the comments section!”}

Jumbo Stuffed Shells

{“head_note”:””,”instructions”:”

    \r\n \t

  1. Rinse block of tofu and wrap with paper towels followed by 2-3 tea towels. Place it on a cutting board or plate and add several heavy cookbooks on top. Press tofu for about 20-25 minutes to drain out the water. Alternatively, you can use a tofu press.<\/li>\r\n \t
  2. Grease a very large casserole dish. I used about 30 shells, but you\u2019ll need to cook more than that as some shells will break during the cooking process. Cook shells in a pot of boiling water until al dente, about 8-11 minutes. Be careful not to overcook. Drain shells and set aside to cool.<\/li>\r\n \t
  3. Preheat oven to 400\u00b0F. For the tofu ricotta: In a large skillet, saut\u00e9 the garlic and onion in the oil for about 5 minutes. Season with salt and pepper. Add in the chopped celery, basil, and parsley and saut\u00e9 for another 5 minutes or so. Feel free to throw in some spinach for extra greens.<\/li>\r\n \t
  4. For the tofu, you can either crumble it into the skillet with your hands or you can give it a whirl in the food processor and then stir it into the skillet. If you use the processor, the texture will be very creamy like ricotta cheese and if you crumble it with your hands it will be more chunky\/crumbly. It\u2019s up to you how you want to make it. I usually opt to crumble it by hand so I don\u2019t dirty the processor. Stir in the nutritional yeast, salt, pepper, lemon, and cayenne all to taste. Over medium heat, cook for about 8-10 minutes or until most of the water cooks off.<\/li>\r\n \t
  5. Spoon about 1 cup of marinara sauce into the casserole dish and spread around. Add about 2 tbsp of tofu ricotta into each stuffed shell and place shells on top of marinara sauce. Cover shells with the remaining 2-2.5 cups marinara sauce and any leftover tofu ricotta. You can add vegan cheese on top, but I don\u2019t bother. Cover dish with tin foil and poke several air holes. Bake at 400\u00b0F for about 20 minutes or until heated throughout. Serve with a basic green salad and garlic bread, if desired.<\/li>\r\n<\/ol>“,”foot_note”:””}