Category Archives: Uncategorized

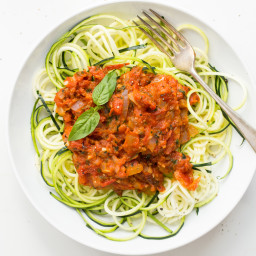
Thick & Chunky Tomato Sauce from Scratch

{“head_note”:”A few simple ingredients can create the most delightful homemade tomato sauce! The secret to this recipe is blending sun-dried tomatoes with a scoop of sauce and then stirring it back into the pot. The result is a thick and creamy tomato sauce with a ton of flavour unlike any other tomato sauce. There’s no need to skin the tomatoes for this recipe, but I like to quickly discard the seeds before using. Chop the tomato into 4-5 large wedges and then push the seeds out from both sides and discard. Proceed with dicing as usual. If you don’t have oil-packed sun-dried tomatoes, feel free to use dried – but be sure to soak them in water until soft and drain before use. You might want to bump up the olive oil to 1.5 tablespoons to make up for the reduction in oil. Lastly, this batch only makes 1 & 1\/4 cups – I would suggest doubling it because it doesn’t last long!”,”instructions”:”

    \r\n \t

  1. Add the oil, onion, and garlic into a medium pot and stir to combine. Season with salt and pepper. Saute over medium heat for about 5 minutes, until the onion is translucent.<\/li>\r\n \t
  2. Stir in the diced tomatoes and increase heat to high-medium to bring to a low boil. When the mixture boils, reduce the heat to medium and simmer for about 15 minutes, uncovered, until most of the water cooks off. Watch closely, reducing heat if necessary and stirring often.<\/li>\r\n \t
  3. Add sun-dried tomatoes into a food processor along with a ladle of the tomato sauce. Process until mostly smooth. Stir this mixture back into the tomato sauce in the pot.<\/li>\r\n \t
  4. Stir in the minced basil, oregano, salt, and pepper, and optional red pepper flakes to taste. Continue cooking until thickened to your liking and then remove from heat.<\/li>\r\n \t
  5. Serve sauce over a bed of pasta noodles, zucchini noodles, or spaghetti squash noodles.<\/li>\r\n<\/ol>“,”foot_note”:”Note: For how to julienne or spiralize zucchini (and the tools I use for the job), see this post<\/a>.”}
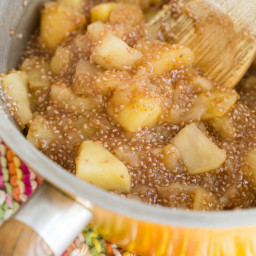
Sugar-Free Apple Pie Chia Seed Jam + Parfait

{“head_note”:”This nontraditional jam is thickened with omega-3 fatty acid rich chia seeds and is free from added sugar. Enjoy it on toast, layered in parfaits, or on top of oatmeal.”,”instructions”:”

    \r\n \t

  1. For the jam: Add all jam ingredients into a medium pot and stir to combine. Bring mixture to a low boil. Reduce heat to medium-low, cover, and simmer for 15-20 minutes, stirring every 5 minutes or so. When the apples are fork tender, remove from heat and mash 50% of the mixture to thicken. Set aside to cool.<\/li>\r\n \t
  2. For the vegan overnight oats: Combine the oats, chia seeds, almond milk, vanilla, and cinnamon in a small bowl. Whisk to combine. Place in the fridge overnight, or for at least 1-2 hours to thicken. Once the oats are softened and the liquid is mostly absorbed, it’s ready. You can thin it out with more milk if needed or thicken it with more chia seeds.<\/li>\r\n \t
  3. To make each parfait: Layer the vegan overnight oats with the apple pie jam, a few spoonfuls of each per layer. Add toasted chopped walnuts on top of each layer if desired.<\/li>\r\n \t
  4. Store leftover jam in an air-tight container or jar in the fridge. Should last for at least 1-2 weeks.<\/li>\r\n<\/ol>“,”foot_note”:”Note: For a homemade milk option, see my Homemade Vanilla Almond Milk<\/a> Recipe.”}

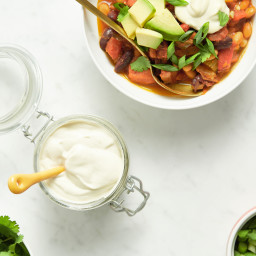
Cashew Sour Cream

{“head_note”:”Rich and tangy, this vegan sour cream is the perfect complement to My Favourite Vegan Chili or any Mexican entr\u00e9e. Be sure to soak the cashews (either overnight or using my quick-soak method) before you begin.”,”instructions”:”

    \r\n \t

  1. Place cashews in a bowl and cover with water. Soak overnight or for 8 hours if you have the time. For a quick-soak method, pour boiling water over the cashews and soak for 1 hour. Rinse and drain.<\/li>\r\n \t
  2. Place the drained cashews in a high-speed blender.<\/li>\r\n \t
  3. Add the water, lemon, vinegar, and salt. Blend on high until super smooth. You might have to stop to scrape down the blender now and then or add a touch more water to get it going.<\/li>\r\n \t
  4. Transfer into a small, air-tight container and chill in the fridge. It makes 2 cups. The cream will thicken up as it chills. The cream will keep in the fridge for about 1 week. You can also freeze it for up to 1 month. I like to freeze it in silicone mini muffin cups. Once solid, transfer the cups into a freezer-safe zip bag for easy grab and go portions.<\/li>\r\n<\/ol>“,”foot_note”:””}

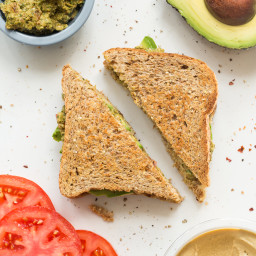
Ultimate 4-Layer Vegan Sandwich

{“head_note”:”Toasted sprouted grain bread is slathered with hummus and homemade sun-dried tomato hemp pesto all topped off with sliced avocado, tomato, and red pepper flakes. This is one vegan sandwich that you won’t soon forget! Add some lettuce for a nice crunch. This would also be fantastic in a wrap if you don’t want to use toasted bread. For a gluten-free option, use gluten-free bread (or wrap) or try serving it wrapped in Bibb lettuce for a grain-free option.”,”instructions”:”

    \r\n \t

  1. For the pesto: Mince garlic in a food processor. Add the rest of the pesto ingredients and process until the pesto is smooth, stopping to scrape down the bowl as needed.<\/li>\r\n \t
  2. Toast the bread in a toaster.<\/li>\r\n \t
  3. Spread bread with hummus and pesto (one on each). Layer on the avocado, tomato, and lettuce. Sprinkle on red pepper flakes, salt, and pepper. Slice in half and enjoy!<\/li>\r\n<\/ol>“,”foot_note”:”Note: I use Food for Life Ezekiel sprouted grain bread.”}

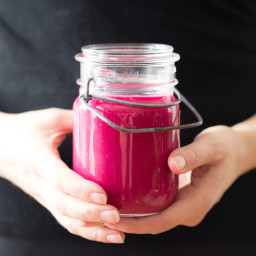
Pink Power Detox Smoothie

{“head_note”:”Beet, strawberries, avocado, and lemon unite to create one kick-butt, surprisingly delicious, bright pink smoothie! This creamy & thick smoothie is not overly sweet – it’s more on the tart side thanks to juice from a whole lemon. If you prefer sweeter smoothies, I suggest adding an apple to the mix or your preferred liquid sweetener. I also suggest using a small to medium sized beet, anything larger and the earthy beet might overpower the other flavours. Consider gently steaming the beet until tender before blending if you don’t have a Vitamix or other capable blender.\u00a0 I just use the beet raw because I know my blender can handle it. Best to be safe than sorry if you are unsure!”,”instructions”:”

    \r\n\t

  1. Steam beet if necessary before starting. See my tips in the headnote.<\/li>\r\n\t
  2. Add all ingredients into a high-speed blender and blend on high until smooth. Adjust sweetness if desired, adding an apple or liquid sweetener to taste if needed.<\/li>\r\n<\/ol>“,”foot_note”:”1) If you are not a beet fan, try adding a handful of leafy greens instead of the beet and include the optional apple. 2) Smoothies shown in pictures does not include apple. Yield may be slightly higher with an apple added in.”}

Quick ‘n Easy No-Bake Protein Bars

{“head_note”:”These no-bake bars are thrown together in minutes and make the perfect snack to store in the freezer for a quick burst of energy. Feel free to use sunflower seed butter to make these nut-free. I used an unsweetened\/unflavoured protein powder, so if you are using a sweetened protein powder, you will likely have to reduce the liquid sweetener (and make up for the lack of liquid by adding some non-dairy milk). Play around with it if necessary and aim for a cookie dough texture. You can also roll the dough into balls and add in chocolate chips if you don’t wish to make them into bar form.”,”instructions”:”

    \r\n \t

  1. Line an 8-inch square pan with a piece of parchment paper. Mix the oat flour, protein powder, rice crisp, and salt together in a large bowl.<\/li>\r\n \t
  2. Add in the nut\/seed butter, maple syrup, and vanilla. Stir well to combine. If the mixture is a bit dry, add a splash of non-dairy milk and mix again.<\/li>\r\n \t
  3. Press into pan and roll out with a pastry roller until smooth. Pop into the freezer.<\/li>\r\n \t
  4. Melt the chocolate chips and coconut oil together in a small pot over low heat. When half of the chips have melted, remove from heat and stir until smooth.<\/li>\r\n \t
  5. After freezing the bars for about 5-10 minutes, remove from freezer and slice into bars. Drizzle with melted chocolate and freeze again until set. Store in the freezer for a week or longer in an air-tight freezer bag or container.<\/li>\r\n<\/ol>“,”foot_note”:””}

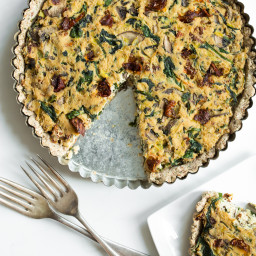
Sun-dried Tomato, Mushroom, and Spinach Tofu Quiche

{“head_note”:”This was my first time making a tofu quiche and it really surprised us with how amazing it turned out! Even Eric went crazy for this quiche, often enjoying leftovers twice a day until it was finished. Enjoy it for breakfast, lunch, dinner, or a snack. I’ve made this a few different ways simply by changing up the vegetables used. One version used asparagus (1 cup diced) and broccoli (1.5 cups diced), which was also very nice. The only thing I would advise against is using a high-water vegetable, like fresh tomatoes as it might result in a water-logged quiche. Best of all, it reheats well. Simply place leftover quiche on a baking sheet and pop it in the oven for 15-20 minutes at 350F. Inspired by the Sprouted Kitchen Cookbook.”,”instructions”:”

    \r\n \t

  1. Preheat oven to 350F and lightly grease a round 10-inch tart pan. Alternatively, you can use a 9-inch glass pie dish if desired.<\/li>\r\n \t
  2. Wrap rinsed tofu in a few tea towels. Place a few books on top of it to lightly press out the water while you prepare the crust.<\/li>\r\n \t
  3. For the crust<\/strong>: Whisk together flax and water mixture in a small bowl and set aside so it can gel up.<\/li>\r\n \t
  4. In a large bowl, stir together the almond meal, oat flour (or buckwheat flour), parsley, oregano, and salt.<\/li>\r\n \t
  5. Add in the flax mixture and oil. Stir until mostly combined, adding the remaining water until the dough is sticky (about the consistency of cookie dough). The dough should stick together when you press it between your fingers.<\/li>\r\n \t
  6. Crumble the dough evenly over the base of the tart pan (or pie dish). Starting from the centre of the pan, press the mixture evenly into the pan, working your way outward and up the sides of the pan. Poke a few fork holes in the dough so air can escape.<\/li>\r\n \t
  7. Bake the crust at 350F for 13-16 minutes, or until lightly golden and firm to touch. Set aside to cool while you finish preparing the filling. Increase oven temperature to 375F.<\/li>\r\n \t
  8. For the filling<\/strong>: Break apart the tofu block into 4 pieces and add into food processor. Process the tofu until smooth and creamy. If it doesn’t get creamy, add a tiny splash of almond milk to help it along.<\/li>\r\n \t
  9. In a skillet, add oil and saute the leek (or onion) and garlic over medium heat for a few minutes. Stir in the mushrooms, season with salt, and cook on medium-high heat until most of the water cooks off the mushrooms, about 10-12 minutes. Stir in the herbs, sun-dried tomatoes, spinach, nutritional yeast, oregano, salt, pepper, and red pepper flakes until combined. Cook until the spinach is wilted.<\/li>\r\n \t
  10. Finally, remove from heat and stir in the processed tofu until thoroughly combined. Adjust seasoning to taste if desired. Spoon mixture into baked crust and smooth out with a spoon until even.<\/li>\r\n \t
  11. Bake quiche, uncovered, at 375F for 33-37 minutes, until the quiche is firm to the touch. For best results, cool the quiche for 15-20 minutes on a cooling rack before attempting to slice. The crust may crumble slightly when sliced warm, but not to worry.<\/li>\r\n \t
  12. Wrap up leftovers and refrigerate for 3-4 days. Leftover quiche can be reheated in the oven on a baking sheet for about 15-20 minutes at 350F.<\/li>\r\n<\/ol>“,”foot_note”:””}

Irresistible Chewy Trail Mix Cookies

{“head_note”:”Welcome to my dream cookie. Ram packed with healthy ingredients, chewy, crispy around the edges, thick and bite-sized, with dark chocolate sprinkled throughout. One thing to point out. I used a very \”drippy\” raw almond butter in this recipe. If you are using a more solid & thick and less liquid-y nut butter, you may want to add another 1\/2-1 tablespoon of water into your flax egg to prevent the batter from becoming too dry. I did make a version with a traditional flax egg using 1 tbsp ground flax and 3 tbsp water, but the cookies spread out too much and were quite thin. So by reducing the flax egg to 2 tbsp water, it produced a much thicker cookie. As you can see, small changes in the consistency of the batter will produce greatly different outcomes so keep this in mind when experimenting!”,”instructions”:”

    \r\n \t

  1. Preheat oven to 350F and line a baking sheet with parchment paper.<\/li>\r\n \t
  2. Whisk together the ground flax and water in a small mug and set aside so it can gel up.<\/li>\r\n \t
  3. In a large mixing bowl, whisk together all of the dry ingredients.<\/li>\r\n \t
  4. In another medium sized bowl, stir together the wet ingredients, including the flax egg until thoroughly combined.<\/li>\r\n \t
  5. Add the wet mixture on top of the dry mixture and stir well until combined. This will take quite a bit of stirring until all of the dry patches of flour are gone.<\/li>\r\n \t
  6. Portion small balls of dough (just smaller than golf balls) onto the baking sheet, spacing them a couple inches apart. I ended up baking two trays of cookies because I didn’t know how much they were going to spread out.<\/li>\r\n \t
  7. Bake cookies for 13-15 minutes (I baked for a full 15 minutes), until light golden brown on the bottom. Cool on the baking sheet for 5 minutes before transferring to a cooling rack until completely cool. The cookies will break apart easily until cooled, so be careful.<\/li>\r\n \t
  8. Wrap up and store leftovers on the counter or in the freezer, if desired.<\/li>\r\n<\/ol>“,”foot_note”:”Notes: 1) For a completely gluten-free cookie, be sure to use certified gluten-free rolled oats and to check all other ingredient labels. 2) To make oat flour: Add 1 cup of rolled oats into a high speed blender and process on high until a flour forms. 3) To make almond meal, add a scant 1\/2 cup of almonds into a high speed blender and blend on high until a fine meal forms. Break up clumps with your fingers and measure as normal. 4) The raw almond butter I used was very drippy, so be sure to use a drippy, all-natural nut butter if possible.\r\n\r\n \r\n\r\nNutritional Info<\/a>“}

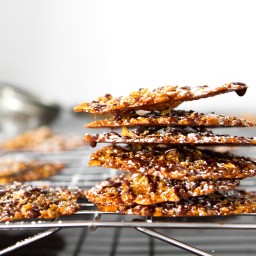
Vegan Florentines (Almond Lace Cookies)

{“head_note”:”Traditional Florentine cookies made vegan and gluten-free!”,”instructions”:”

    \r\n \t

  1. Preheat oven to 275\u00b0F and line a large baking sheet with parchment paper.<\/li>\r\n \t
  2. Finely chop sliced almonds and place in a large mixing bowl. Stir in the rest of the dry ingredients (flour, orange zest, salt, sugar).<\/li>\r\n \t
  3. In a medium-sized pot, add the wet ingredients (non-dairy butter, brown rice syrup, coconut cream) and stir until combined. Increase heat to medium-high and bring to a low boil. Immediately remove from heat and stir in the vanilla extract.<\/li>\r\n \t
  4. Add the dry ingredients into the wet ingredients and stir until combined. Set aside to cool for about 10-15 minutes.<\/li>\r\n \t
  5. Wet fingers and shape dough into tiny 1\/2 tablespoon balls. Roll with hands into a uniform ball and place on baking sheet, at least 3 inches apart. Repeat until you can\u2019t fit anymore on the baking sheet.<\/li>\r\n \t
  6. Bake for 10 minutes at 275\u00b0F, rotate the pan, and bake for another 7-9 minutes. Allow to cool for 5 minutes on the pan and then carefully transfer to cooling rack. Repeat baking process for the rest of the dough. When cookies are cool, place on paper towel and press lightly to absorb any butter on the bottom of the cookie.<\/li>\r\n \t
  7. Melt chocolate and coconut oil over low heat. Drizzle cookies with melted chocolate (a fork works fine for this) and sift with icing sugar. Chill in the freezer until hardened, Cookies also freeze well.<\/li>\r\n<\/ol>“,”foot_note”:”
      \r\n \t

    • You can substitute the coconut sugar for cane sugar or even Sucanat sugar.<\/li>\r\n \t
    • I have not tried subbing the coconut cream, but you might be able to replace it with non-dairy creamer or even a splash of almond milk. I wouldn\u2019t add much because you don\u2019t want the batter to be too wet.<\/li>\r\n \t
    • I have not subbed the brown rice syrup, but if you eat honey you can sub it with that. I don\u2019t know how maple syrup or agave would turn out. If you try it please leave a comment and let us know.<\/li>\r\n \t
    • I used an orange flavoured chocolate for this cookie and it paired nicely with the orange zest. If you aren\u2019t an orange fan, feel free to leave out the zest or try subbing it with a touch of lemon or lime zest or even with a bit of almond extract instead of zest.<\/li>\r\n \t
    • I used gluten-free all-purpose flour in this recipe, but you can also use whole wheat pastry flour, all-purpose, spelt, etc.<\/li>\r\n \t
    • Since I could only bake 10 cookies at one time, this process took some time. You might be able to bake two cookie sheets at once, just be sure to rotate the pans accordingly and adjust the baking time if necessary.<\/li>\r\n<\/ul>“}

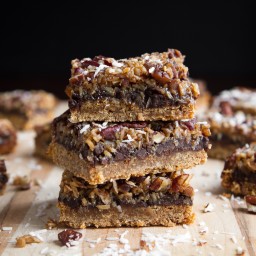
Lightened Up Magical Coconut Bars

{“head_note”:”While these are lighter than some traditional magical coconut bar recipes, they are still quite decadent, so I prefer to serve them in small squares. A little bit goes a long way! We also found that the bars tasted better the next day, possibly because the flavours have time to settle. Make sure you really push the graham crumbs down firmly into the pan. This is key if you want the crust to hold together well. See my substitution notes below and be sure to read the entire recipe before starting.”,”instructions”:”

    \r\n \t

  1. Prepare condensed coconut milk: Preheat oven to 350\u00b0F and line a 9-inch square pan with two pieces of parchment paper (one going each way). Add entire can of coconut milk into a medium-sized pot, and whisk in the coconut sugar. Increase heat to medium and bring to a low simmer. Watch closely as it can boil over very quickly! Simmer on low-medium heat for about 12-14 minutes, whisking occasionally, until the mixture thickens slightly. If film develops on the top as it condenses, just whisk it back into the mixture. Remove from heat to cool while you prepare the crust.<\/li>\r\n \t
  2. Prepare graham cracker crust: In a pot, soften coconut oil over low heat until mostly melted. Add to a mixing bowl along with graham cracker crumbs and maple syrup. Stir very well until thoroughly combined. Spoon graham mixture into prepared pan. Starting at the centre of the pan, press the graham cracker crumbs as firmly as you can, moving outward from the centre. The harder you press the crumbs into the pan, the better the bars will hold together. I used a pastry roller at the end to really pack it all in and I had no problems with crumbling when I sliced the bars.<\/li>\r\n \t
  3. Assemble: Pour warm condensed milk over the graham crust. Now, sprinkle on the chocolate chips, followed by the coconut, and finally the pecans, evenly over the condensed milk. Press the mixture down lightly with hands until the coconut milk soaks upward into each layer. Sprinkle with flaked sea salt (optional).<\/li>\r\n \t
  4. Bake in the oven, uncovered, for 27-31 minutes at 350\u00b0F (I baked for 30 mins), until the edges are golden. Remove pan from oven and place on cooling rack for about 30 minutes. Now, transfer the pan to your freezer for 2 hours (quick-set method). Or chill the bars in the fridge for a minimum of 4 hours or overnight. When set, cut into squares (thaw at room temp first if removing from freezer). Bars can be wrapped up and left on the counter, or in the fridge or freezer.<\/li>\r\n<\/ol>“,”foot_note”:”
      \r\n \t

    • You can use full-fat coconut milk instead of light.<\/li>\r\n \t
    • Coconut sugar can be subbed for any granulated sugar (Sucanat, natural cane sugar, brown sugar, etc).<\/li>\r\n \t
    • Two cups of graham cracker crumbs produced a fairly thick crust (see photo). You can probably reduce the amount to 1.5 cups if you want a thinner crust.<\/li>\r\n \t
    • You can probably sub non-dairy butter for coconut oil.<\/li>\r\n \t
    • I purchased my graham cracker crumbs from Bulk Barn.<\/li>\r\n<\/ul>“}