Category Archives: Uncategorized

Chocolate Banana Bread Spelt Muffins

{“head_note”:”These chocolate banana bread muffins are low in fat and filled with good for you ingredients like spelt flour, coconut oil, walnuts, cocoa powder, and more. Despite being made with spelt flour, they still rise nicely and are wheat-free to boot. With Valentine’s Day coming up, these muffins would make a healthy addition to a special breakfast.”,”instructions”:”

    \r\n\t

  1. Chop walnuts and toast if desired (bake for about 10 minutes at 300F). Set aside.<\/li>\r\n\t
  2. Preheat oven to 350F and grease a muffin tin.<\/li>\r\n\t
  3. In a large bowl, whisk together the dry ingredients (flour, cocoa powder, baking soda, salt).<\/li>\r\n\t
  4. In a small bowl, stir together the almond milk and apple cider vinegar. Set aside for a couple minutes to curdle.<\/li>\r\n\t
  5. In a medium bowl, mash the banana and measure out 1 cup.<\/li>\r\n\t
  6. Stir in the milk mixture, sugar, vanilla, and melted coconut oil into the mashed banana.<\/li>\r\n\t
  7. Immediately, pour the wet mixture over the dry mixture and stir until just combined. Be careful not to overmix as it can result in dense muffins.<\/li>\r\n\t
  8. Fold in the walnuts just briefly.<\/li>\r\n\t
  9. Fill each muffin tin 3\/4 of the way full with the batter.<\/li>\r\n\t
  10. Bake for 18-20 minutes at 350F, or until a toothpick comes out clean.<\/li>\r\n\t
  11. Pace muffin tin on a cooling rack for 5-10 minutes.<\/li>\r\n\t
  12. Now, carefully lift out muffins using a knife around the edge to loosen. Cool muffins on a rack for another 10-15 minutes.<\/li>\r\n<\/ol>“,”foot_note”:””}
Chickpea Dill Sauerkraut Dip with Roasted Rainbow Carrots

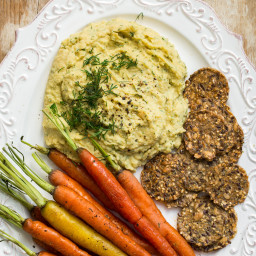
{“head_note”:”When you’re looking for a fun change up from traditional hummus, this is a great dip to try! Filled with digestion-boosting sauerkraut, this tangy and light dip is hard to resist. Instead of serving it with carrots, try a variety of your favourite roasted vegetables or try serving it with toasted bread. It’s also great as a spread on wraps or sandwiches too. My inspiration for this recipe comes from the Vedge cookbook. After flipping through the pages, I couldn\u2019t get the thought\u00a0of combining chickpeas,\u00a0dill, and sauerkraut together and I was practically rushing to the kitchen to make something similar. It’s now my go-to dip of the moment and I hope you love it too!”,”instructions”:”

    \r\n \t

  1. Preheat the oven to 350\u00b0F and line a large baking sheet with parchment paper.<\/li>\r\n \t
  2. Trim the stems off the carrots leaving about 1 inch of the stem intact. Rinse and pat dry.<\/li>\r\n \t
  3. Place carrots on baking sheet and drizzle with oil. Toss to coat. Sprinkle with the salt, cumin, and pepper.<\/li>\r\n \t
  4. Roast carrots in the oven, uncovered, for about 15-20 minutes, or until just fork tender. Be careful not to overcook. Roasted carrots are nice with a bit of resistance to them.<\/li>\r\n \t
  5. Meanwhile, prepare the dip. Drop a clove of garlic and the fresh dill into a food processor and process until minced. Now, add in the rest of the ingredients and process until smooth, scraping the side of the bowl as necessary.<\/li>\r\n \t
  6. When the carrots are ready, add them to a platter along with your favourite crackers or toasted bread. Add the dip on the platter (or in a small bowl). Garnish the dip with minced fresh dill and black pepper, if desired.<\/li>\r\n<\/ol>“,”foot_note”:”Note: Feel free to use any kind of roasted vegetable of your choice here (cooking time will vary). I can see roasted potato wedges working well (try this recipe<\/a>). Or instead of rainbow carrots, you can use regular carrots or even baby carrots.”}

Soft + Chewy Baked Granola Bars

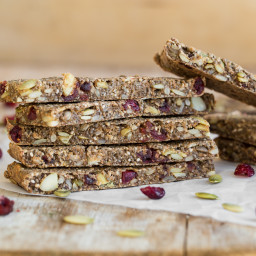
{“head_note”:”Dense, chewy, soft, doughy, seedy, hearty, protein-and-fibre-packed granola bars, sweetened naturally with dates! Try them spread with nut or seed butter for a fun treat or just enjoy them plain. Adapted from my Super Power Chia Bread<\/a>.”,”instructions”:”

    \r\n \t

  1. Preheat oven to 325\u00b0F and line a 9-inch square pan with two pieces of parchment paper, one going each way.<\/li>\r\n \t
  2. Add rolled oats into a high-speed blender. Blend on highest speed until a fine flour forms. Add oat flour into a large bowl.<\/li>\r\n \t
  3. Add water and pitted dates into blender. Allow the dates to soak for 30 minutes if they are a bit firm or your blender has a hard time blending dates smooth. Once they are soft, blend the dates and water until super smooth.<\/li>\r\n \t
  4. Add all of the ingredients into the bowl with the oat flour and stir well until combined.<\/li>\r\n \t
  5. Scoop the mixture into the pan and spread it out with a spatula as evenly as possible. You can use lightly wet hands to smooth it down if necessary.<\/li>\r\n \t
  6. Bake at 325\u00b0F for about 23-25 minutes, or until firm to the touch. Let cool in the pan for 5 minutes and then lift it out and transfer it to a cooling rack for another 5-10 minutes. Slice and enjoy!<\/li>\r\n \t
  7. I suggest freezing leftovers to preserve freshness.<\/li>\r\n<\/ol>“,”foot_note”:””}

The Big Vegan Bowl

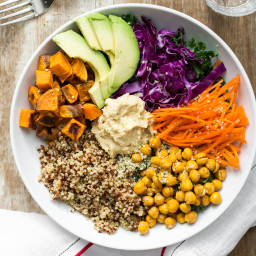
{“head_note”:”Can\u2019t you just imagine this bowl being served at a vegan restaurant? Well,\u00a0why not\u00a0make it in the comfort of your own home? It looks like it would take a long time to prepare, but it only set me back about 25 minutes of prep time. I simply roasted the sweet potato and chickpeas, cooked some quinoa on the stove top, and chopped a few veggies. It\u2019s pretty laid back and you can tend to other things while it\u2019s cooking. Due to the hummus\u00a0and avocado, there\u2019s no real need for a dressing unless of course you want to throw some on. My Lemon-Tahini dressing<\/a> would be great on this, but it’s great plain too. Next time you are in a lunch or dinner rut, give this a shot! It\u2019s simple vegan food at its finest. Bowl idea inspired by Deliciously Ella.”,”instructions”:”

    \r\n \t

  1. Preheat oven to 400\u00b0F and line two large baking sheets with parchment paper.<\/li>\r\n \t
  2. Spread out the chopped sweet potato on one sheet. Drizzle with 1\/2 tablespoon of oil or so and toss the potatoes until coated. Sprinkle with fine grain sea salt.<\/li>\r\n \t
  3. For the roasted chickpeas: Drain and rinse the chickpeas and then place on a large tea towel and pat until completely dry. Discard any skins that fall off. Transfer the chickpeas to the baking sheet and drizzle with 1\/2 teaspoon oil. Rub them around with your hands until lightly coated. Generously sprinkle with fine grain sea salt and your favourite spices. I like to use garlic powder, chili powder, cumin, cayenne, and salt. Toss gently to combine.<\/li>\r\n \t
  4. Place both the sweet potato and chickpeas into the preheated oven. Roast for 15 minutes at 400F and then remove both. Flip the sweet potatoes and gently roll around the chickpeas. Place back in the oven for another 15 minutes or so, watching closely during the last 5 minutes. When the chickpeas are golden and the sweet potatoes are lightly browned on the bottom and fork tender, they are ready to come out.<\/li>\r\n \t
  5. Meanwhile, cook the quinoa while the roasting is going on. In a fine mesh sieve, rinse the quinoa and then place in a medium pot. Add in 1.5 cups of water and stir. Bring the mixture to a low boil and then reduce the heat to low\/medium and cover with lid. Simmer, covered, for about 14-17 minutes (you can check after 13 minutes), until all of the water is absorbed and the quinoa is fluffy. Remove from heat and leave the lid on to steam for another 5-10 minutes or longer if needed. Fluff with fork.<\/li>\r\n \t
  6. Assemble the bowl: Add a couple handfuls of greens into a large shallow bowl. I had some leftover Best Kale Salad<\/a> so I used that for my base. When the roasted veggies and chickpeas are done, allow the chickpeas to cool for 5 minutes and then add them on the salad followed by the sliced avocado, hummus, shredded veggies, and hemp seeds. See picture for how I plated it.<\/li>\r\n \t
  7. Serve immediately and enjoy! You can use dressing if you’d like, but I don’t usually bother. If you have leftover sweet potato and roasted chickpeas, you can place them in the fridge. Reheat in the oven at 400F for about 5-10 minutes.<\/li>\r\n<\/ol>“,”foot_note”:””}
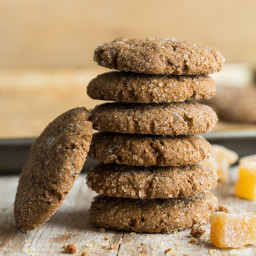
Chewy Molasses Spelt Cookies

{“head_note”:”With crispy edges and chewy middles, these are hard to resist. The candied ginger is optional, so no worries if you don\u2019t have any. I made the first batch without candied ginger and the second with it. I think I prefer the version without the candied ginger as they were a bit less sweet. If you want to cut back on the sugar, omit the candied ginger and the optional rolling in sugar. Either way, they\u2019ll be a nice treat no matter which way you make them!”,”instructions”:”

    \r\n \t

  1. Preheat oven to 350F. Line 1 large baking sheet with parchment paper.<\/li>\r\n \t
  2. Mix flax and water in a mug and set aside for a few minutes. Stir to combine.<\/li>\r\n \t
  3. In a large bowl, beat together the butter, sugar, molasses, syrup, vanilla, and flax mixture until smooth and combined.<\/li>\r\n \t
  4. In the same bowl, beat in one-by one, the dry ingredients (ginger, cinnamon, soda, salt, cloves, and flour) until just combined. Be sure not to overmix.<\/li>\r\n \t
  5. Fold in diced candied ginger if using (or skip this step).<\/li>\r\n \t
  6. Shape dough into small balls and roll in a bowl of sugar (optional). \u00a0Place balls 2 inches apart on the cookie sheet. Carefully flatten ball slightly with hand so it’s about 1\/2 inch thick.<\/li>\r\n \t
  7. Bake cookies for 12 minutes for a crispier cookie, or 10 minutes for a softer cookie (I did 12). Cool on the pan for 5 minutes before transferring to a cooling rack for another 10-15 minutes. Enjoy!<\/li>\r\n<\/ol>“,”foot_note”:”Notes: 1) You can probably swap the light spelt flour for all-purpose flour if desired. 2) This recipe can be doubled if you desire 24 cookies instead of 12. 3) I used a combo of cane sugar and turbinado sugar for rolling (the turbinado makes it really crunchy), but you can use all cane sugar if you prefer.”}

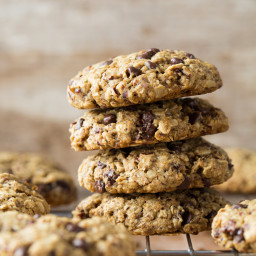
Vegan “Turtle” Oatmeal Cookies

{“head_note”:”Inspired by one of my childhood favourite candies, these \”Turtle\” Oatmeal Cookies are studded with caramel-like Medjool dates and dark chocolate chips, all surrounded with a nutty toasted pecan and oat base. If you can stop eating the dough for long enough to bake them, you are in for a real treat. This sounds a bit strange, but my favourite way to enjoy these is straight from the fridge or freezer where the cookies get firm and crisp.”,”instructions”:”

    \r\n \t

  1. Preheat oven to 325F and line a baking sheet with parchment paper. Toast pecans for about 9-11 minutes, until golden and fragrant. After toasting, remove from oven and cool for a few minutes. Preheat the oven to 350F. Add pecans into food processor along with 1 cup<\/span> of oats and process until coarsely chopped with some fine powder (see photo in blog post). Be sure not to over process or the oils in the nuts will release.<\/li>\r\n \t
  2. In a large bowl, stir the pecan\/oat mixture, the remaining 1 cup rolled oats, flour, Sucanat, baking soda, cinnamon, and salt.<\/li>\r\n \t
  3. In a medium bowl, stir together the maple syrup, melted coconut oil, milk, and vanilla. Pour the wet mixture on the dry ingredients and stir until combined.<\/li>\r\n \t
  4. In a small bowl, coat the chopped dates in 1\/2-1 teaspoon of flour and toss until coated. This prevents the dates from sticking together. Fold the dates and chocolate chips into the dough.<\/li>\r\n \t
  5. Take about 2 tablespoons of dough, roll it into a ball, and then press down on it with your hand to flatten it on the baking sheet. Space cookies a couple inches apart. Repeat until you have about 16 cookies.<\/li>\r\n \t
  6. Bake for 12-13 minutes at 350F until the cookies are golden brown on the bottom. Remove from oven and let sit on baking sheet for 3-4 mins before placing cookies onto a cooling rack for 15 minutes.<\/li>\r\n<\/ol>“,”foot_note”:”Notes: 1) Instead of gluten-free all-purpose flour, you can probably swap it for regular all-purpose flour. Depending on the flour you use, the results can vary. 2) As for the gluten-free flour blend, I recommend using one that is rice based (such as Pamela’s brand) and avoid using one that is garbanzo based (such as Bob’s Red Mill) to avoid any bean-y flavour.”}

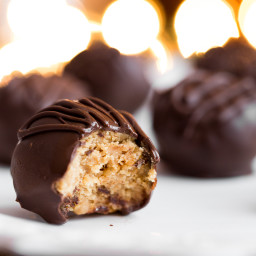
Peanut Better Balls

{“head_note”:”These peanut butter balls forgo the powdered sugar and butter, and instead use a few lighter ingredients using only a fraction of the sweetener compared to traditional recipes. You’ll wonder how you ever lived without this recipe around the holidays! It’s quick to throw together and makes about 16-20 balls that will fill a platter for a holiday party. For mess-free finger food, place the balls in mini cupcake liners.”,”instructions”:”

    \r\n \t

  1. Stir the jar of peanut butter well before using. In a large bowl, mix together the peanut butter and maple syrup vigorously, for 30-60 seconds, until it thickens up. It will go from runny to thick during this time.<\/li>\r\n \t
  2. Stir in the coconut flour until combined (if your PB is dry, you might be able to skip this step or only use half). We’re looking for a texture that isn’t too sticky, but not too dry either. Let it sit for a couple minutes to firm up as the coconut flour will continue to absorb moisture with time. Add a touch more coconut flour if necessary. Or if it’s too dry, add a touch more syrup.<\/li>\r\n \t
  3. Add salt to taste and stir in the rice crisp cereal.<\/li>\r\n \t
  4. Shape into small balls (I made about 17).<\/li>\r\n \t
  5. In a small pot, add the chocolate chips and coconut oil and heat over low heat, stirring frequently. Once half the chips have melted, remove from heat and stir until completely smooth.<\/li>\r\n \t
  6. With a fork, dip the balls into the melted chocolate. Tap off excess chocolate on the side of the pot and place the ball on a plate or cutting board lined with parchment. Repeat for the rest. Save any leftover melted chocolate for later.<\/li>\r\n \t
  7. Place balls in the freezer for around 6-8 minutes until mostly firm.<\/li>\r\n \t
  8. Dip a fork into the leftover melted chocolate and drizzle it on top of the balls to create a \”sophisticated\” design like the baking diva you are.<\/li>\r\n \t
  9. Freeze the balls for another 10-15 minutes, until the chocolate is completely set. If you can wait that long, you win life.<\/li>\r\n<\/ol>“,”foot_note”:”1) I’m not sure if other liquid sweeteners will work in this recipe (and firm up the peanut butter the same way as maple syrup does), therefore I can’t recommend any. A reader did tell me that agave nectar worked for her though! 2) I recommend only using 100% natural peanut butter for this recipe. You just want to see roasted peanuts on the label (and maybe salt, if it\u2019s salted). The no-stir<\/em> kinds made with oil and sugar might not work the same way. The PB I used was very drippy. If your PB seems dry, you probably won’t need to use all of the coconut flour.”}

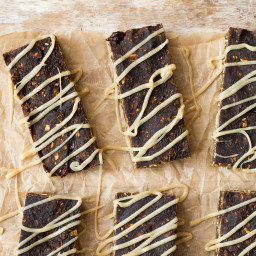
Pumpkin Gingerbread Snack Bars

{“head_note”:”These lightly sweet pumpkin gingerbread snack bars are dense, chewy, and filling! Try them topped with my creamy cashew butter maple cinnamon glaze, or enjoy them plain or spread with pumpkin butter. This recipe is adapted from Have Cake Will Travel<\/a>.”,”instructions”:”

    \r\n \t

  1. Preheat oven to 350F. Line an 8-inch square pan with 2 pieces of parchment paper, one going each way.<\/li>\r\n \t
  2. In a medium pot over medium heat, stir together the pumpkin, molasses, sugar, and oil. Heat until melted and combined. Remove from heat and stir in the vanilla.<\/li>\r\n \t
  3. In a blender or food processor, add the rolled oats. Blend on the lowest<\/span> speed (or pulse, if using a processor) until roughly chopped. You don’t want to pulverize it into a flour – the goal here is to keep a coarse texture, with some large pieces of oats and some smaller ones.<\/li>\r\n \t
  4. In a large bowl, stir together the dry ingredients (oats, flour, cinnamon, ginger, salt, and cranberries).<\/li>\r\n \t
  5. Scoop the wet ingredients over the dry and stir well until combined. The mixture will be very sticky and heavy. Totally normal…swear.<\/li>\r\n \t
  6. Scoop the dough into the prepared square pan. Since the dough is so sticky and dense, it’s challenging to spread out smoothly. I placed a piece of parchment paper on top of the dough and pressed down on it with my hands, trying to spread it out evenly as I went. It takes a bit of time, so don’t worry! After pressing it as smoothly as I could, I placed a pastry roller on top of the parchment and rolled it smooth while pressing in the edges with my fingers.<\/li>\r\n \t
  7. Bake in the oven, uncovered, for 22-25 minutes (I baked 23) until firm to the touch. Cool in the pan for 5 minutes before lifting out the square and cooling it on a cooling rack for another 30 minutes. Slice into 10-12 bars.<\/li>\r\n \t
  8. For the glaze (optional): In a small bowl stir together all the glaze ingredients until combined. Add the glaze into a plastic bag and snip off the corner so you can \”pipe\” it on the bars. Or simply spread the bars with the cashew mixture using a knife. Your call.<\/li>\r\n<\/ol>“,”foot_note”:”Note: If you aren’t using gluten-free all-purpose flour, I suggest using all-purpose flour or light spelt flour. Whole wheat pastry flour might work too. If you try anything, please let us know in the comments how it went! 2) Feel free to swap the cashew butter glaze for a simple icing sugar glaze. 3) For a nut-free option, skip the cashew butter glaze.”}

Creamy Dreamy Peppermint Patties

{“head_note”:”Luxurious, invigorating, melt-in-your-mouth peppermint patties made from scratch! Even better than store-bought versions. I suggest keeping these in the fridge or freezer for the best texture. The chocolate coating gets all snappy which is a wonderful contrast to the creamy middle.”,”instructions”:”

    \r\n\t

  1. Place cashews in a bowl and cover with water. Let soak overnight, or for at least 2-3 hours. If your blender isn’t great at blending things smooth, I suggest soaking overnight for the best results.<\/li>\r\n\t
  2. Drain and rinse the cashews after soaking.<\/li>\r\n\t
  3. Add the cashews, melted coconut oil, agave, milk, and peppermint extract into a high-speed blender. Blend on the highest speed until completely smooth. This can take a couple minutes.<\/li>\r\n\t
  4. Line a baking sheet with parchment paper and grab mini cupcake\/candy liners. Add a half tablespoon of filling into each liner. Place on the baking sheet. Repeat until you don’t have any filling left (you should get about 22-25). Freeze, uncovered, for 20-35 minutes, or until firm to the touch.<\/li>\r\n\t
  5. After freezing, quickly pop the patties out of the cupcake liners and set each on top of their respective liner. Return to the freezer for 10 minutes to firm up even more.<\/li>\r\n\t
  6. Meanwhile, melt the chocolate and coconut oil in a small pot over the lowest heat. When half of the chips have melted, remove it from the heat and stir until all the chips are melted. Allow the chocolate to cool slightly for a few minutes before dunking the patties.<\/li>\r\n\t
  7. Remove the patties from the freezer and dunk them into the melted chocolate with a fork. Tap the side to shake off excess chocolate and place on parchment paper. Do this step as quickly as possible so the patties don’t melt. Update: Some of you are having trouble with the chocolate thickening up as you do this step. If this happens, I suggest heating the chocolate again over low heat to thin it back out. The cold peppermint patties are probably causing it to thicken with time. Another option is to just drizzle the chocolate on top of the patties.<\/li>\r\n\t
  8. Return the patties to the freezer until set, for about 10 minutes, until the chocolate coating is firm. Store leftover patties in the freezer\/fridge until ready to enjoy!<\/li>\r\n<\/ol>“,”foot_note”:”1) you can sub in your favourite liquid sweetener for agave, if desired. Just know that the flavour will change depending on the sweetener you use. 2) See the bottom of this post<\/a> for a nut-free version and more tips on making this recipe. 3) If you have melted chocolate leftover, spread it into a parchment paper lined plate and freeze it. This way nothing goes to waste!”}

Sparkling Cranberry Lime Cocktail

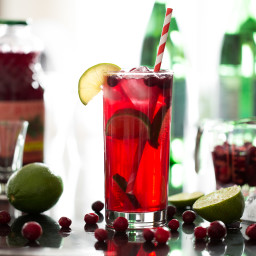
{“head_note”:”Festive, low in sugar, and super quick to throw together, this is a great last-minute holiday drink option for a party! Often referred to as a \”Cape Codder\”, this mix of cranberry + lime + vodka is sure to please the folks who aren’t crazy about sweet drinks. I love adding club soda instead of using all cranberry juice to give it a bit more bite and a pretty sparkle. The recipe below makes one large (16-ounce) glass, so feel free to increase the servings as you see fit. This cocktail comes in at under 100 calories and just 6 grams of sugar (or, if you omit the agave, only 3.5 grams of sugar).”,”instructions”:”

    \r\n \t

  1. Add the vodka into a 16-ounce tall glass. Now add a handful of cranberries and a couple lime slices. Add the ice on top.<\/li>\r\n \t
  2. Pour in the cranberry juice followed by the club soda.<\/li>\r\n \t
  3. Add a squeeze of lime juice (if desired) and agave to taste. Stir to combine.<\/li>\r\n \t
  4. Enjoy immediately!<\/li>\r\n<\/ol>“,”foot_note”:”Note: 1) For a mocktail, simply omit the vodka and add a couple extra tbsp of cranberry juice. 2) For a fun variation, try pomegranate juice + arils instead of cranberry juice and cranberries.”}