Category Archives: Uncategorized

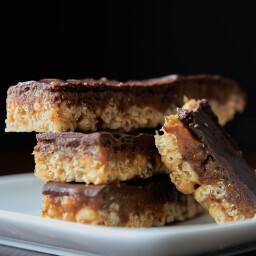
Homemade Crispy Twix Bars

{“head_note”:””,”instructions”:”

    \r\n \t

  1. Line an 8-inch pan with two pieces of parchment paper. In a small pot, add the brown rice syrup, peanut butter, and vanilla. Increase heat to medium and bring to a simmer, stirring frequently until combined. Add pinch of salt. Pour into a large bowl with rice crisp and stir well.<\/li>\r\n \t
  2. Scoop the rice crisp mixture into pan. Wet hands slightly and then spread the mixture evenly and press down firmly until smooth. Place in freezer while you make the date caramel.<\/li>\r\n \t
  3. Soak dates in water until soft (only if necessary) and drain. Place pitted dates, peanut butter, milk, and salt in the food processor and process until almost smooth and a big ball forms.<\/li>\r\n \t
  4. Spread caramel layer over top of the crust until it\u2019s as smooth and even as you can get it. Place back in the freezer for 10-15 minutes to set.<\/li>\r\n \t
  5. Melt the chocolate and optional coconut oil in a small pot over low heat. When 2\/3 of the chips are melted, remove from heat and stir until smooth. Spread chocolate on top of the caramel and place in the freezer for about 3 minutes only.<\/li>\r\n \t
  6. Remove from freezer (chocolate should be slightly firm, but not completely set) and slice into rows and then in half. Freeze again until set for about 10 minutes. Store in fridge or freezer.<\/li>\r\n<\/ol>“,”foot_note”:”
      \r\n \t

    • The brown rice syrup can probably be subbed for honey (if you include honey in your diet). Agave won\u2019t hold together as well since it\u2019s not as \u201ctacky\u201d, but it will hold together when kept in the freezer. It will fall apart at room temperature though.<\/li>\r\n \t
    • You can sub peanut butter for sunflower seed butter as a nut-free option.<\/li>\r\n<\/ul>“}
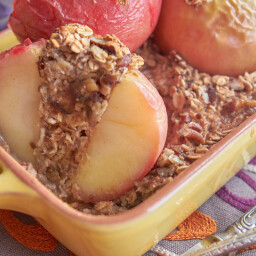
Baked Apples Stuffed With Cinnamon Date Pecan Oatmeal

{“head_note”:””,”instructions”:”

    \r\n \t

  1. Preheat oven to 350\u00b0F. Wash and core apples. You want to make the hole about an inch in diameter, so there is enough room for stuffing. Place cored apples in a lightly oiled rimmed baking dish (I used a 4 cup dish).<\/li>\r\n \t
  2. In a mixing bowl, whisk together the rest of the ingredients.<\/li>\r\n \t
  3. Fill apples with the oatmeal mixture (pack it down slightly) and then spoon the leftover oatmeal + all liquid into the dish, surrounding the apples.<\/li>\r\n \t
  4. Bake, uncovered, for approximately 35-50 minutes (this time will vary depending on your apples, so keep an eye on it). To test for doneness, pierce apple with a knife. If it slides through fairly easy it\u2019s done. The almond milk should also be absorbed and the oatmeal fairly firm. Serve with drizzle of pure maple syrup, apple butter or pumpkin butter, whipped coconut cream, non-dairy ice cream, or yogurt.<\/li>\r\n<\/ol>“,”foot_note”:””}

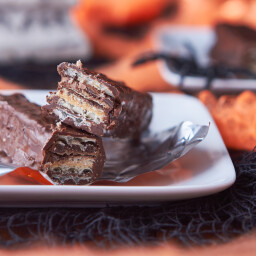
Homemade Vegan “Kit Kat” Bars

{“head_note”:”I purchased my tort wafers from Bulk Barn.\r\nMake sure you use good-tasting chocolate because the chocolate will make or break these bars”,”instructions”:”

    \r\n \t

  1. Chill full-fat coconut milk can overnight in the fridge. Grab 3 tort wafer sheets (11.5 inches x 9 1\/4 inches) and slice in half to create 6 halves.<\/li>\r\n \t
  2. In a small pot, melt 1.5 cups chocolate chips with 1 tsp coconut oil over low heat. When 2\/3 of the chips are melted, remove from heat and stir until all chips are melted.<\/li>\r\n \t
  3. Place a wafer half on top of a board lined with parchment paper. Spread 2 tbsp melted chocolate over 1 wafer. I found a spatula helpful for spreading. Place another wafer (#2) on top of melted chocolate and press down firmly. Add heavy object(s) on top and freeze for 5 minutes to set.<\/li>\r\n \t
  4. Remove from freezer and spread 3-4 tbsp peanut butter on top. Add another wafer (#3) on top of peanut butter and press down firmly.<\/li>\r\n \t
  5. Spread 2 tbsp melted chocolate on top and cover with 4th wafer. Press down firmly and cover again with heavy object(s). Freeze for 10 minutes.<\/li>\r\n \t
  6. Meanwhile, make the chocolate whipped cream (for step by step photos, see this tutorial). Flip coconut milk can upside down and open lid. Pour off excess liquid (you can save for smoothies). Scoop out the remaining coconut cream and place into a bowl. Beat with electric beaters until smooth. Now sift in cocoa powder and add maple syrup and vanilla. Blend until smooth. Reheat melted chocolate over very low heat if necessary.<\/li>\r\n \t
  7. Remove stacked wafers from freezer and spread on about 3 tbsp of whipped cream until smooth, being sure to coat all edges.<\/li>\r\n \t
  8. Grab the final (5th) wafer and spread on 2 tbsp melted chocolate. Flip wafer (so chocolate side is facing on top of whipped cream) and press onto the whipped cream, firmly. Add more heavy objects on top and freeze for 15 minutes.<\/li>\r\n \t
  9. Meanwhile, melt another 1.25-1.5 cups of chocolate chips with another 1 tsp coconut oil on low heat.<\/li>\r\n \t
  10. Remove stacked wafers from freezer and score with a knife before slicing through. I sliced about 12-13 rows and then sliced those in half to make 24-26 small pieces.<\/li>\r\n \t
  11. Dunk each piece into melted chocolate until fully coated. Use a knife to remove excess chocolate and place on parchment paper. Repeat for the rest. Freeze for 15 minutes or until set. Store in fridge. Use leftover whipped cream as a dip for the bars.<\/li>\r\n<\/ol>“,”foot_note”:”Note: On the tort wafers I used there was a smoother side and a not as smooth side (with deeper squares). I prefer to use the smooth side to spread on the chocolate\/filling because you don’t have to use as much to coat.”}

Homemade “Rolo” Knock-Offs

{“head_note”:””,”instructions”:”

    \r\n \t

  1. [Note: You want to use very soft Medjool dates. If yours are firm, soak in water to soften before using. Be sure to drain well.] Process pitted dates in food processor until a sticky paste forms. Now, add in the nut or seed butter along with a pinch of fine grain sea salt. Process until combined. The mixture will be SUPER sticky, but this is a good thing!<\/li>\r\n \t
  2. Scoop out the sticky mixture into a bowl and freeze for about 10 minutes. Chilling it makes the caramel easier to shape into balls. After chilling, lightly wet your fingers and shape caramel into small balls to make about 18 balls total.<\/li>\r\n \t
  3. Place balls back into the freezer for another 10 minutes on a parchment lined plate. Meanwhile, melt chocolate chips along with 1 teaspoon coconut oil on the stove top over low heat. When 2\/3 of the chips are melted, remove from heat and stir until everything is melted.<\/li>\r\n \t
  4. Remove balls from freezer and dunk each ball into the melted chocolate, one at a time. Roll around to coat. Tap off excess chocolate and place back onto parchment-lined plate. Sprinkle with chia seeds (optional) and stick a toothpick into each. Repeat for the rest.<\/li>\r\n \t
  5. Freeze again for at least 20 minutes until set. Bites taste best straight from the freezer and will soften (but will not melt) at room temperature.<\/li>\r\n<\/ol>“,”foot_note”:”The chia seeds were added for a Halloween spooky bug-like appearance and for some sneaky nutrition!”}

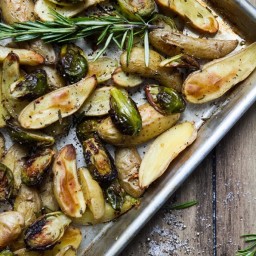
Roasted Fingerling Potatoes and Brussels Sprouts with Rosemary and Garlic

{“head_note”:”Give brussels sprouts another shot. \u00a0Trust me on this one.”,”instructions”:”

    \r\n \t

  1. Preheat oven to 400\u00b0F and line a large baking sheet with parchment paper.<\/li>\r\n \t
  2. Rinse and scrub potatoes. Pat dry. Slice in half lengthwise and place into large mixing bowl.<\/li>\r\n \t
  3. Cut off stem of brussels sprouts and remove loose outer leaves. Rinse and pat dry. Place in bowl.<\/li>\r\n \t
  4. Add the minced garlic, minced rosemary, oil, optional Sucanat, salt, pepper, and optional red pepper flakes into the bowl along with the potatoes and sprouts. Toss with your hands to combine and place on baking sheet.<\/li>\r\n \t
  5. Roast for 35-38 minutes at 400\u00b0F, stirring once half way through baking. Potatoes will be golden and brussels will be lightly charred when ready. Season with Herbamare (or salt) and pepper to taste and serve immediately.<\/li>\r\n<\/ol>“,”foot_note”:””}

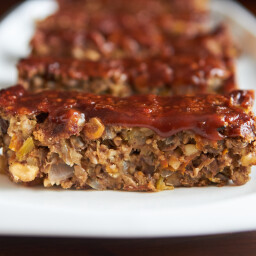
Glazed Lentil Walnut Apple Loaf, Revisited

{“head_note”:””,”instructions”:”

    \r\n \t

  1. Preheat oven to 325\u00b0F. Rinse and strain lentils. Place lentils into pot along with 3 cups of water (or veg broth). Bring to a boil and season with salt. Reduce heat to medium\/low and simmer, uncovered, for at least 40-45 minutes. Stir frequently & add touch of water if needed. The goal is to over-cook the lentils slightly (see pictures in post). Mash lentils slightly with a spoon when ready.<\/li>\r\n \t
  2. Toast walnuts at 325\u00b0F for about 8-10 minutes. Set aside. Increase oven temp to 350\u00b0F.<\/li>\r\n \t
  3. Whisk ground flax with water in a small bowl and set aside.<\/li>\r\n \t
  4. Heat a teaspoon of olive oil in a skillet over medium heat. Sautee the garlic and onion for about 5 minutes. Season with salt. Now add in the diced celery, shredded carrot and apple, and raisins. Sautee for about 5 minutes more. Remove from heat.<\/li>\r\n \t
  5. In a large mixing bowl, mix all ingredients together. Adjust seasonings to taste.<\/li>\r\n \t
  6. Grease a loaf pan and line with parchment paper. Press mixture firmly into pan. Whisk glaze ingredients and then spread half on top of loaf. Reserve the rest for a dipping sauce.<\/li>\r\n \t
  7. Bake at 350\u00b0F for 40-50 minutes, uncovered. Edges will be lightly brown. Cool in pan for at least 10 minutes before transferring to a cooling rack. I usually wait until loaf is cool before slicing.<\/li>\r\n<\/ol>“,”foot_note”:”Note: Use Gluten-free oat flour and breadcrumbs if necessary. If you need a nut-free version you might want to try using toasted sunflower seeds.”}

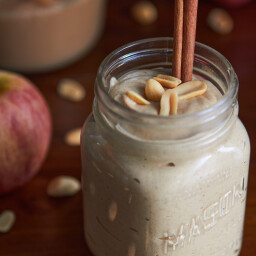
2-Minute Apple Cinnamon Peanut Butter

{“head_note”:””,”instructions”:”

    \r\n \t

  1. Add apple butter and peanut butter into a food processor and process until combined.<\/li>\r\n \t
  2. Now add in the rest of the ingredients and process again, scraping down the side of the bowl as necessary. Adjust to taste. Should keep for 2-4 weeks in an air-tight container in the fridge.<\/li>\r\n<\/ol>“,”foot_note”:””}

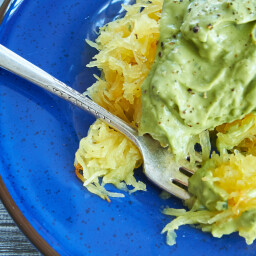
Creamy Avocado Spaghetti Squash Pasta, Fall Edition

{“head_note”:””,”instructions”:”

    \r\n \t

  1. Preheat oven to 375\u00b0F. Wash spaghetti squash and place on an old tea towel (this helps prevent it from slipping) or cutting board. Slice off stem, flip cut side down, and then carefully slice it in half, lengthwise. Remove seeds + squash guts and set aside.<\/li>\r\n \t
  2. Brush the cut-sides with oil and then season with salt and pepper. Place cut side down on a baking sheet lined with parchment paper and bake for 35-45 minutes, depending on the size of the squash. Squash is ready when the strands scrape off with a fork fairly easily. My 5 pound squash took 40 mins.<\/li>\r\n \t
  3. Meanwhile, make the avocado sauce. Add the garlic and basil to a food processor and mince. Now, add in the lemon juice and olive oil and stop to scrape down the sides of the bowl.<\/li>\r\n \t
  4. Slice avocado in half and pit. Scoop out the flesh and drop it into the processor with the motor running. Add water, 1 tbsp at a time, to thin out the sauce as needed. Stop to scrape down the bowl. Add salt and pepper to taste and process again. Feel free to add more lemon or oil, adjusting to taste, if desired.<\/li>\r\n \t
  5. When the squash is ready, flip over and allow to cool slightly so it\u2019s safe to handle. Grab a fork and scrape off strands of squash until you have two empty \u201cshells\u201d. Place strands onto a plate (or just serve in the shells), season with s & p, and top with the avocado sauce. Sauce will keep for 1 day in the fridge in an air-tight container.<\/li>\r\n<\/ol>“,”foot_note”:””}

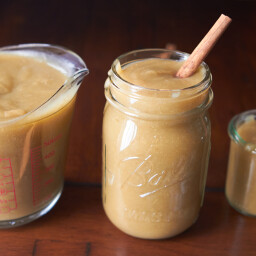
Easy Slow Cooker Naked Apple Butter

{“head_note”:”Naked apple butter – no sweetener added and minimal spices. It’s like the \”Blonde Roast\” of apple butters and so easy to make.”,”instructions”:”

    \r\n \t

  1. Slice apples. There is no need to peel the apples. In fact, your apple butter is much healthier with the peel left on. Tip: If you have an apple slicer, now is the time to use it. I love my OXO apple slicer<\/a>. Add apple slices to slow cooker.<\/li>\r\n \t
  2. Set slow cooker on HIGH for 4 hours, covered with lid. During those 4 hours, give it a few stirs as the apples tend to stick to the bottom a bit. You can add some apple juice or cider to prevent sticking. If you\u2019d rather cook it longer on a lower heat, you can do that too.<\/li>\r\n \t
  3. Mash apples and turn off heat. After 4 hours, most of the apples are soft enough to mash up with a wooden spoon or potato masher. After mashing, we now have applesauce (with the peel of course)!<\/li>\r\n \t
  4. Cool slightly and scoop into high-speed blender. With a big ladle, scoop the apple mixture into a blender. If you have a small blender you may have to do this in a few batches. Make sure lid is secured tightly.<\/li>\r\n \t
  5. Blend the mixture. Start on a low setting and go faster until you reach max speed. You may need to let some steam escape through the top hole if there is one. Puree mixture until super smooth and buttery. If it\u2019s still chunky, keep blending.<\/li>\r\n \t
  6. Pour the apple butter back into the slow cooker. Turn heat on HIGH and cook down, uncovered, for another 45-90 minutes until it\u2019s as thick as you desire. After 45 mins, I was left with 5 cups and the consistency was very similar to my pumpkin butter. Keep in mind it will thicken slightly once chilled overnight.<\/li>\r\n \t
  7. When ready, add cinnamon to taste (or other spices if desired) and a very small amount of lemon juice if desired.<\/li>\r\n \t
  8. Cool completely and store in an air-tight jar for up to 1 month in the fridge. Or you can try canning it as well<\/li>\r\n<\/ol>“,”foot_note”:”Also, try my pumpkin butter recipe<\/a>“}

Roasted Butternut Squash with Almond-Pecan Parmesan

{“head_note”:”This\u00a0comforting and nutritious side dish will warm you to the bone! The Almond-Pecan\u00a0Parmesan\u00a0lends\u00a0a\u00a0crunchy contrast to the buttery and lightly sweet squash. Finely chopped kale provides a boost of green power. Trust me when I say that it’s so good you’ll want to enjoy this dish as a main course.”,”instructions”:”

    \r\n \t

  1. Preheat oven to 400\u00b0F (200\u00b0C) and lightly grease a large casserole dish with oil.<\/span><\/li>\r\n \t
  2. Peel the squash. Thinly slice off the bottom and top and then slice through the middle lengthwise to make two halves. Remove seeds with a spoon. Chop the two halves into 1-inch chunks and place into the casserole dish.<\/li>\r\n \t
  3. Add the minced garlic, parsley, oil, and salt into casserole dish and toss\u00a0until combined with the squash. Do not add the kale yet.<\/li>\r\n \t
  4. Cover the casserole dish with tinfoil (with a few holes poked) and bake at 400\u00b0F (200\u00b0C) for about 45 minutes, until tender and lightly browned.<\/li>\r\n \t
  5. Meanwhile, in a mini food processor, pulse the Almond-Pecan Parmesan ingredients together until coarsely chopped.<\/li>\r\n \t
  6. After cooking, remove the squash from the oven and reduce the heat to 350\u00b0F (180\u00b0C). Remove the tinfoil. Stir in the chopped kale and sprinkle the Parmesan all over the squash. Bake for another 5 to 8 minutes, uncovered, until the nuts are lightly toasted. Watch closely so you don\u2019t burn the nuts.\u00a0Serve\u00a0warm.<\/li>\r\n<\/ol>“,”foot_note”:””}