Category Archives: Uncategorized

Ultimate Lentil Walnut Loaf

{“head_note”:”This lentil walnut loaf is so delicious, you’ll find it hard to resist. Raved about by readers, husbands, children, and recipes testers alike, many claim it\u2019s better than traditional meatloaf. The beauty of creating a lentil loaf (as opposed to a meatloaf) is that you can taste the mixture as you go without having to worry about the raw meat. This results in a perfectly seasoned loaf and, trust me, the batter tastes so good! Lentil loaves can be temperamental, so it\u2019s best to follow the directions exactly as written as I\u2019ve tested this multiple ways. Even minor changes to this recipe can result in a loaf that doesn\u2019t stick together as well. I love to serve this loaf with my stunning Cauliflower Carrot Mash, applesauce, and\/or steamed broccoli or greens. This lentil loaf is inspired by Terry Walters’ Clean Food Lentil Loaf recipe.”,”instructions”:”

    \r\n \t

  1. Preheat the oven to 325\u00b0F (160\u00b0C). Grease a 9×5-inch loaf pan, and then line it with a piece of parchment paper cut to fit the length of the pan. <\/li>\r\n \t
  2. If using canned lentils, rinse and drain them in a colander. If using lentils cooked from scratch, follow the directions in the note below. After draining, add them into a very large bowl and mash the lentils with a potato masher. The goal is to create a lentil paste while still leaving about 1\/3 of the lentils intact. <\/li>\r\n \t
  3. Spread the chopped walnuts onto the baking sheet. Toast the nuts for 8 to 12 minutes until fragrant and lightly golden. Set aside to cool. <\/li>\r\n \t
  4. Increase the oven heat to 350\u00b0F (180\u00b0C). <\/li>\r\n \t
  5. Add the oil into a large skillet, and increase the heat to medium. Stir in the onion and garlic and season with a pinch or two of salt. Cook for 4 to 5 minutes until the onion softens. <\/li>\r\n \t
  6. Stir in the celery and carrot, and continue cooking for another few minutes. <\/li>\r\n \t
  7. Finally, stir in the grated apple, dried cranberries (or raisins), thyme, oregano, 1\/2 teaspoon salt, and black pepper. Cook for a couple minutes longer. <\/li>\r\n \t
  8. Into the bowl with the mashed lentils, stir in the walnuts, ground flax, oat flour, and bread crumbs until combined. <\/li>\r\n \t
  9. Stir in all of the veggie mixture until combined. Add the red pepper flakes, if using. Taste and add more salt (I usually add another 1\/2 teaspoon). If the mixture seems dry, add a tablespoon or two of water and mix again.<\/li>\r\n \t
  10. Press all of the lentil loaf mixture into the prepared loaf pan. Pack it down as firmly as you can as this will help it hold together after cooling. <\/li>\r\n \t
  11. In a small bowl, whisk together the ketchup, applesauce, vinegar, and maple syrup until combined. Using a pastry brush (or simply a spoon), spread all of the glaze over top of the lentil loaf. <\/li>\r\n \t
  12. Bake the lentil loaf, uncovered, at 350\u00b0F (180\u00b0C) for 50 to 60 minutes until the edges start to darken and the loaf is semi-firm to the touch. Place the loaf pan directly onto a cooling rack for 15 minutes. Then, slide a knife around the ends to loosen, and carefully lift out the loaf (using the parchment paper as \”handles\”) and place it directly onto the cooling rack for another 30 minutes.<\/li>\r\n \t
  13. After cooling, carefully slice the loaf into slabs. Serve immediately. The loaf will continue to firm up as it cools. Some crumbling is normal if sliced while warm.<\/li>\r\n<\/ol>“,”foot_note”:”
      \r\n \t

    • * If you’d like to make lentils from scratch, swap the two cans of lentils for 1 cup of uncooked lentils. Add the lentils into a pot and cover with water. Bring to a low boil over high heat, reduce the heat to medium-high, and then simmer the lentils uncovered for 20 to 30 minutes until tender. Drain well.<\/li>\r\n<\/ul>“}

Pumpkin Oatmeal Anytime Squares

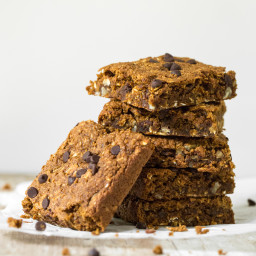
{“head_note”:”Soft and muffin-like in texture, these oil-free pumpkin oatmeal bars are light enough for breakfast and all your snacking needs.”,”instructions”:”

    \r\n \t

  1. Preheat oven to 350F and line an 8-inch square pan with parchment paper.<\/li>\r\n \t
  2. Mix flax egg in a small bowl or mug and set aside to thicken for about 5 minutes.<\/li>\r\n \t
  3. In a large mixing bowl, beat the pumpkin and sugar with electric beaters until combined.<\/li>\r\n \t
  4. Pour in the flax egg and vanilla extract and beat until combined.<\/li>\r\n \t
  5. Add the baking soda, salt, cinnamon, ginger, and nutmeg and beat again.<\/li>\r\n \t
  6. Finally add in the oat flour, rolled oats, almond flour, arrowroot flour, and pecans. Beat until combined.<\/li>\r\n \t
  7. Spoon dough into prepared pan and spread out until smooth and even. The dough will be very sticky, but this is normal. I like to cover the dough with a piece of parchment paper and roll it with a pastry roller. Sprinkle the chocolate chips on top and press down.<\/li>\r\n \t
  8. Bake for 15-19 minutes (I baked for 18 minutes), until lightly golden and firm to the touch. Be sure not to overbake.<\/li>\r\n \t
  9. Place pan on a cooling rack for 10 minutes. Then, lift out and place square directly on cooling rack for another 10-20 minutes, until cool. Slice and enjoy! The bars will crumble slightly if sliced warm, but they firm up nicely when cooled.<\/li>\r\n<\/ol>“,”foot_note”:”Tips: 1) Instead of coconut sugar, you can try using Sucanat or natural cane sugar. Also, if you’d like a less sweet square you can try reducing the sugar a bit. 2) To make the freshly ground oat flour, add 3\/4 cup rolled oats into a high speed blender. Blend on high until a fine flour forms. You can also simply use store-bought oat flour (3\/4 cup + 1 tablespoon should do it).”}

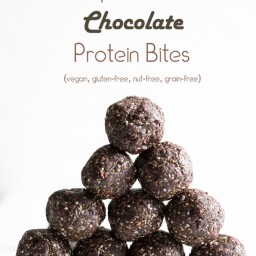
Super Seed Chocolate Protein Bites

{“head_note”:”Nut-free chocolate energy bites featuring hemp, sesame, and chia seeds!”,”instructions”:”

    \r\n \t

  1. Add dates into processor and process until a chunky paste forms.<\/li>\r\n \t
  2. Add in the hemp, chia, sesame, cocoa, vanilla, cinnamon, and salt. Process until thoroughly combined. Pulse in the cacao nibs. The dough should be sticky when pressed between your fingers. If it\u2019s not sticky enough to shape into balls, add a small amount of water (a teaspoon at a time) and process until it comes together.<\/li>\r\n \t
  3. Shape dough into small balls (about 16) and freeze for 20 minutes or so until firm. Store leftovers in the freezer until your next snack attack hits.<\/li>\r\n<\/ol>“,”foot_note”:””}

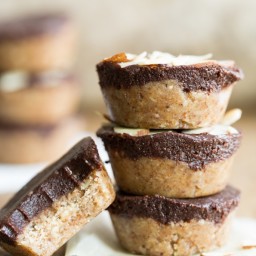
Raw Almond Butter Cups

{“head_note”:”Like the peanut butter cup candy, but so much tastier and better for you! These raw almond butter cups are the perfect solution to any sweet craving. I used a mini silicone muffin tray since they are so flexible and I just popped the cups out after freezing. You can certainly use a regular muffin tin lined with paper liners too. For the thick chocolate coating, I made my own chocolate using cocoa powder, coconut oil, and sweetener. Feel free to simply use melted dark chocolate if that’s what you have on hand. Be sure to keep these chilled until just before serving and store them in the freezer for best results. I personally love them straight from the freezer.\r\n\r\nNote: Use certified gluten-free oats to make this recipe gluten-free. \u00a0NEW: See below for a nut-free version!”,”instructions”:”

    \r\n \t

  1. Add almonds and oats into a high-speed blender and blend on high until a flour forms. Dump into a large bowl and break up any clumps with your fingers.<\/li>\r\n \t
  2. Add the nut butter, coconut oil, maple syrup (or agave), cinnamon, vanilla, and salt into the bowl. Stir until thoroughly combined. The dough should be fairly sticky like cookie dough.<\/li>\r\n \t
  3. Line a mini (or regular) muffin tin with paper liners or use a silicone muffin holder. Portion the dough into each muffin cup and press down until even and smooth.<\/li>\r\n \t
  4. To make the chocolate sauce: Whisk together the coconut oil, sweetener, cocoa powder, and salt until no clumps remain. Spoon the sauce over top each of the cups, distributing evenly. Garnish cups with sliced almonds if desired.<\/li>\r\n \t
  5. Place in the freezer in a flat area for 30-45 minutes, until firm. Pop out the cups & enjoy immediately! These are best consumed straight from the freezer.<\/li>\r\n<\/ol>“,”foot_note”:”If looking for an oat-free option, you might be able to substitute the 1\/4 cup of oats for more almond meal. My guess is that you\u2019d need to add another 1\/3-1\/2 cup almonds to avoid the dough becoming too sticky. Please report back!\r\nFor a nut-free version, sub the almond meal for an equal amount of rolled oats (so use 1 cup total rolled oats). Sub the almond butter for sunflower seed butter. Works great!”}

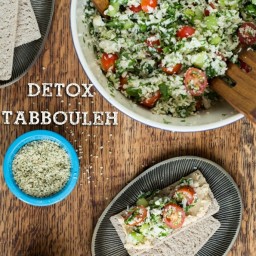
Detox Tabbouleh

{“head_note”:”A raw, no-cook detox tabbouleh, bursting with flavour! You won’t see tabbouleh the same way again. My favourite way to enjoy this is served with Buckwheat Crackers and hummus. It makes a great snack or light summery lunch when you don\u2019t want to turn on the oven. The leftovers will keep for a couple days and it tastes even better after sitting for a few hours so the flavours can develop. Just be sure to toss it well before serving.\r\n\r\n \r\n\r\nInspired by: Detox Salad<\/a>“,”instructions”:”

    \r\n \t

  1. If using a food processor, use the grater blade attachment. Drop cauliflower florets into the machine to grate. If using a box grater, quarter the cauliflower and grate each piece until just the stem is left. Scoop into a large bowl. Discard leftover stem pieces.<\/li>\r\n \t
  2. Stir the rest of the vegetables (tomatoes, parsley, celery, cilantro, and green onion) into the bowl.<\/li>\r\n \t
  3. Whisk together the dressing in a small glass or jar. Pour onto salad and toss to combine, adjusting salt to taste if desired. You can serve it immediately or place it in the fridge for a few hours so the flavours can develop a bit more. Just before serving, sprinkle with hemp seeds for added protein.<\/li>\r\n<\/ol>“,”foot_note”:”Salad will keep in a container for a couple days (possibly longer) in the fridge.”}

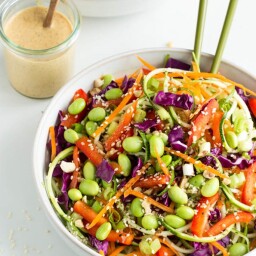
Rad Rainbow Raw Pad Thai

{“head_note”:””,”instructions”:”

    \r\n \t

  1. Prep vegetables. Add the zucchini, carrots, pepper, and cabbage into one or two large bowls. Toss with hands to combine.<\/li>\r\n \t
  2. Prepare the dressing by processing all dressing ingredients in a mini processor (or simply whisk by hand). The dressing may seem a bit thin at first, but it thickens as it sits.<\/li>\r\n \t
  3. Top bowls with edamame (or tofu), green onion, hemp seeds, and sesame seeds. Pour on dressing and enjoy!<\/li>\r\n<\/ol>“,”foot_note”:””}

Speedy Almond Milk Iced Coffee

{“head_note”:”This is my go-to homemade almond milk iced coffee. I find a 1:1 ratio of coffee concentrate and almond milk is really tasty. Feel free to adjust this to your own taste buds depending on how strong you like it!”,”instructions”:”

    \r\n \t

  1. Stir together the coffee concentrate and almond milk. Add sweetener to taste if desired. Add ice cubes and enjoy.<\/li>\r\n<\/ol>“,”foot_note”:”Tip: You can also make coffee ice cubes to use in your iced coffee so it doesn\u2019t get watered down by regular ice. I personally drink it so fast the ice cubes don\u2019t really have a chance to melt, so I don\u2019t bother with the coffee cubes! Coffee ice cubes would be ideal if serving to a large crowd in a pitcher though.”}

Iced Mocha Green Monster Smoothie

{“head_note”:”This icy drink is a hybrid between an Iced Mocha Coffee and a Green Monster Smoothie. I snuck in a handful of greens, but you can\u2019t taste them one bit.”,”instructions”:”

    \r\n \t

  1. Blend until smooth. Gulp. Cool down. Enjoy summer!<\/li>\r\n<\/ol>“,”foot_note”:””}

Thai-Inspired Cucumber Salad with Roasted Spiced Chickpeas

{“head_note”:”A hydrating, Thai-style cucumber salad topped with crunchy spiced chickpeas.”,”instructions”:”

    \r\n \t

  1. Whisk dressing ingredients together in a small bowl and adjust to taste. Feel free to add more sweetener if you prefer. Set aside.<\/li>\r\n \t
  2. Peel cucumbers, slice off the ends, and slice in half lengthwise. Scoop out the seeds with a small spoon (see photo in post if necessary). Slice halves into 1\/8-inch \u201chalf moons\u201d and toss into a large bowl. If your cucumbers are really big you can slice the half-moons in half as well.<\/li>\r\n \t
  3. Dice the red pepper and red onion and add into bowl. Roughly chop cilantro and add into bowl. Pour in all the dressing and toss to combine. Let this salad sit for about 30 minutes in the fridge, tossing every 10 minutes or so to help the dressing soak in.<\/li>\r\n \t
  4. Meanwhile, prepare the roasted chickpeas (if desired). Recipe follows.<\/li>\r\n \t
  5. Portion into bowls and top with peanuts and optional roasted chickpeas. Serve immediately.<\/li>\r\n<\/ol>“,”foot_note”:””}

2-Ingredient Chocolate Fudge Frosting

{“head_note”:”A luxurious fudge frosting with just two ingredients – no butter or shortening required!”,”instructions”:”

    \r\n \t

  1. Chill can of full-fat coconut milk in the fridge overnight. When ready, flip can over and open with can opener. Pour off the water (you can save it for a smoothie or discard). Scoop only the solid white coconut cream into a pot. Add the chocolate chips into the pot as well and gently melt the coconut cream and the chocolate chips together over low heat. Stir frequently and be careful not to burn.<\/li>\r\n \t
  2. Transfer this mixture into a bowl (cover with wrap) and then into the fridge for 2-3 hours (or overnight) until it firms up enough to whip into frosting. You really just have to eyeball it as I expect the timing for individual batches will differ depending on how cold your fridge is. I put it in the fridge overnight and then left it on the counter for the entire morning until I was ready to frost the cupcakes in the afternoon.<\/li>\r\n \t
  3. When it\u2019s firmed enough to your liking, whip it with electric beaters until smooth and creamy. If it\u2019s still too firm, you can leave it out on the counter for a bit longer. I didn\u2019t need to add any milk to thin it out or any sugar to sweeten \u2013 it was just perfect as is! If your batch tastes bitter, you can always add a bit of sweetener to your taste. I also like to add a small pinch of fine grain sea salt to make the flavours pop.<\/li>\r\n<\/ol>“,”foot_note”:”Note: On a hot day, this frosting could melt. Be sure to keep frosted cupcakes in the fridge until ready to enjoy.\r\nLooking for a vegan cupcake recipe? Find my favourite chocolate cupcakes here<\/a>.”}