Category Archives: Uncategorized

Spiced Buttercream Frosting

{“head_note”:”Buttery, sweet, fluffy, spicy\u2026and vegan to boot! The perfect Fall-spiced frosting.<\/em>“,”instructions”:”

    \r\n \t

  1. Whip the Earth Balance with a mixer until smooth.<\/li>\r\n \t
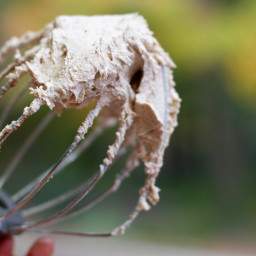
  2. Now add half of the icing sugar and blend well, stopping to scrape the side of bowl as needed.<\/li>\r\n \t
  3. Now add in the vanilla, pumpkin pie spice, and almond milk (if needed). Mix well.<\/li>\r\n \t
  4. Add in the remaining icing sugar and blend for several minutes, stopping to scrape the sides of the bowl.<\/li>\r\n \t
  5. Once the Gingerbread has fully cooled, spread on the icing using a wet spatula.<\/li>\r\n<\/ol>“,”foot_note”:””}
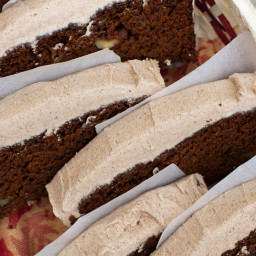
Pumpkin Gingerbread with Spiced Buttercream

{“head_note”:””,”instructions”:”

    \r\n \t

  1. Preheat oven to 350\u00b0F (180\u00b0C). Line a regular sized loaf pan with parchment paper and lightly oil on top.<\/li>\r\n \t
  2. Toast the walnuts on a baking sheet for about 10-12 minutes until golden. Remove from oven and set aside.<\/li>\r\n \t
  3. Combine the following ingredients (pumpkin, maple syrup, sugar, coconut oil, molasses, chia egg) in a medium-sized mixing bowl and blend well.<\/li>\r\n \t
  4. In a large bowl, combine the dry ingredients.<\/li>\r\n \t
  5. Add the wet mixture to the dry, and stir well.<\/li>\r\n \t
  6. Stir in the toasted nuts. Pour the batter into the pan, smooth out with wet spoon, and bake for 50-60 minutes or until an inserted toothpick comes out clean.<\/li>\r\n \t
  7. Allow to cool before removing from pan. While it is baking, make your spiced buttercream frosting<\/a>. Serves eight 1-inch slices.<\/li>\r\n<\/ol>“,”foot_note”:””}
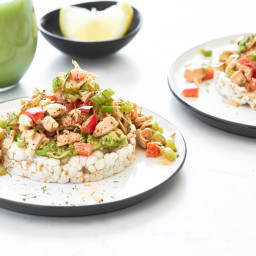
Smoky Jackfruit “Chicken” Salad

{“head_note”:”I recently started experimenting with jackfruit recipes, and I discovered that jackfruit makes a fantastic sub for chicken in a traditional chicken salad. My goodness, it\u2019s delicious (and not only is jackfruit delicious, it\u2019s rich in Vitamin C too)! Because jackfruit has such a mild flavour, it takes on all the wonderful flavours in this dish\u2014tangy lemon and dill, creamy eggless mayo, savoury garlic, and smoky paprika. I\u2019ve added fresh vegetables like celery, green onion, and bell peppers to give it a great crunch and loads of fibre. Serve this salad in pieces of Boston or Bibb lettuce, in a wrap or sandwich, or on crackers. To boost the protein, I like adding hemp hearts.\u00a0You can find canned jackfruit online or in health food stores, Asian grocery stores, and the international section of some chain grocers. Recipe is adapted from my favourite Chickpea Salad<\/a>.”,”instructions”:”

    \r\n \t

  1. Drain and rinse the jackfruit. Place the drained jackfruit segments onto a large cutting board. Using a knife, slice off the fibrous core of each jackfruit segment. You\u2019ll only want to use the \u201cstringy\u201d parts that resemble pulled pork. Discard the core and chop the remaining pieces into small 1\/2-inch chunks. It should look like shredded chicken and you should have about 1 1\/2 cups chopped.<\/li>\r\n \t
  2. Add the chopped pieces to a bowl and stir in the celery, green onions, bell peppers, mayonnaise, and garlic until combined.<\/li>\r\n \t
  3. Now stir in the dill and season with the lemon juice, smoked paprika, salt, and pepper, adjusting quantities to taste after mixing.<\/li>\r\n \t
  4. Serve in a sandwich or wrap, on top of a big salad, or with crackers. I love enjoying it with rice cakes and mashed avocado too. Leftovers can be refrigerated in an airtight container for 3 to 4 days. Stir before serving.<\/li>\r\n<\/ol>“,”foot_note”:”* I use Native Forest Organic Young Jackfruit which comes in a 14-ounce (398 mL) can. Make sure to purchase canned jackfruit that says \u201cin brine\u201d as opposed to \u201cin syrup\u201d (or simply ensure that it\u2019s unsweetened). Some brands (like Cha\u2019s) recommend cooking it before serving to soften the jackfruit. To do this, gently boil it for 15 minutes and then drain and rinse with cold water. Native Forest brand can be used straight from the can without cooking.\r\n\r\n** If you\u2019d like a soy-free version of this salad, be sure to use soy-free vegan mayonnaise (Vegenaise makes a tasty soy-free version). Or you can make my homemade soy-free mayo<\/a>.\r\n\r\nFeel free to add finely chopped dill pickle to the mix, too! I like adding about 1\/4 cup of chopped dill pickle for a tangy crunch.”}

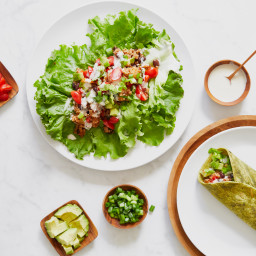
One Pot Quinoa and Black Bean Wraps

{“head_note”:”These quinoa wraps are ready and on the table in less than 30 minutes and will only set you back 10 minutes of prep! This is a great go-to summer dish when you don\u2019t want to turn the oven on, but still want a well-rounded, fun meal. Enticing flavours like sweet pineapple, smoky paprika, savoury coconut aminos, and spicy cayenne pepper come together to create a delectable base for these healthy wraps. The crunch from the lettuce wrap is a nice contrast to the soft and chewy quinoa and beans, but feel free to use flour wraps and simply stuff some lettuce inside instead. Don\u2019t forget about the toppings too\u2014they really complete the dish and enhance the flavours and textures! I love my wraps topped with avocado (duh), runny tahini or cashew cream, cilantro, salsa, and sometimes pickled jalape\u00f1os for a kick.”,”instructions”:”

    \r\n \t

  1. Gather your quinoa ingredients on the counter so you have them ready. To a large pot, add the quinoa and broth. Set the heat to medium and bring to a simmer while you add the rest of the ingredients: drained black beans, red pepper, pineapple, coconut aminos, paprika, cayenne, lime juice, salt and pepper. Stir to combine. <\/span><\/li>\r\n \t
  2. Bring to a low boil over medium-high heat. Reduce heat to medium, cover, and cook<\/span> for 16 to 21 minutes, reducing heat if necessary, until the quinoa is fluffy and the water is mostly absorbed. I recommend checking it after 16 minutes and then every few minutes thereafter.\u00a0Stir the cooked quinoa mixture and season to taste.<\/span><\/li>\r\n \t
  3. If using lettuce for your wraps, place one large leaf on a plate. Add another leaf on top so that its base is pointing the opposite way of the leaf below. Top each lettuce wrap (or flour wrap, if using) with a spoonful of hot quinoa. Add your desired toppings (I like to use every topping listed), a small pinch of salt, and a lime wedge on the side. If the lettuce wraps are too difficult to eat with your hands, you can dig in with a fork and knife. <\/span><\/li>\r\n \t
  4. The quinoa is best served fresh as it tends to dry out in the fridge, but you can store it in an airtight container in the fridge for 1 to 2 days. To reheat the quinoa, add it to a pot along with a splash or two of broth, cover, and warm on the stovetop over medium heat. You\u2019ll likely need to add more seasonings as the flavour diminishes over time. \u00a0<\/span><\/li>\r\n<\/ol>“,”foot_note”:”* You\u2019ll want to dice the red pepper very small (think almond-sized) so it cooks quickly.\r\n\r\n** My frozen pineapple chunks are quite large, so I like to chop them into almond-sized pieces before adding to the pot. This way the pineapple gets spread around a bit more!\r\n\r\n*** You can use salt in place of the coconut aminos if you\u2019d like. I found I needed 1 1\/4 teaspoons pink salt or a bit more to make the flavours pop. Start with half and then add the rest after cooking to taste.\r\n\r\n**** For a kid-friendly option, reduce or omit the cayenne pepper as needed.”}

Zucchini Bread Oatmeal

{“head_note”:”Zucchini bread in oatmeal form…who knew?! This tasty dish comes together in less than 15 minutes\u2014perfect for when you\u2019re craving the warm spiciness of zucchini bread but don\u2019t have time to make a whole loaf. Luxurious canned coconut milk lends this oatmeal a satisfying, decadent creaminess, while the grated zucchini adds a dose of Vitamin C, B Vitamins, and Potassium. Chia seeds help thicken the oatmeal and provide a nice boost of healthy fats! I don\u2019t recommend skipping the suggested toppings below\u2014they give this bowl a nutty, sweet chewiness and that signature zucchini bread flavour. And you may be happy to know that this oatmeal is super versatile (often I don\u2019t even measure when I make it at home!)\u2014you can use rolled or instant oats, grated or finely grated zucchini, and play around with the zucchini-to-oat ratio however you\u2019d like. I encourage you to find your <\/i>perfect bowl! This recipe is inspired by my 2011 version<\/a>.”,”instructions”:”

    \r\n \t

  1. Add all of the oatmeal ingredients except for the vanilla to a medium pot and stir to combine. Bring mixture to a simmer over medium-high heat. Reduce heat to medium. Cook uncovered for 7 to 9 minutes, stirring frequently, until thickened. <\/li>\r\n \t
  2. Remove from heat and stir in the vanilla. Adjust spices and sweetener to taste, if desired.<\/li>\r\n \t
  3. Divide the oatmeal into bowls and top with your desired toppings. Leftovers will keep in an airtight container in the fridge for 3 to 5 days. To reheat, add the leftovers to a small pot along with a splash of coconut milk. Stir and heat over medium until heated through. Alternatively, you can enjoy leftovers cold too! <\/li>\r\n<\/ol>“,”foot_note”:”* You can use instant oats instead of rolled oats, if you prefer. Instant oats have a much less chewy texture and tend to disappear into the mixture, but they work well for babies and toddlers who aren\u2019t able to chew the larger oats.\r\n\r\n** If you use the finest grate hole on the box grater, the zucchini will virtually disappear into the oatmeal, whereas a standard-size grate hole will yield visible strands of zucchini throughout (and amp up the bowl\u2019s chewy texture). You can play around with these two options to see which way you prefer the oatmeal. Once you get used to it, feel free to add even more zucchini to future pots!\r\n\r\nMake it nut-free: Omit the pecan topping.”}

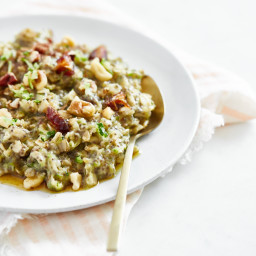
Cauli-power “Alfredo”

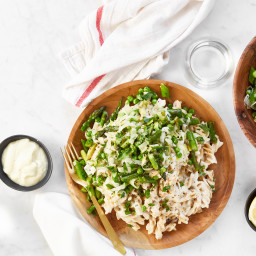
{“head_note”:”This vegan \u201calfredo\u201d sauce tastes decadent, yet is super light and energizing thanks to the sneaky cauliflower base! The nutritional yeast lends this sauce a rich \”cheesy\” flavour, while the blended cauliflower creates a creamy, luxurious base. This alfredo sauce is lovely served with pasta, but you can also enjoy it stirred into your favourite roasted or saut\u00e9ed veggies. I love saut\u00e9ing seasonal vegetables to serve along with the sauce over pasta. In the photo, I topped my bowl with a lovely spring veggie trifecta of leeks, asparagus, and peas.”,”instructions”:”

    \r\n \t

  1. Place cauliflower florets in a steamer basket and steam, covered, for 10 to 15 minutes until fork tender. (Alternatively, you can boil the cauliflower in a pot of water for 8 to 15 minutes until fork tender. Drain well before proceeding.)<\/span><\/li>\r\n \t
  2. Meanwhile, cook the pasta according to the package directions. Drain well and add it back to the pot. Set aside.<\/span><\/li>\r\n \t
  3. Add the oil and minced garlic to a small skillet and saut\u00e9 over low heat for 4 to 5 minutes until softened and fragrant. Be careful not to burn. <\/span><\/li>\r\n \t
  4. Add the cooked cauliflower, saut\u00e9ed garlic, milk, nutritional yeast, lemon juice, onion powder, garlic powder, salt, and pepper to a high-speed blender. Blend until a very smooth sauce forms. Adjust seasonings to taste.<\/span><\/li>\r\n \t
  5. Add the cauliflower sauce to the pot with the pasta and stir well. Heat over low-medium until heated through. The pasta will tone down the flavours of the sauce so it\u2019s important to taste the mixture and add more seasonings (salt, pepper, lemon, etc.) to taste before serving.<\/span><\/li>\r\n \t
  6. For serving: Divide the warm pasta into bowls and top with more salt and pepper (to taste), along with a squeeze of lemon and some fresh minced parsley. Feel free to add your favourite cooked veggies such as broccoli, peas, leeks, asparagus, butternut squash, etc.<\/span><\/li>\r\n<\/ol>“,”foot_note”:”* It\u2019s very important that you use an unsweetened and unflavoured non-dairy milk in this recipe (nothing with vanilla or added sugar, please!).\r\n\r\n** If you\u2019re only preparing a couple servings, feel free to cook less pasta and save leftover sauce for another time. The alfredo sauce will keep in an airtight container in the fridge for at least a few days.\r\n\r\n \r\n\r\nTo make the alfredo taste extra decadent, add a tablespoon or two of vegan butter to the sauce.\r\n\r\nMake it gluten-free: Use gluten-free pasta.\r\n\r\nBoost the protein: Use a legume-based pasta such as chickpea pasta.\r\n\r\nMake it nut-free: Use a nut-free non-dairy milk (such as soy milk) instead of almond milk. Be sure to use unsweetened and unflavoured milk.”}

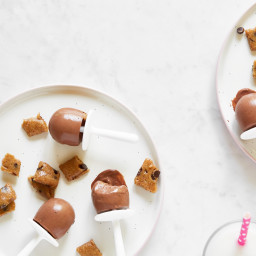
Mini Cookie Dough Fudge Pops

{“head_note”:”These cookie-dough-studded dark chocolate fudge pops are deeply chocolaty, luxuriously creamy, and completely addictive (if you could only have seen how many of these babies I ate this past week!). The velvety texture of these mini pops is just like ice cream, and the chocolate chips from the cookie dough chunks provide a fantastic crunch. Be sure to chill your can of full-fat coconut milk for at least 24 hours before you begin this recipe as you\u2019ll need to scoop out the solid coconut cream.”,”instructions”:”

    \r\n \t

  1. For the cookie dough: In a medium bowl, stir together the almond butter, maple syrup, coconut oil, and vanilla until smooth. Now stir the oat flour, almond flour, baking soda, salt, and chocolate chips into the wet mixture until combined. <\/span><\/li>\r\n \t
  2. Place the dough between two large sheets of parchment paper and <\/span>use a rolling pin to roll the dough into a 1\/4- to 1\/2-inch-thick rectangle. Using the parchment paper to grip, lift the cookie dough onto a large plate. Transfer the plate to the freezer and freeze for 15 to 30 minutes until the slab is solid. <\/span><\/li>\r\n \t
  3. For the fudge pops: <\/span>Break the chocolate bar into chunks and melt in a small pot over low heat.<\/span> Once two-thirds of the chocolate has melted, remove it from the heat and stir until smooth.<\/span><\/li>\r\n \t
  4. Scoop the solid coconut cream from the top of the can (you should have about one cup) and place it in a high-speed blender. Save the coconut water for another use, such as a smoothie.<\/span><\/li>\r\n \t
  5. Add the melted chocolate, maple syrup, cocoa powder, vanilla and salt to the coconut cream. <\/span>Blend on high until smooth. Pour the liquid into a small bowl. <\/span><\/li>\r\n \t
  6. Remove frozen cookie dough slab from freezer. Using a pizza slicer, slice the slab into small square chunks (about 1\/4-inch wide). <\/span><\/li>\r\n \t
  7. Grab a narrow teaspoon and spoon 1\/2 to 1 teaspoon fudge pop liquid into the bottom of each mold. Top with 2 to 3 frozen cookie dough chunks. Spoon more liquid into the molds and add a couple more chunks on top, making sure the liquid fills to just below the top of the mold. Insert the sticks into each respective mold.<\/span><\/li>\r\n \t
  8. Freeze the molds for 2 1\/2 to 3 hours, or until solid. Store leftovers in the freezer (either directly in the popsicle mold or in a freezer-safe zip bag) for up to 2 weeks (any longer and they tend to get icy).<\/span><\/li>\r\n<\/ol>“,”foot_note”:”* I use Enjoy Life\u2019s mini vegan chocolate chips for this recipe. If you\u2019re using regular-sized chips or chocolate chunks, I recommend chopping them finely first.\r\n\r\n** I love 70% dark chocolate in this recipe. If you\u2019re using a sweeter variety (such as 55% cacao), you may need to reduce the maple syrup a bit. Conversely, if you use a darker chocolate (such as 85%), you may want to increase the maple syrup to 1\/4 cup.\r\n\r\n*** You will need about 1 cup of coconut cream to make the fudge pop base.”}

Homemade Mocha “Nutella”

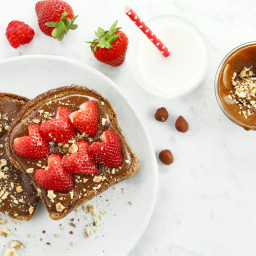
{“head_note”:”Once you taste this homemade chocolate spread, you\u2019ll never go back to the store-bought stuff again! In all honesty, I haven\u2019t tasted the brand-name stuff personally, but my testers tell me this version is\u00a0way tastier than any store-bought or homemade knock-off they\u2019ve tried. I use coconut sugar for an unrefined sweetness and raw cashews for the luxurious creaminess that dairy would normally provide in chocolate spreads. My secret ingredient, espresso powder, takes this recipe to the next level\u2014it adds a hint of sophistication that adults will love, but feel free to leave it out if you don\u2019t have any on hand. Enjoy my Homemade Mocha \u201cNutella\u201d drizzled overtop a bowl of oatmeal, thrown into a smoothie, spread on toast with fresh berries, or inhaled off a spoon (the way I usually like it). Please note that this recipe requires a\u00a0heavy-duty food processor…less powerful processors aren’t\u00a0robust enough to make nut butter.”,”instructions”:”

    \r\n \t

  1. Preheat oven to 300\u00b0F \u00a0(190<\/span>\u00b0C) <\/span>and roast the hazelnuts for 14 to 17 minutes, watching closely, until the skins have darkened and are starting to peel away from the nut.<\/span><\/li>\r\n \t
  2. Meanwhile, add the coconut sugar to a blender and blend until fine and powdery. Breaking the coconut sugar down helps yield a smoother spread. <\/span><\/li>\r\n \t
  3. Grab a large old tea towel. Slowly roll the roasted hazelnuts directly off the pan onto the centre of the towel. Gather the corners of the tea towel to form a \u201cpurse\u201d around the nuts, then rub vigorously for 1 to 2 minutes until the skins fall off. Don\u2019t worry\u2014not all of the skins will come off, but at least half should. Pick out the nuts (leaving the skins behind on the towel) and place them into the bowl of a heavy-duty food processor. <\/span><\/li>\r\n \t
  4. Add the coconut oil and raw cashews to the hazelnuts in the processor bowl. Process for 5 to 10 minutes, until you achieve a nut butter texture, stopping the processor to scrape down the bowl if necessary. <\/span><\/li>\r\n \t
  5. Now add the coconut sugar, vanilla, cocoa powder, espresso powder (if using), and salt to the processor and process for another 5 minutes or so, until the chocolate spread is smooth and runny. The spread should drip right off the spoon!<\/span><\/li>\r\n \t
  6. Serve and enjoy! Leftover spread can be stored in an airtight container in the fridge for several weeks. The spread will thicken when chilled. Simply bring it to room temperature or heat to soften before enjoying.<\/span><\/li>\r\n<\/ol>“,”foot_note”:”If you don\u2019t have a blender to blend the coconut sugar into a powder, you can try using a food processor instead. The processor won\u2019t get the coconut sugar quite as smooth as a blender would, so the final spread will be a bit grainier in texture, but it\u2019s an option in a pinch.\r\n\r\n \r\n\r\nIf you’d like to amp up the chocolaty flavour, feel free to add some non-dairy chocolate into the food processor during the second processing step.”}

Nutty Crusted Butternut Squash Bowl

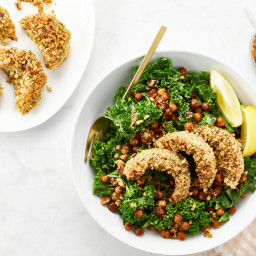
{“head_note”:”This hearty dish is filled with so many amazing crunchy, chewy textures\u2014the crispy roasted chickpeas and nutty butternut coating are a delightful contrast to the soft squash and chewy kale. The flavours are out of this world: there\u2019s sweetness from the squash and pure maple syrup, pops of tangy lemon and savoury garlic, and smokiness from the spiced chickpeas. Because there are a few components, this recipe is perfect for the weekend when you have a bit of extra time on your hands. If you\u2019re like me, you\u2019ll find yourself dreaming about these nutty crusted butternut squash wedges and wanting to put them on just about everything!”,”instructions”:”

    \r\n \t

  1. Position two oven racks near the middle of the oven and preheat oven to 375\u00b0F (190\u00b0C). Line two large baking sheets with parchment paper and set aside. <\/li>\r\n \t
  2. Prepare the nutty crust topping: Add the garlic clove to a food processor and process until minced. Now add the hemp hearts, hazelnuts (no need to remove skins!), cashews, walnuts, nutritional yeast, and salt to the processor and pulse the mixture until coarsely<\/b>\u00a0ground with some larger chunks of nuts (the mixture should be the texture of large-flake sea salt). Be careful not to overprocess the nuts as you want the topping to be crunchy. Spoon all of the mixture into a large shallow bowl.<\/li>\r\n \t
  3. Peel the squash and halve it lengthwise. Use a spoon to remove and discard the seeds inside. Slice each half into thin 3\/4-inch wedges.<\/li>\r\n \t
  4. Now we\u2019re going to coat the wedges in the nutty crust topping, and I\u2019ll warn you in advance that this is a messy, imperfect process…but the result is delicious, so don\u2019t sweat it! To start, in a shallow bowl, whisk the arrowroot powder and oil together until smooth. Use a pastry brush to generously brush the oil mixture onto a single squash wedge until it\u2019s completely coated in oil (or simply dip the wedge into the oil and toss to coat). Immediately transfer the oil-coated wedge to the bowl of nutty crust topping. Using your fingers, heap the mixture onto the top and sides of the wedge until it\u2019s covered completely. Be generous! Press the topping into the wedge so that there\u2019s a thick coating. (And it\u2019s totally normal for some topping to fall off in spots.) If you find your fingers covered in the topping, rinse and dry them as needed.<\/li>\r\n \t
  5. Repeat this process for all of the wedges, placing each one gently on the baking sheet as you go and leaving about 2 inches of space between. If you run out of topping, you can reserve leftover wedges for another use or coat them in oil and roast them alongside the topping-coated wedges as directed.<\/li>\r\n \t
  6. Prepare the 10-Spice Roasted Chickpeas: Place the drained and rinsed chickpeas onto a tea towel and roll the chickpeas around until they\u2019re dry. Spread the chickpeas onto the second baking sheet and toss with the oil. Sprinkle on the 10-Spice Mix and toss the chickpeas again until coated evenly. <\/li>\r\n \t
  7. Place both baking sheets into the oven. Roast the chickpeas for about 30 to 35 minutes until lightly golden and then remove them from the oven. Roast the squash for a total of 40 to 55 minutes (I bake for about 50 minutes), until fork tender and lightly golden. I suggest testing the squash around the 40-minute mark and keeping a close eye on it thereafter.<\/li>\r\n \t
  8. While the chickpeas and squash are roasting, prepare the marinated kale. Rinse the kale leaves and use absorbent tea towels to pat dry. Separate the stems from the kale and discard. Tear the kale into bite-sized pieces and transfer to a very large mixing bowl. In a small bowl, whisk the garlic, olive oil, maple syrup, salt, lemon, and tahini until smooth. Pour the dressing over the kale and \u201cmassage\u201d until fully coated. Feel free to enjoy the marinated kale raw or use a skillet to heat it up. (I like to saut\u00e9 mine if I have time!) Set aside.<\/li>\r\n \t
  9. For serving: Divide the marinated kale into 4 large shallow bowls and top each with\u00a0a few squash wedges along with a large spoonful of roasted chickpeas. Drizzle a tablespoon of tahini onto each bowl and top with a few generous squeezes of lemon juice too. You can serve the bowls with lemon wedges on the side if preferred. Oh, and if there is nutty topping remaining on the baking sheet, feel free to sprinkle it over the bowls so nothing goes to waste.<\/li>\r\n<\/ol>“,”foot_note”:”* I recommend using a butternut squash on the smaller side here because a large squash (2 1\/2 pounds or more) won\u2019t leave enough nutty crust topping to go around.\r\n\r\n** Cornstarch should work as an alternative to arrowroot powder.\r\n\r\n*** For the 10-Spice Mix, use this recipe<\/a> from the blog or on page 284 of The Oh She Glows Cookbook<\/a>. Feel free to omit the white pepper for a slightly less spicy version.\r\n\r\nIf you\u2019re not including the roasted chickpeas, please note that the squash will bake\u00a0more quickly in the oven alone.\r\n\r\nHave leftover roasted squash? It\u2019s great thrown into a wrap the next day!”}

Flourless Bite-Sized Breakfast Muffins

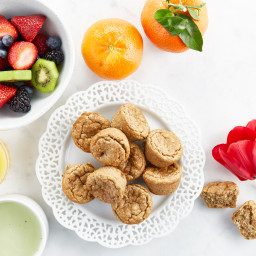
{“head_note”:”These grain-free, kid-friendly muffins are packed with fibre-rich chia seeds and contain only a couple tablespoons of natural sweetener! The almond butter base gives them a deliciously nutty flavour, and overripe bananas lend an extra sweetness. We love serving these mini muffins at breakfast and snack time. Best of all, this recipe is made entirely in a food processor so there\u2019s only one dish to clean when you\u2019re done! I\u2019ve provided optional instructions for preparing larger muffins as well as a nut-free version so be sure to read through the tips.”,”instructions”:”

    \r\n \t

  1. Preheat the oven to 350<\/span>\u00b0<\/span>F (180<\/span>\u00b0<\/span>C) and <\/span>set aside two silicone 12 mini muffin pans or one silicone 24 mini muffin pan. There\u2019s no need to grease silicone pans, but i<\/span>f you\u2019re using metal muffin pans, line them with mini paper liners. This recipe makes enough for more than 24 mini muffins, so line an additional 2 to 3 small ramekins with standard-sized paper liners to use up the remaining batter.<\/span><\/li>\r\n \t
  2. Add the almonds to the food processor and process to a fine crumb. Be sure not to overprocess the almonds into butter. If the ground almonds start getting sticky, they can negatively impact the texture of the muffins once baked.<\/span><\/li>\r\n \t
  3. Add the chopped banana to the ground almonds along with the almond butter, arrowroot starch, chia seeds, maple syrup, baking powder, cinnamon, apple cider vinegar, baking soda, and salt. Process the mixture until smooth.<\/span><\/li>\r\n \t
  4. Use a small cookie dough scoop to portion the batter into the muffin pans, filling each until about three-quarters full. Use the remaining batter to fill the ramekins until about two-thirds full.<\/span><\/li>\r\n \t
  5. Bake the mini muffins for about 18 to 22 minutes (I bake for 20 minutes), allowing an additional 6 to 9 minutes for the ramekins to bake through. To test doneness, gently touch the top of one muffin. When ready, they will spring back very slowly. Finished muffins should also have visibly golden edges.<\/span><\/li>\r\n \t
  6. Cool the muffins in the pans\/ramekins for 30 minutes before attempting to remove. Carefully slide a knife around each muffin and gently pop it out of the silicone pan. (If using paper liners, the muffins must be cooled completely<\/span><\/i> before removing, or the liners will stick to the muffins when peeled.) I love spreading these muffins with a little coconut oil before serving, but they\u2019re also fantastic topped with chia seed jam. And thanks to the nutty taste and natural sweetness, you can enjoy them plain too. Leftovers can be stored in the fridge in an airtight container for 3 to 4 days, or in the freezer for up to 1 month.<\/span><\/li>\r\n<\/ol>“,”foot_note”:”It’s important to stir the almond butter well before measuring. Be sure not to use firm\/hard\/dry almond butter as it’ll result in dense muffins.\r\n\r\n \r\n\r\nTo make a dozen regular-sized muffins, use a 12-cup silicone muffin pan. Fill each mold to two-thirds full and bake for 24 to 26 minutes. If using a metal pan, be sure to line each with paper liners, filling and baking as directed, until they have golden edges and very slowly spring back when touched on the top.\r\n\r\n \r\n\r\nFor a NUT-FREE version: Swap the almonds for 1\/2 cup raw sunflower seeds and the almond butter for 1\/2 cup smooth sunflower seed butter (I use SunButter Organic Sunflower Seed Butter…make sure it only has sunflower seeds on the ingredient list), and increase the cinnamon to 1 teaspoon. The muffins have a distinct sunflower seed flavour, but I find it quite pleasant even though they aren’t as sweet as the almond version. The muffins are also a bit darker, but still need just as much bake time, if not a minute or two longer, and they are more dense.\r\n\r\n \r\n\r\nIf you\u2019d like to make these muffins more decadent, try stirring some chocolate chips into the batter! For a crunch, add a couple handfuls of chopped walnuts or pecans.”}