Category Archives: New app recipes

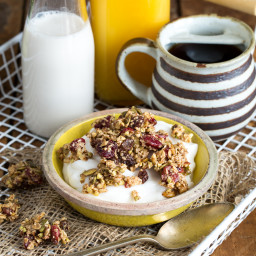
Ultimate Nutty Granola Clusters

{“head_note”:”I drove myself a bit crazy testing this granola recipe. I wanted to create something truly unique, something unlike the loose granola recipes that I had tried. My goal was to create the ultimate nutty, cluster-filled granola. It was a tough job, but someone had to do it! Two tips for creating the clusters: Use almond meal to aid binding, and let the granola cool completely on the pan before you break it apart. I know it\u2019s a lot to ask, but letting it cool allows the sugars to harden, making it less likely that you\u2019ll be left with a crumbly mess at the end. Go ahead and break some off when it comes out of the oven, but leave the rest on the pan for about one hour, and you\u2019ll be rewarded with the perfect bite-size clusters for sprinkling on oatmeal, cereal, parfaits, and smoothies, or enjoying alone as a snack. This is a versatile recipe, so have fun changing up the nuts, seeds, dried fruit, and sweeteners at your every whim. Reprinted by arrangement with Avery Books, a member of Penguin Group (USA) LLC, A Penguin Random House Company. Copyright \u00a9 Glo Bakery Corporation, 2014.”,”instructions”:”

    \r\n\t

  1. Preheat the oven to 275\u00b0F (140\u00b0C). Line a large rimmed baking sheet with parchment paper.<\/li>\r\n\t
  2. Place \u00bd cup (125 mL) of the almonds into a food processor and process for about 10 seconds, until a fine meal forms (similar in texture to sand). Transfer the almond meal to a large bowl.<\/li>\r\n\t
  3. In the food processor, combine the remaining \u00bd cup (125 mL) almonds and all of the walnuts and process for about 5 seconds, until finely chopped. You\u2019ll be left with some larger pieces and some powdery meal, which is what you want. Add the mixture to the bowl with the almond meal.<\/li>\r\n\t
  4. Add the oats, buckwheat groats, dried fruit, pepita seeds, sunflower seeds, coconut, cinnamon, and salt to the large mixing bowl and stir to combine.<\/li>\r\n\t
  5. Add the maple syrup, melted oil, and vanilla to the bowl with the dry ingredients and stir until thoroughly combined.<\/li>\r\n\t
  6. With a spatula, spread the granola into a \u00bd-inch (1-cm) layer on the prepared baking sheet and gently press down to compact it slightly. Bake for 20 minutes, then rotate the pan and bake for 18 to 25 minutes more, or until the granola is lightly golden on the bottom and firm to the touch.<\/li>\r\n\t
  7. Cool the granola on the pan for at least 1 hour before breaking it apart into clusters.<\/li>\r\n\t
  8. Store the granola in a glass jar in the fridge for 2 to 3 weeks or freeze it for 4 to 5 weeks.<\/li>\r\n<\/ol>“,”foot_note”:”Tips: If you\u2019d like to make a completely grain-free granola, simply replace the buckwheat groats and rolled oats with an additional 1 cup finely chopped nuts.”}
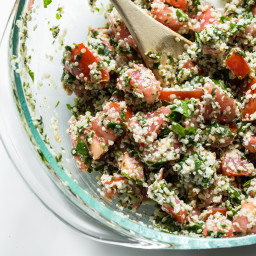
Gena’s Hemp Seed Tabouli

{“head_note”:”Tabouli with a high-protein twist! A tasty raw summer dish that doesn’t require any cooking and comes together in less than 10 minutes. Try serving it with my Endurance Crackers<\/a> and hummus for a fun mezze platter. Recipe from Choosing Raw by Gena Hamshaw. Reprinted with permission from Da Capo Lifelong, \u00a9 2014.<\/em>“,”instructions”:”1. In a food processor fitted with the \u201cS\u201d blade, process the parsley, mint, and sea salt until minced.\r\n2. Transfer the herbs and salt to a large mixing bowl. Add the tomatoes, hemp seeds, hemp oil, and lemon juice. Mix well, and serve.\r\nStored in an airtight container in the fridge, the tabouli will keep for 2 days.”,”foot_note”:””}

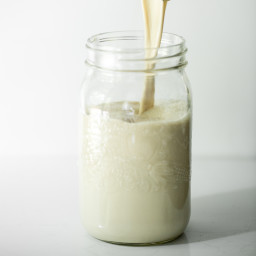
Coffee Shop Worthy Caramel Vanilla Bean Hazelnut Milk

{“head_note”:”Decadent, luxurious, and totally splurge-worthy, this homemade hazelnut milk is fit for a high end coffee shop and it pairs perfectly in a cup of coffee or black tea. I use a mix of soaked hazelnuts and almonds, but feel free to use all hazelnuts if you prefer. It’s lightly flavoured with notes of caramel (from Medjool dates), cinnamon, and a whole vanilla bean and I imagine you could turn it into a chocolate hazelnut milk quite easily by adding a bit of dutch-processed cocoa powder. This recipe is lightly adapted from my Homemade Almond Milk recipe<\/a>.”,”instructions”:”

    \r\n \t

  1. Place hazelnuts and almonds in a bowl and cover with water. It\u2019s preferred to soak them overnight (for 8-12 hours) in the water, but you can get away with soaking for 1-2 hours in a pinch.<\/li>\r\n \t
  2. Rinse and drain the soaked hazelnuts and almonds. Place nuts into a blender along with water, pitted dates, vanilla bean, cinnamon, and salt (if using).<\/li>\r\n \t
  3. Cover and blend on highest speed for 1 minute or so.<\/li>\r\n \t
  4. Place a nut milk bag (here is the bag I love<\/a>) over a large bowl and slowly pour the milk mixture into the bag. Gently squeeze the bottom of the bag to release the milk. This process can take 3-5 minutes, so be patient. You should be left with about 1 cup of pulp in the bag. See my tips below on using the leftover pulp.<\/li>\r\n \t
  5. Rinse out blender and pour the milk back in. Now, pour it easily into a Mason jar and secure with lid. Chill in the fridge. It will stay fresh for 2-3 days. Give the jar a good shake before enjoying. Drink it alone, use it in cereal or smoothies, make hot oatmeal, and one of my favourites – use as a creamer in coffee or black tea.<\/li>\r\n<\/ol>“,”foot_note”:”1) If your dates or vanilla bean are dry\/stiff, soak in water to soften before use. You can also use another sweetener of your choice like maple syrup instead of dates. Same goes for vanilla \u2013 feel free to use vanilla extract for a more subtle vanilla flavour.\r\n\r\n2) Ideas for using leftover pulp: stir into oatmeal or muffin batter, add to smoothies, make crackers, or you can even dehydrate it and then blend it up to make hazelnut meal. You can freeze it for a later use too.\r\n\r\n3) You might be wondering \u2013 If I don\u2019t have a nut milk bag<\/a> can I use a fine mesh sieve?<\/em> Yes you can. I don’t find the milk gets as smooth compared to using a nut milk bag, but if you strain it several times, it comes out decent. Also, feel free to try a cheesecloth (you can even line the sieve with a layer of cheesecloth).”}

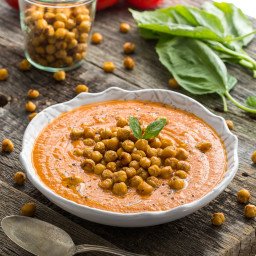
Cream of Tomato Soup with Roasted Italian Chickpea Croutons

{“head_note”:”This is a classic cream-based tomato soup, revamped to be good for you and free of animal products. Blending a small amount of soaked cashews into the soup transforms the tomato base into a luxurious, creamy soup, and the sun-dried tomatoes add depth of flavor to the tomato base. And with the crunchy Italian chickpea \u201ccroutons,\u201d there are no traditional bread croutons required. Be sure to soak the raw cashews in water the night before (or for at least three to four hours) so they are ready when you plan to make the soup.”,”instructions”:”

    \r\n\t

  1. Make the Chickpea Croutons<\/span>: Preheat the oven to 425\u00b0F (220\u00b0C). Line a large rimmed baking sheet with paper towels.<\/li>\r\n\t
  2. Place the chickpeas on the paper towels and place a couple of paper towels on top. Roll them around until any liquid on them has been absorbed. Discard the paper towels.<\/li>\r\n\t
  3. Transfer the chickpeas to a large bowl and stir in the oil, oregano, cayenne, garlic powder, onion powder, and salt.<\/li>\r\n\t
  4. Line the baking sheet with parchment paper and then spread the chickpeas in an even layer on the baking sheet.<\/li>\r\n\t
  5. Bake for 15 minutes. Give the pan a shake from side to side and cook for 15 to 20 minutes more, watching closely, until the chickpeas are lightly charred and golden. Let cool on the baking sheet for at least 5 minutes. The chickpeas will crisp up as they cool.<\/li>\r\n\t
  6. Make the Tomato Soup<\/span>: In a large saucepan, heat the olive oil over medium heat. Add the onion and garlic and saut\u00e9 for 5 to 6 minutes, or until the onion is translucent.<\/li>\r\n\t
  7. In a blender, combine the soaked cashews and the broth and blend on high speed until creamy and smooth. Add the garlic-onion mixture, tomatoes and their juices, sun-dried tomatoes, and tomato paste and blend on high until smooth.<\/li>\r\n\t
  8. Pour the tomato mixture into the saucepan in which you cooked the onions and set the pan over medium-high heat. Bring the mixture to a simmer, then stir in the oregano, salt, pepper, and thyme, all to taste.<\/li>\r\n\t
  9. Gently simmer over medium heat, uncovered, for 20 to 30 minutes, until the flavors have developed.<\/li>\r\n\t
  10. Ladle the soup into bowls and top each with 1\/3 to \u00bd cup of the Chickpea Croutons. Garnish with minced fresh basil leaves, a drizzle of olive oil, and freshly\r\nground black pepper.<\/li>\r\n<\/ol>“,”foot_note”:”1) The chickpeas will lose their crispness in the soup, so be sure to add them just before you sit down to eat\u2014or you can even add the chickpeas as you eat the soup.\r\n2) If you have leftover chickpeas, make sure they\u2019re cool, then pop them into a baggie or container and throw them in the freezer. Freezing the chickpeas seems to retain their crispness better than leaving them at room temperature. To reheat, simply pop the frozen chickpeas into the oven at 425\u00b0F\u00a0 for 5 minutes or so, until thawed. Voil\u00e0\u2014instant roasted chickpeas!”}

Comforting Red Lentil + Chickpea Curry

{“head_note”:”Packed with protein and healthy spices, this vegan curry dish will energize you and keep you full for hours.”,”instructions”:”

    \r\n\t

  1. Rinse lentils in a fine mesh strainer. Add lentils in a medium pot with 2 1\/2-3 cups of water. Bring to a boil and then reduce heat to medium-low. Cover and simmer, for 10 to 15 minutes until just tender, adding more water if necessary. Drain.<\/li>\r\n\t
  2. Add oil, onion, and garlic into a large skillet. Cook over medium heat until the onions are soft and translucent, about 10-15 minutes. Stir in the minced ginger and cook for 1-2 minutes more.<\/li>\r\n\t
  3. Meanwhile, prepare the rice (if using) according to package directions.<\/li>\r\n\t
  4. In a small bowl, mix together the curry paste, curry powder, turmeric, cumin, salt, and sugar.\u00a0 Stir into the skillet mixture. Increase heat to medium-high and cook until fragrant for 1 to 2 minutes, stirring frequently.<\/li>\r\n\t
  5. Finally, stir in the crushed tomatoes (or tomato puree), drained and rinsed chickpeas, and cooked red lentils. Cook until heated through and serve immediately over a hot bed of rice.<\/li>\r\n\t
  6. Leftovers keep for up to 5 days in an air-tight container in the fridge. Can also be frozen.<\/li>\r\n<\/ol>“,”foot_note”:””}

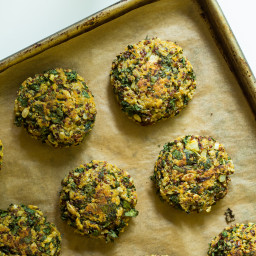
Crispy Quinoa Cakes

{“head_note”:”Crispy quinoa cakes packed with vegetables like kale, sweet potato, sun-dried tomatoes, and more! Enjoy these as part of breakfast, lunch, or dinner. They are great with roasted home fries and avocado toast, on top of a salad, in a wrap, or enjoyed all of their own. It’s important to make sure the vegetables are finely chopped for this recipe. If the pieces are too large, the patties won’t stick together as well. Recipe inspired by Vegetarian Times <\/a>.”,”instructions”:”

    \r\n \t

  1. Preheat oven to 400\u00b0F. Line a large baking sheet with parchment paper.<\/li>\r\n \t
  2. Mix the ground flax and water in a small bowl and set aside for 5 minutes or so to thicken.<\/li>\r\n \t
  3. Combine all ingredients together in a large bowl, including the flax mixture and the 1.5 cups cooked quinoa. Stir well until the mixture comes together. Don’t forget the flour because it helps bind the patties.<\/li>\r\n \t
  4. Shape mixture into 1\/4-cup patties with wet hands. Pack tightly so they hold together better. Place on baking sheet.<\/li>\r\n \t
  5. Bake for 15 minutes, then carefully flip cakes, and bake for another 8-10 minutes until golden and firm.<\/li>\r\n \t
  6. Cool for 5 minutes on the sheet and then enjoy!<\/li>\r\n \t
  7. Store leftovers in a container in the fridge for up to 5-6 days. To reheat, preheat a skillet over medium heat, add a bit of oil, and cook patties for about 3 minutes per side, or until heated through.<\/li>\r\n<\/ol>“,”foot_note”:”Tips: 1) To cook quinoa, rinse 1 cup uncooked quinoa in a fine mesh strainer. Place quinoa in a medium pot and cover with 1 1\/2 cups water. Bring to a low boil, reduce heat to medium-low, and then cover with a tight fitting lid. Simmer covered for 14-17 minutes until most of the water is absorbed and the quinoa is light and fluffy. Remove from heat, fluff with a fork, and then place lid back on to steam for another 4-5 minutes. Note that this makes almost 3 cups of cooked quinoa and you only need 1 1\/2 cups for this recipe, so you will have leftover quinoa (which is never a bad thing if you ask me!).\r\n\r\n2) To make oat flour, add the oats into a high speed blender and blend on the highest speed until a fine flour forms. You can also use store-bought oat flour if desired.”}

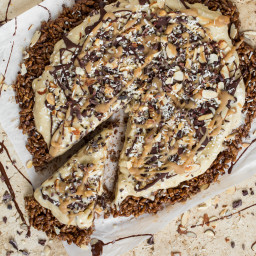
Beat the Heat Frozen Dessert Pizza

{“head_note”:”Growing up, my sister and I often requested a the popular dessert pizzas from Dairy Queen for special occasions. This is my vegan, healthier take on it. I don\u2019t miss the store-bought version one bit! Be sure to freeze the bananas the night before so that they are ready when you make the pizza. This recipe is from The Oh She Glows Cookbook<\/a>.”,”instructions”:”

    \r\n\t

  1. Line a pizza pan with a circle of parchment paper.<\/li>\r\n\t
  2. Make the Crust: In a large bowl, mix the cereal, brown rice syrup, oil, and cocoa powder until all the cereal is coated. Spoon the crust mixture onto the prepared pizza pan and spread it out into a 10-inch (25-cm) circle. Add a piece of parchment paper on top and press down with your hands to compact the mixture and form the shape. Place the pan in the freezer for 5 to 10 minutes, until firm.<\/li>\r\n\t
  3. Gently spread the Banana Soft Serve over the chilled crust, leaving about 1 inch (2.5 cm) around the edge. Return the pan to the freezer for 5 to 10 minutes.<\/li>\r\n\t
  4. For the Toppings: In a small saucepan, melt the chocolate chips and 2 teaspoons (10 mL) of the oil over very low heat. When two-thirds of the chips have melted, remove the pan from the heat and stir until completely smooth.<\/li>\r\n\t
  5. In a small bowl, stir together the almond butter, remaining 1 tablespoon (15 mL) oil, and the maple syrup. Transfer the mixture to a plastic baggie and snip off the corner so you can \u201cpipe\u201d it onto the pizza.<\/li>\r\n\t
  6. Drizzle one-third of the melted chocolate over the pizza and \u201cpipe\u201d on one-third of the almond butter mixture. Immediately sprinkle the pizza with half of the sliced almonds, cocoa nibs, and coconut. Repeat this entire step until you don\u2019t have any toppings left.<\/li>\r\n\t
  7. Return the pizza to the freezer for 5 to 10 minutes more, then slice and serve immediately. This pizza is best enjoyed frozen, straight from the freezer, and will melt\r\nquickly.<\/li>\r\n<\/ol>“,”foot_note”:”Tips:Instead of the Banana Soft Serve, you can substitute 2 cups (500 mL) of your favorite non-dairy ice cream. Feel free to get creative and use any toppings you desire. The sky is the limit!\r\nFor a soy-free option, use soy-free non-dairy chocolate (such as Enjoy Life brand).\r\n\r\nRecipe reprinted by arrangement with AVERY, a member of Penguin Group (USA) LLC, A Penguin Random House Company. Copyright \u00a9 GLO BAKERY CORPORATION, 2014.”}

Creamy Cherry Pie Fruit Dip with Rainbow Fruit Kabobs

{“head_note”:”The creamiest non-dairy fruit dip ever! Soaked raw cashews form the base of this creamy, lightly sweet dip. Drizzle it on fresh fruit, oatmeal, fruit crumbles, pancakes, waffles, and more.”,”instructions”:”

    \r\n \t

  1. Place the cashews in a bowl and cover with an inch of water. Soak overnight or for at least 8 hours. If using a Vitamix you can get away with soaking for only 2-3 hours. Drain and rinse the cashews thoroughly.<\/li>\r\n \t
  2. Add the almond milk into the blender followed by the drained and rinsed cashews, pitted cherries, vanilla, and sweetener. Blend on low and increase the speed gradually until blending at full speed. Keep blending until the mixture is velvety smooth and doesn\u2019t have any texture to it. You can add a splash more milk if you need to help the blender along.<\/li>\r\n \t
  3. Chill the fruit dip for a few hours (or overnight) for the best flavour, but you can also enjoy it right away if desired.<\/li>\r\n \t
  4. Prepare the fruit kabobs (if making) or simply drizzle the fruit dip over a bowl of fruit.<\/li>\r\n \t
  5. The fruit dip will keep in a sealed container in the fridge for about 1-1.5 weeks, possibly longer.<\/li>\r\n<\/ol>“,”foot_note”:”Tip: For a nut-free fruit dip option, try making coconut whipped cream<\/a> instead. You can mix a bit of chia seed jam into it for a similar fruity effect.”}

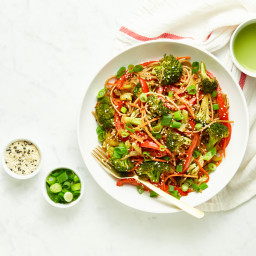
Speedy Teriyaki Veggie Noodle Bowl

{“head_note”:”A veggie-packed, light-on-the-noodles<\/em> noodle bowl that’s paired with a quick and easy homemade Teriyaki sauce. Go ahead and customize this noodle bowl with whatever veggies you have on hand to use up. To add protein to this recipe, try adding edamame or pan-fried tofu.”,”instructions”:”

    \r\n \t

  1. Bring a medium pot of water to a boil. Add the noodles and reduce heat to medium-high. Cook the noodles as instructed on the package directions. Drain and rinse with cold water.<\/span><\/li>\r\n \t
  2. Prepare the sauce<\/span>: In a medium bowl, whisk together the sauce ingredients until combined. Set aside.<\/span><\/li>\r\n \t
  3. For the noodle bowl<\/span>: Preheat an extra-large skillet or wok over medium-high heat. Add the oil and coat the pan. Add the broccoli florets, celery, and red pepper, and saute for about 7-10 minutes, until almost tender. Stir frequently, and reduce heat if necessary.<\/span><\/li>\r\n \t
  4. Add the carrots and edamame (if using) to the skillet and saute another couple minutes.<\/span><\/li>\r\n \t
  5. Stir the drained noodles into the stir-fry mixture along with all of the Teriyaki sauce. Cook for a couple minutes until the sauce thickens slightly and the carrots soften a bit.<\/span><\/li>\r\n \t
  6. Serve immediately with a garnish of sliced green onion, and sesame seeds.<\/span><\/li>\r\n \t
  7. Store leftovers in a container in the fridge for 1- 2 days. To re-heat leftovers, add them into a skillet with a bit of oil. Heat over medium until heated throughout, season to taste, and serve.<\/span><\/li>\r\n<\/ol>“,”foot_note”:”
      \r\n \t

    • I use spelt buckwheat noodles as I love the flavour. They contain gluten, however. For a gluten-free option, use gluten-free soba noodles that contain 100%\u00a0buckwheat (or a mix of buckwheat and rice). Be sure to check the label as many buckwheat noodles contain wheat.<\/li>\r\n<\/ul>“}

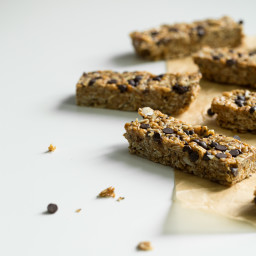
No-Bake Almond Joy Granola Bars

{“head_note”:”Easy no-bake granola bars inspired by the popular Almond Joy Chocolate bar flavour. Roasted almond butter, mini chocolate chips, and coconut unite to create one tasty bar that’s whipped up in 10 minutes (no oven required!).”,”instructions”:”

    \r\n \t

  1. Line an 8-inch or 9-inch square pan with two pieces of parchment paper, one going each way so it’s easy to lift out.<\/li>\r\n \t
  2. In a large bowl, stir together the oats, rice crisp cereal, sliced almonds, coconut, and chia seeds.<\/li>\r\n \t
  3. In a medium pot over low heat, melt the coconut oil. Remove from heat and stir in the almond butter, coconut nectar, and vanilla, until smooth.<\/li>\r\n \t
  4. Pour wet mixture over dry and stir well until thoroughly combined. Add a pinch of salt to taste and stir again.<\/li>\r\n \t
  5. Spoon mixture into the pan and roughly spread out (but don’t pack down yet). Sprinkle on the chocolate chips in an even layer. Wet hands lightly and then press down the mixture until even. Use a pastry roller to roll it out and pack it in even more.<\/li>\r\n \t
  6. Transfer pan to the freezer for about 10 minutes until firm. Slice into bars, wrap, and store in the fridge or freezer. These bars fall apart easily so I don’t recommend leaving them at room temperature for longer than a few minutes.<\/li>\r\n<\/ol>“,”foot_note”:”I do not recommend swapping the coconut nectar or brown rice syrup for any other liquid sweetener. Other sweeteners won’t be sticky enough to bind the bars.”}