Category Archives: New app recipes

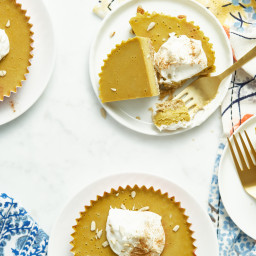
Pumpkin Pie Tarts with a Cookie Crust

{“head_note”:”This is a luxurious and creamy nut-free version of my favourite Raw Pumpkin Pie from The Oh She Glows Cookbook <\/i>(page 247\u2013248). After many trials, I ended up using a combination of sunflower seed butter and full-fat coconut cream to replace the cashews in the original recipe, and it worked out so well! The pie has a light coconut flavour, but it’s balanced out nicely by the earthy sunflower seed butter. As a bonus, this filling doesn\u2019t use any whole nuts or whole seeds so you don\u2019t need a Vitamix (or other high powdered blender) to get the filling super smooth. I used 4 tart-sized (about 4-inches diameter) \”freestanding\” baking cups which I found at Target, but you can also use a standard muffin tin lined with paper liners (or simply greased well) to make mini tarts. I’d imagine a 7- to 9-inch springform cake pan would work well too. The dough is a bit difficult to shape into a traditional pie crust (with high sides) so that’s why I went with a flat crust for this recipe. If you don’t mind fiddly things, then by all means take a stab at the regular pie crust. Also, the paper liners are easily removed if you remove them while the pies are frozen.”,”instructions”:”

    \r\n \t

  1. Preheat oven to 350\u00b0F (180\u00b0C). Grab 4(4-inch diameter) baking paper cups, or 12 standard muffin paper liners and set aside. You can also use a 7- to 9-inch springform cake pan greased and lined with a circle of parchment paper. <\/li>\r\n \t
  2. Add the sunflower seeds into a skillet and toast the seeds over medium heat for 5 to 8 minutes, until lightly golden and fragrant. Remove from heat. <\/li>\r\n \t
  3. For the crust: Add the toasted sunflower seeds, oats, and salt into a food processor and process until finely chopped, resembling a coarse flour. Now, add the melted oil, maple syrup, and sunflower seed butter, and process until the mixture comes together into a heavy dough. The dough should stick together very easily when pressed between your fingers. If it’s still a tad too dry, add the optional water and process again until it comes together. I find that I always need 2 teaspoons of water, but it’ll depend on your ingredients\u2019 moisture content. <\/li>\r\n \t
  4. Divide the dough equally between the liners, crumbling it all over each base. (Note: I reserved about 1\/2 cup of the dough for sprinkling on the pies when serving.) Lightly wet your fingers. Starting at the centre, press the dough into the base to form a crust. If the dough starts to stick to your hands at any time, lightly wet your hands and shake off the excess water. Once the crust is all pressed in, poke the base with a fork about 2 to 3 times to allow the air to escape while baking. I place the 4 liners onto a baking sheet so it’s easy to remove them from the oven. <\/li>\r\n \t
  5. Bake the crusts for around 10 to 12 minutes until lightly golden around the edges. Place baking sheet on a cooling rack and cool the crusts for at least 15 to 20 minutes, or longer if you have the time. <\/li>\r\n \t
  6. For the filling: Open the chilled can of coconut milk. Scoop off 1\/2 cup of the white coconut cream only (not the water) and place it into a blender. (You can save the remaining contents of the can for a smoothie or other use.) Add the pumpkin pur\u00e9e, maple syrup, melted oil, sunflower seed butter, vanilla, pumpkin pie spice (to taste; I use 2 teaspoons), and salt. Blend, starting at a low speed and increasing the speed, until smooth. <\/li>\r\n \t
  7. Divide the filling equally among the cooled crusts. Carefully, transfer the baking sheet (or muffin tin, if making 12 mini tarts) into the freezer on a flat surface. Chill until firm, about 3 to 5 hours. There’s no need to cover it. <\/li>\r\n \t
  8. After the tarts are solid, carefully remove the paper liners. Here you can transfer the pies to the fridge for a mousse-like texture, but I prefer the texture when frozen after sitting on the counter for 5 to 10 minutes before serving.<\/li>\r\n \t
  9. Serve with coconut whipped cream on top, if desired. This pie filling softens a great deal at room temperature, so it’s best not to leave leftovers on the counter. Return them to the fridge or freezer for best results.<\/li>\r\n<\/ol>“,”foot_note”:”

DIY Burrito Bowl

{“head_note”:”This burrito bowl is so filling and healthy! The Spicy Black Beans are adapted from one of my favourite cookbooks, Super Fresh: Super Natural, Super Vibrant Vegan Recipes<\/i> by Jennifer Houston and Ruth Tal. The spicy black beans are to die for. (Or, to live for!) I love to use the beans in a wrap, sprinkled on a salad, or even as a dip with tortilla chips and guacamole. The Avocado-Lime Sauce is also a must-make. It yields about a heaping half cup so if you are a big avocado lover you can always double the recipe. To change up this recipe, stuff everything into a large soft tortilla wrap rather than enjoying it bowl style.”,”instructions”:”

    \r\n \t

  1. For the rice: Add the rice and 1 tablespoon of oil or butter into a medium pot along with 2 cups of water. Increase heat to medium-high and bring to a simmer. Immediately reduce the heat to low-medium, and cover with a lid. Cook the rice until it\u2019s tender and the water is absorbed. For white long-grain rice this will take 13 to 20 minutes, but please follow the directions on your specific package for best results. <\/span><\/li>\r\n \t
  2. Meanwhile, prepare the Spicy Black Beans: In a large wok or skillet, add the oil and melt it over medium heat. Stir in the onion and garlic, along with a pinch of salt, and saut\u00e9 for about 5 to 6 minutes, until softened. <\/span><\/li>\r\n \t
  3. Stir in the chopped tomatoes, chili powder, garlic powder, dried oregano, cayenne (if using), and 1\/2 teaspoon of salt. Continue saut\u00e9ing for another 3 to 5 minutes (increasing\/reducing heat if necessary), until the tomato softens. <\/span><\/li>\r\n \t
  4. Now stir in the tomato paste and drained and rinsed black beans. Cook for a few more minutes until heated throughout. Taste and add more salt if desired. Stir in the cilantro. You can leave the mixture over low heat until ready to serve or simply turn off the heat and reheat before serving. <\/span><\/li>\r\n \t
  5. For the Avocado-Lime Sauce: Mince the garlic clove in a mini food processor (or use a regular size processor, if necessary). Now add the avocado flesh, lime juice, water, and salt. Process until smooth. Taste and adjust lime juice if desired. I usually add another teaspoon.<\/span><\/li>\r\n \t
  6. When the rice is ready, reheat the bean mixture, if necessary. Divide the rice between 2 to 3 bowls. Top each with a couple scoops of the hot black bean mixture, and a large spoonful of both the salsa and the Avocado-Lime Sauce. Garnish with sliced green onion and optional sliced grape tomatoes. Serve immediately.<\/li>\r\n<\/ol>“,”foot_note”:”
      \r\n \t

    • * Why the use of refined coconut oil? Unlike virgin coconut oil, refined coconut oil doesn’t have a noticeable coconut flavour. I use it whenever I don’t want a coconut flavour to come through. That being said, if you don’t mind a bit of coconut flavour feel free to use the virgin kind.<\/li>\r\n<\/ul>“}

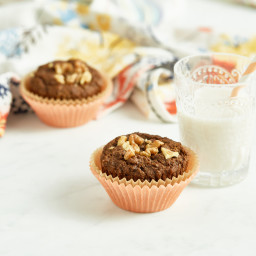
Pumpkin Gingerbread Muffins

{“head_note”:”Despite using whole-grain spelt flour, pumpkin pur\u00e9e, and molasses, these muffins rise beautifully and they are so light and fluffy! I think you\u2019re going to love them. They are perfectly spiced (not too strong and not too light) and great for fall and winter baking. You won\u2019t believe how incredible these muffins will make your house smell, too. Throw a batch in the oven before company comes over and your entire place will smell like a gingerbread house! This recipe is adapted from a reader-favourite recipe: my Pumpkin Gingerbread Loaf<\/a> with Spiced Buttercream.”,”instructions”:”

    \r\n \t

  1. Preheat the oven to 350\u00b0F (180\u00b0C). Line a muffin pan with large paper liners. My favourite brand of liners is \u201cIf You Care\u201d brand as they never stick!<\/li>\r\n \t
  2. In a medium bowl, whisk together the chia seeds and water. Set aside for a few minutes to thicken.<\/li>\r\n \t
  3. In a large bowl, whisk together the dry ingredients (spelt flour, pumpkin pie spice, baking soda, baking powder, and salt).<\/li>\r\n \t
  4. In the same bowl as the chia mixture, whisk together the wet ingredients (chia mixture, pumpkin pur\u00e9e, oil, maple syrup, brown sugar, and molasses) until smooth.<\/li>\r\n \t
  5. Add the wet mixture to the dry ingredients and stir until just combined. No patches of flour should remain. Be sure not to overmix the batter as spelt is a delicate flour. The batter will be quite thick.<\/li>\r\n \t
  6. If using, stir in the chopped walnuts. You can also reserve some for garnish on top, like in the photos.<\/li>\r\n \t
  7. Divide the batter equally between the 12 muffin liners. They should be about 3\/4 full or a bit more. Add any reserved walnuts on top and gently push down (optional).<\/li>\r\n \t
  8. Bake the muffins for 20 to 24 minutes until a toothpick comes out clean.<\/li>\r\n \t
  9. Cool the muffins in the pan for 5 to 10 minutes, and then transfer each muffin onto a cooling rack until completely cool. Serve with homemade almond milk.<\/li>\r\n<\/ol>“,”foot_note”:”
      \r\n \t

    • * If your pumpkin pur\u00e9e is a bit grainy, try throwing it into a food processor and processing it until smooth before making this recipe. Or you can beat it with electric beaters. This will simply prevent clumps in the dough.<\/li>\r\n \t
    • ** If using melted coconut oil, make sure that the rest of the wet ingredients are all at room temperature (do not use refrigerated pumpkin, maple syrup, etc. as they will harden the coconut oil).<\/li>\r\n \t
    • *** I haven’t tried these muffins with any other flour, but I expect that regular all-purpose flour will work (like in the loaf recipe).<\/li>\r\n \t
    • Make it nut-free: Simply omit the walnuts.<\/li>\r\n<\/ul>“}

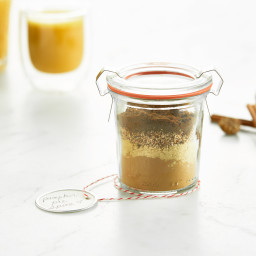
Pumpkin Pie Spice

{“head_note”:”Use this pumpkin pie spice mix in cakes, cookies, bars, oatmeal, smoothies, lattes, chia seed pudding, and more! I like to keep a large batch of it on hand and I find myself using it in just about everything. This recipe is reprinted with permission from DIY Vegan. Copyright \u00a9 2015 Nicole Axworthy and Lisa Pitman. Published by St. Martin’s Griffin.”,”instructions”:”

    \r\n \t

  1. Combine all the ingredients in an airtight container or jar. Attach lid and shake to combine. Store at room temperature for up to 6 months. Shake jar before each use.<\/li>\r\n<\/ol>“,”foot_note”:””}

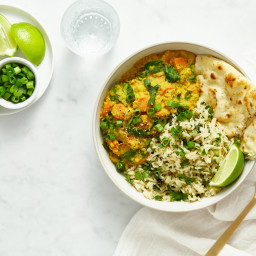
Golden Red Lentil Dal with Cilantro-Speckled Basmati

{“head_note”:”This easy, flavourful curry is a great one to whip up during the workweek, and leftovers only get better the next day. Light coconut milk makes this curry so luxuriously rich and decadent tasting, while still feeling quite light and energizing. It definitely won\u2019t weigh you down, but I can promise it\u2019ll warm and comfort you on a chilly day. While it\u2019s lovely all on its own (enjoyed like a rich, thick stew), I love it even more spooned over top my cilantro-speckled basmati rice with toasted pepita seeds, sliced green onion, cilantro, and a squeeze of lime juice. The amount of broth called for yields a very thick consistency; if you\u2019d like it thinner and more \u201csoup-like\u201d feel free to thin it out with a bit more broth (if so, you might need to also increase the spices and seasonings as the extra broth will dilute the flavours).”,”instructions”:”

    \r\n \t

  1. For the curry: Add the oil in a large pot and increase heat to medium. Add the onion, garlic, and a pinch of salt. Stir to combine. Saut\u00e9e over medium heat for 4 to 5 minutes, stirring occasionally, until softened. <\/span><\/li>\r\n \t
  2. Stir in the ginger and carrots, and continue saut\u00e9ing for another few minutes over medium heat. <\/span><\/li>\r\n \t
  3. Add the curry powder, cumin, and turmeric. Stir well. Cook for a minute, until fragrant. <\/span><\/li>\r\n \t
  4. Pick over and rinse the lentils in a fine mesh sieve. Stir in the entire can of coconut milk, red lentils, broth, and salt. Bring to a simmer and reduce heat to medium-low. Cook, covered with the lid ajar, for about 15 to 20 minutes, or until the lentils and carrots are tender. Stir occasionally to prevent the lentils from sticking to the bottom. Stir in a touch more broth if you’d like a slightly thinner consistency. After cooking, stir in all of the spinach until wilted. Stir in the black pepper, cayenne (if using), and sugar (if using). Taste and adjust salt, if desired. <\/span><\/li>\r\n \t
  5. Meanwhile, prepare the rice. Add the rice into a medium pot along with the oil and broth. Increase heat to medium-high and bring to a simmer. Reduce heat to medium, cover with a lid, and cook for 12 to 16 minutes, until the rice is soft and tender. Fluff with a fork and stir in the cilantro. Season to taste with salt and lime juice. Keep the lid on until ready to serve.<\/span><\/li>\r\n \t
  6. Add a generous scoop of rice on a plate or bowl and top with a couple ladlefuls of curry. Add your desired toppings and serve immediately. Leftovers will keep in an air-tight container in the fridge for up to 4 to 6 days. The curry can also be frozen for up to 4 weeks, possibly longer. For easy freezer storage, add the cooled curry into a freezer-safe bag, press out the air, and freeze on a flat surface. Thaw overnight in the fridge, or simply leave on the counter until mostly thawed.<\/li>\r\n<\/ol>“,”foot_note”:”
      \r\n \t

    • * The smaller you dice the carrots, the faster they cook! I opt for thinly sliced carrots here to hasten cook time.<\/li>\r\n \t
    • ** Be sure to use a good-quality curry powder (one you enjoy the taste of) as a poor-tasting one can throw the flavours off. I am quite fond of Simply Organic curry powder.<\/li>\r\n \t
    • *** Not a cilantro fan? Simply leave it out and prepare the rice without it. No biggie!<\/li>\r\n<\/ul>“}

Luxurious Sunflower Seed Butter

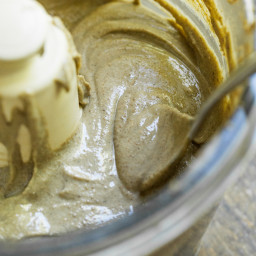
{“head_note”:”Plain sunflower seed butter can taste quite bitter so I\u2019ve improved its flavour by adding a touch of coconut sugar, cinnamon, and some virgin coconut oil to thin the consistency just a bit. The result is a sunflower seed butter you\u2019ll want to add to everything, and eat by the spoonful. Even though it\u2019s not the ever popular<\/em> almond or peanut butter, you won\u2019t feel like you\u2019re missing out when you make this nut-free spread.”,”instructions”:”

    \r\n \t

  1. Preheat oven to 325F. Line a large baking sheet with parchment paper and spread on the seeds in an even layer. Roast for 9-12 minutes, until some of the seeds are lightly golden. Cool the seeds for a few minutes before using.<\/li>\r\n \t
  2. Meanwhile, add the sugar into a high speed blender and grind until a powder forms. Leave the lid on and set aside so the \u201cdust\u201d can settle.<\/li>\r\n \t
  3. Spoon the toasted seeds into a heavy-duty food processor. (I like to spoon the seeds into my measuring cup and transfer them that way. When I have about 1\/2 cup of seeds left on the pan I will use the parchment paper to \u201cfunnel\u201d the remaining seeds into the processor.)<\/li>\r\n \t
  4. Process the seeds for a few minutes, stopping to scrape the bowl every minute. It will look dry and powdery at this stage. (If you have a chute, you can leave it open to allow steam to escape.)<\/li>\r\n \t
  5. Add the coconut oil and process for another couple minutes. The butter will clump together into a large ball and it’ll start rattling around for a bit. Then, the ball will eventually break down into butter again. Stop to scrape down the bowl as needed.<\/li>\r\n \t
  6. Now, add in the ground sugar, salt, and cinnamon. Process for another few minutes until smooth. Now, slowly stream in the vanilla while processing. Add in the vanilla bean seeds, if using. You can add a touch more oil if you need to thin out the butter (but do not add water or liquid sweetener because it will seize). I like to let the machine run at least another 2 minutes to get the sunflower seed butter super smooth. I process for a total of about 8 minutes, but timing will vary based on your food processor and preference. Some machines may need to run for upwards of 15 minutes to get the seed butter smooth enough.<\/li>\r\n \t
  7. Transfer the sunflower seed butter into an air-tight container. Chill in the fridge. Here it’ll keep for about 2 months and it will remain \u201cspreadable\u201d even when chilled.<\/li>\r\n<\/ol>“,”foot_note”:”Tips: 1) Do not skip toasting the seeds; it\u2019s necessary for the seeds to break down in the processor. 2) The sweetener is added because sunflower seed butter is bitter; feel free to adjust the sweetener to your own taste. 3) If for some reason your seeds aren\u2019t breaking down after the specified times, add a touch more coconut oil, a teaspoon at a time. Some machines just might need to run a bit longer though, so be patient!”}

The Blender Girl’s Mystical Mango Smoothie

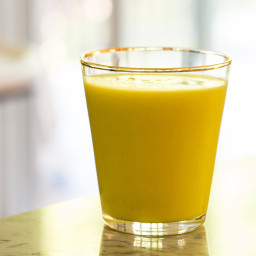
{“head_note”:”I fell in love with this smoothie’s thick and creamy texture and\u00a0sweet, tangy flavor. It makes the perfect breakfast drink to pair with a bowl of overnight oats, tofu scramble,\u00a0or chia pudding. This recipe is lightly adapted from Tess Master’s The Blender Girl Smoothies (2015) published by Ten Speed Press.\r\n\r\nTess writes, \”With a creamy texture and exquisite flavor, this immunity blend is a fabulous for collagen formation and glowing skin, hair, and nails. Mango’s enzymes and vitamins A, C, and E cleanse the liver and aid digestion, and its potassium and fibre help regulate blood pressure and cholesterol. This one will make your heart happy.\””,”instructions”:”

    \r\n \t

  1. Add all of the ingredients into a high speed blender and blend on high for 30-60 seconds, until smooth and creamy. If using the Vitamix, you can use the tamper stick to get things moving. If the mixture seems too thick you can thin it with a bit more water.<\/li>\r\n<\/ol>“,”foot_note”:”Note: Tess says you can boost this smoothie with 1\/2 teaspoon wheatgrass powder, 1 teaspoon chia seeds, and 1 teaspoon of flaxseed oil.”}

Sunflower Seed Butter Energy Bites (nut-free)

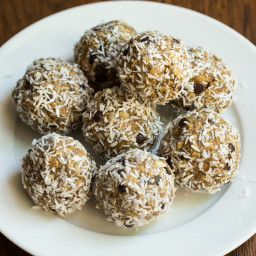
{“head_note”:”Nut-free energy bites that come together fast! I used sunflower seed butter and sunflower seeds to make these nut-free, but feel free to swap in almond or peanut butter (and chopped almonds or peanuts) to change up the flavour. Keep in mind that the consistency of your seed or nut butter will impact how wet or dry the dough is. I don’t recommend using a dry seed or nut butter (you know the dried up bits in the bottom of the jar? not ideal for this recipe!). If your seed or nut butter is super oily and runny, you might have to cut back on the oil or eliminate it all together. Lastly, I like to roll these in shredded unsweetened coconut because the dough is a bit sticky and it adheres well. Although I will admit, the coconut does make for a messier eating experience, so you can always skip that if you prefer. Or roll it in ground toasted nuts…yum!”,”instructions”:”

    \r\n\t

  1. Add oats into a food processor and process for only about 4-5 seconds, until coarsely chopped. You should have a mix of big pieces of oats and some powdery oat flour.<\/li>\r\n\t
  2. In a medium bowl, stir together the sunflower butter, maple syrup, 1 1\/2 tablespoons coconut oil, vanilla, salt, and cinnamon until combined. The batter will be quite sticky at this point.<\/li>\r\n\t
  3. Stir in the oats until combined. Now stir in the cereal, sunflower seeds, chocolate, and chia seeds until everything is thoroughly coated in the wet mixture. If your mixture is too dry, you can add water, a teaspoon at a time, and mix again. If it\u2019s too sticky you can add more oats, a tablespoon at a time, and mix again.<\/li>\r\n\t
  4. Shape the dough into 8-10 large balls by rolling it between your hands. Place on a large plate.<\/li>\r\n\t
  5. Add coconut into a bowl. Roll each bite into the coconut until it’s completely covered. Repeat for the rest. (If the coconut isn’t sticking to your bites, add a small amount of water on your hands and pat the energy bite all over. Now try rolling it again – the water will help it stick.)<\/li>\r\n\t
  6. Store the energy bites in the fridge. They will harden up a bit when chilled (thanks to the coconut oil), but they will soften again at room temperature.<\/li>\r\n<\/ol>“,”foot_note”:””}

Coconut-Cardamom Vegan Overnight Oat Parfait with Blueberry Chia Seed Jam

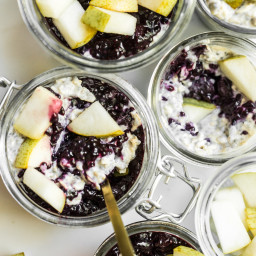
{“head_note”:”Overnight oats are getting fancy up in here! Coconut milk, oats, and chia seeds are mixed with ground cardamom, cinnamon, and maple syrup, and then layered with blueberry chia seed jam and sliced pear. You\u2019ll want to eat this for breakfast, lunch, snacks, and dinner! Chia seeds don\u2019t lie. Also, can I just say how awesome a layer of vegan ice cream or banana soft serve would be in this?”,”instructions”:”

    \r\n \t

  1. Prepare the chia seed jam<\/span>: In a medium pot, stir together the blueberries and maple syrup until combined. Add a dash of salt. Simmer over medium-high heat, uncovered, for about 8-10 minutes until softened (the berries will release a lot of water during this time).<\/li>\r\n \t
  2. Add the chia seeds and stir until combined. Continue simmering and stirring frequently (reducing heat if necessary to avoid sticking) about 8-15 minutes longer, until most of the water cooks off and the jam reduces in volume. it will look thickened.<\/li>\r\n \t
  3. Remove from heat and stir in the\u00a0 lemon juice. Transfer the mixture to a bowl, uncovered, and into the fridge until cool, for at least a couple hours. For a quicker cooling method, pop the jam in the freezer, uncovered, for 45-60 minutes, stirring every 15 minutes, until cool.<\/li>\r\n \t
  4. For the vegan overnight oats<\/span>: In a medium container (with a lid) or in a medium bowl, stir together the entire can of coconut milk, oats, chia seeds, maple syrup, cardamom, and cinnamon until combined. Cover and chill for 1-2 hours, or overnight, until the oats soften and the mixture thickens. Stir to combine before using.<\/li>\r\n \t
  5. Layer the chia jam, overnight oats, and diced pear into small jars. Secure lids (or cover with wrap) and store leftovers in the fridge for up to 3-4 days. The chia seed jam will keep in an air-tight container in the fridge for up to 2 weeks. Also, leftover jam can be frozen in plastic baggies and it thaws beautifully.<\/li>\r\n<\/ol>“,”foot_note”:””}

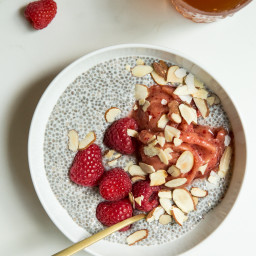
Basic Chia Seed Pudding

{“head_note”:”Thrown together in just a couple minutes! Be sure to make this in advance (I like making it before bed) so it has time to thicken up. The thickness of the chia pudding will vary based on the kind of almond milk you use, so don\u2019t worry if it looks a bit thick or thin when you first try it out. If your pudding is too thin you can add more chia seeds and let it sit for 30 minutes more; if it\u2019s too thick, try adding a touch more almond milk.”,”instructions”:”

    \r\n \t

  1. Whisk the almond milk, chia seeds, and sweetener together in a large bowl. (For a thin and runny chia pudding, use 1\/2 cup chia seeds. For a thick chia pudding, use 3\/4 cup chia seeds.) Let sit for 5-10 minutes and then whisk again (this just helps prevent clumping).<\/li>\r\n \t
  2. Cover and chill in the fridge for 3 hours, or overnight. It helps to stir the mixture every so often during this time, but don’t worry if you can’t.<\/li>\r\n \t
  3. Stir well before serving. If it’s too runny, whisk in more chia seeds and let it sit again until thickened. If it’s too thick, thin it with a touch of milk.<\/li>\r\n \t
  4. Portion into bowl(s) and add your desired toppings. Leftovers will keep in an airtight container in the fridge for 3 to 5 days.<\/li>\r\n<\/ol>“,”foot_note”:””}