Author Archives: Angela Liddon

Sleepy Morning Blender Matcha

{“head_note”:”You know when you wake up on a chilly morning and need a hot drink now<\/i>? Well this is my go-to on fall and winter mornings (or afternoons!) when I want a change from coffee. The thought of this smooth, warm, creamy drink seriously lures me out of my cozy bed. I love how effortless this recipe is, especially on those half-awake, barely functioning mornings (just make sure you\u2019re alert enough to operate a blender with hot liquid!). I love matcha green tea powder because it delivers calming, jitter-free energy as well as powerful antioxidants. Be sure to see my Deluxe Version in the Tips section below for a more decadent way to make this beverage\u2014when I want an especially comforting treat, I\u2019ll forgo the water and only use canned coconut milk.”,”instructions”:”

    \r\n \t

  1. Add the water to a kettle or pot and bring to a boil.<\/span><\/li>\r\n \t
  2. While the water heats up, add the coconut milk and matcha powder to a high-speed blender. <\/span><\/li>\r\n \t
  3. Once the water has boiled, remove it from the heat and let sit for 15 seconds. Carefully add it to the blender along with the maple syrup (if using).<\/span><\/li>\r\n \t
  4. If your blender\u2019s lid is vented, secure it on top. If you don\u2019t have a vented lid, keep the lid slightly ajar so air can escape. Blend on the lowest speed, very slowly increasing to medium, for about 20 seconds until frothy and combined. <\/span><\/li>\r\n \t
  5. Immediately pour into a mug and enjoy your cozy cup o\u2019 green!<\/span><\/li>\r\n<\/ol>“,”foot_note”:”* If using already<\/i> chilled<\/i>\u00a0canned coconut milk, add an extra 1\/3 cup (80 mL) hot water to ensure your blend is hot enough (nobody wants lukewarm tea, if you know what I mean!). Be sure to stir the coconut milk before measuring.\r\n\r\n \r\n\r\n** My preferred brand of matcha powder is DoMatcha Organic Summer Harvest Matcha Powder<\/a>.\r\n\r\n \r\n\r\nDeluxe Version: Heat 1 cup (250 mL) canned light coconut milk on the stovetop over medium heat, watching closely to ensure it doesn\u2019t boil over. Once it starts to simmer and froth, immediately remove it from the heat. Add this to the blender along with the matcha powder (and maple syrup, if using).\u00a0Follow steps 4 and 5 above and enjoy your extra-creamy tea!”}

Instant Pot Cauliflower Thai Curry

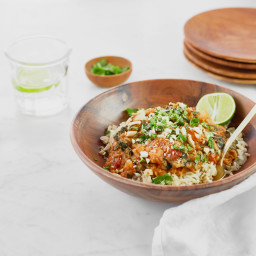
{“head_note”:”I love the soft, stew-like texture of this spicy curry and how serving it over a cup of fluffy rice lends just the right amount of chewiness! This dish is one of those crave-worthy comfort foods that I reach for again and again. I created this recipe out of a need for more go-to pantry dinner options that take advantage of my speedy new Instant Pot<\/a> electric pressure cooker. Not to worry if you don\u2019t have one, though\u2014follow my directions in the tip below to make this curry on the stovetop instead. It\u2019s important to follow the Instant Pot directions carefully to avoid overcooking the veggies. This recipe’s directions (steps 1 and 2) have been lightly edited as of January 10, 2018 to avoid some machines getting a burn notice.”,”instructions”:”

    \r\n \t

  1. Add all of the curry ingredients (except the red lentils and kale\/chard) to the Instant Pot\u00a0and stir until combined.\u00a0<\/li>\r\n \t
  2. Add the red lentils on top of the mixture and gently press them into the liquid (do not stir the lentils into the mixture as this can result in a burn notice in some machines).<\/li>\r\n \t
  3. Secure lid in the lock position and check that the Steam Release Handle is pointing to the \u201cSealing\u201d position. <\/li>\r\n \t
  4. Press the \u201cPressure Cook\u201d button (or \u201cManual\u201d, on some machines) and set the cook time to 5 minutes on high pressure. After 5 seconds you\u2019ll hear a couple beeps and the screen will say \u201con\u201d. The cooking process has begun! You can now go do something fun for about 10 to 15 minutes while the curry cooks. <\/li>\r\n \t
  5. You\u2019ll hear a few beeps when the timer is up. Immediately do a \u201cQuick Pressure Release\u201d to avoid overcooking the curry. I stand back and use a wooden spoon handle (never my hand!) to shift the Steam Release Handle to the \u201cVenting\u201d position to release the pressure. Once all of the pressure has been released, the float valve will sink and you won\u2019t hear steam anymore. <\/li>\r\n \t
  6. Carefully open the lid and stir the curry. To achieve a thicker texture, I like to mash a bit of the curry with a potato masher, simply pulsing about 4 or 5 times around the pot. You can also blitz it for a second or two with an immersion blender.<\/li>\r\n \t
  7. Stir in the chopped greens until thoroughly combined and secure the lid. Set the Instant Pot to the \u201cKeep Warm\u201d setting and allow the greens to wilt for about 5 minutes in the curry.\u00a0Press \u201cCancel\u201d to turn the heat off and release the steam again, if necessary, before removing the lid.<\/li>\r\n \t
  8. Serve over rice or grain of choice, if desired, and garnish with cilantro and lime. The lime juice gives it a lovely brightness, but avoid using too much as it can overpower. I always add a sprinkle of salt and pepper before serving too.<\/li>\r\n<\/ol>“,”foot_note”:”* The canned diced tomatoes that I use are quite \”soupy\” and liquid-y. If your can seems to be on the low end of the liquid content, I would recommend adding a 1\/2 cup of water to this recipe before cooking.\r\n\r\n** I love this Thai Kitchen Red Curry Paste<\/a>\u2014it\u2019s shelf stable and comes in a small glass jar. You can often find it in the international cuisine aisle of grocery chains.\r\n\r\n \r\n\r\n*** Dried flaked onion is less concentrated than onion powder. Onion powder will work as a substitute if that’s what you have on hand, but I would suggest using a smaller amount (around 1\/2 teaspoon) as it\u2019s more flavourful.\r\n\r\n \r\n\r\nSTOVETOP OPTION: Not to worry if you don’t have an Instant Pot as this recipe works great on the stovetop too. Simply add all of the ingredients except the kale (or chard, if using) to a large pot, stir, and bring to a low boil over medium-high heat. Reduce the heat to medium-low and simmer, covered, for 25 to 35 minutes (adding the kale\/chard during the last 10 minutes), until the veggies and lentils are tender. Stir the curry every 5 minutes while cooking, and reduce the heat if necessary to prevent it sticking to the pot. Follow directions #5 and #7.\r\n\r\n \r\n\r\nNote: Cauliflower amount has been changed from 2 1\/2 cups to 2 cups as of Sept. 25\/18.”}

Peaches ‘n Cream Oatmeal

{“head_note”:”This peaches \u2018n cream oatmeal is absolutely divine! Creamy, luxurious, decadent, and comforting\u2014I\u2019ve combined the rich flavours of creamy coconut milk and vegan butter with crunchy chia seeds and chewy rolled oats to make one irresistible bowl. And it\u2019s all topped off with juicy, delicious peaches, but you can change those up with whatever seasonal fruit you have on hand. Make this oatmeal when you are craving a morning treat that you can still feel good about. Heck, sometimes I even make it as a late afternoon snack when I want some comfort food!”,”instructions”:”

    \r\n \t

  1. To a medium pot, add the coconut milk, oats, chia seeds, coconut sugar, vegan butter (if using), salt, and water. Stir to combine. Set heat to medium-high and bring to a simmer. <\/span><\/li>\r\n \t
  2. Cook uncovered on medium heat for 7 to 10 minutes, stirring frequently and reducing heat if necessary until the oatmeal softens. You can stir in a bit more water if you\u2019d like to thin it out more. After cooking, stir in the vanilla and remove from heat.<\/span><\/li>\r\n \t
  3. Spoon the oatmeal into bowls and add your desired toppings. I love adding peaches along with a drizzle of maple syrup, a sprinkle of cinnamon, and my Crunchy Coconut Granola Clusters on top. <\/span><\/li>\r\n<\/ol>“,”foot_note”:”* When peaches aren\u2019t in season I like to use thawed frozen peaches.”}

Grain-free, Nut-free Chocolate Chunk Cookies

{“head_note”:”I\u2019ve had so many requests for a grain- and nut-free version of my popular vegan chocolate chip cookies and I\u2019m so happy to have one to share at long last. These delicate cookies are light as air and use sunflower seeds (both in butter and ground form) to create a rich and \u201cnutty\u201d cookie. Sometimes sunflower seeds can lend a bitter flavour, but these cookies have a mellow and pleasant taste! I also use cassava flour, which is a grain- and gluten-free flour made from dried yuca. I\u2019ve found it has good binding properties and a neutral flavour for baking. You can purchase it on Amazon<\/a> or find it in some health food stores. It\u2019s very important to follow the instructions exactly as written as these cookies are sensitive to even small changes.”,”instructions”:”

    \r\n \t

  1. Preheat the oven to 350\u00b0F (180\u00b0C) and line a large baking sheet with parchment paper.<\/span><\/li>\r\n \t
  2. To a large bowl, add the wet ingredients (sunflower seed butter, brown sugar, maple syrup, and oil) and stir until completely smooth.<\/span><\/li>\r\n \t
  3. Place the sunflower seeds into a food processor and process for about 40 to 60 seconds until a fine meal forms. You want to process the seeds to as fine a meal as possible without them turning into butter!<\/span><\/li>\r\n \t
  4. Add the dry ingredients (ground sunflower seeds, cassava flour, ground chia seeds, baking soda, and salt) to the wet mixture bowl and stir until thoroughly combined. The dough will be very sticky, but this is normal. Chop the chocolate, reserving one heaping tablespoon for later. Stir the remaining chopped chocolate into the dough until combined. <\/span><\/li>\r\n \t
  5. Using a 2-tablespoon (30-mL) cookie scoop (or simply a spoon), scoop small mounds of dough onto the prepared baking sheet a few inches apart. There\u2019s no need to flatten the mounds as they\u2019ll spread out during baking. Now, using the chocolate you set aside, press a few chunks into each mound (this just helps the cookies look a bit more chocolaty when baked!).<\/span><\/li>\r\n \t
  6. Bake for 10 to 11 minutes (I bake for 10 minutes) for a soft and tender cookie. <\/span><\/li>\r\n \t
  7. Remove cookies from the oven and cool directly on the baking sheet for 10 minutes. Using a spatula, gently transfer each cookie (they\u2019ll be very fragile) to a cooling rack for another 10 to 15 minutes. The cookies will be crumbly until they are fully cooled, so it\u2019s very important that you give them some time to firm on the rack (I know, it\u2019s the hardest thing you\u2019ll ever do!). <\/span><\/li>\r\n \t
  8. Serve and enjoy! Cooled cookies will keep in an airtight container in the fridge for 1 to 2 days, or in the freezer for up to 4 weeks. I love the delightful \u201csnappy\u201d texture these cookies get as the chocolate firms up from chilling!<\/span><\/li>\r\n<\/ol>“,”foot_note”:”* The sunflower seed butter should be 100% sunflower seeds without any added sugars or oils. I use Organic SunButter<\/a>. Be sure to stir the sunflower seed butter before measuring and avoid using the dry\/hard butter at the bottom of the jar. If using thicker seed butter, the cookies won\u2019t spread as much when baking.\r\n\r\n** If your coconut oil is hard as rock, you can melt it over very low heat and then cool before using. Avoid using warm coconut oil as it\u2019ll melt the chocolate chips.\r\n\r\n*** Cassava flour can be a bit tricky to locate. Your best bet is to buy from an online retailer (such as this one on Amazon<\/a>) or a natural food store.\r\n\r\n**** To make ground chia seed, add seeds to a high-speed blender or coffee grinder and blend\/grind on high until a flour forms. An equal amount of ground flaxseed also works in place of chia, but it will yield a thicker cookie. I prefer using ground chia. Leftover ground seeds can be stored in the freezer in an airtight freezer bag for future use.”}

3-Ingredient Chia and Quinoa Flatbread

{“head_note”:”Packed with protein, these easy chia and quinoa flatbreads make the perfect healthy base for all your favourite toppings! This is a great basic flatbread that you can jazz up with delicious toppings. These crack a bit when rolled up wrap-style, so I prefer to simply eat them like fun open-faced sandwiches instead. Try serving the flatbread with mashed avocado, chopped tomatoes or salsa, hummus, green onion, roasted veggies, my 10-Spice Mix<\/a>, flaky sea salt, roasted chickpeas, Hemp Seed Tabbouleh<\/a>, and more. For a sweet version, top them with nut or seed butter, sliced banana, berries, and chia seed jam. They are also fantastic toasted in the toaster or toaster oven using low heat. The texture is soft and chewy with little pops of quinoa in each bite…yum!”,”instructions”:”

    \r\n \t

  1. Rinse and drain the quinoa in a fine mesh sieve and transfer to a medium pot. Add 2 cups of water, stir, and bring it to a low boil. Reduce heat to medium, cover with a tight-fitting lid, and cook for 13 to 16 minutes until the water is absorbed and the quinoa is fluffy. After cooking, remove the lid to let the steam escape and remove the pot from the element.<\/li>\r\n \t
  2. While the quinoa is cooking, preheat the oven to 350\u00b0F (180\u00b0C) and line a very large baking sheet (or 2 medium baking sheets) with parchment paper. If using 2 baking sheets, position 2 oven racks near the centre of the oven. <\/li>\r\n \t
  3. Stir the chia seeds, coconut oil (or olive oil, if using), and salt into the cooked quinoa until combined. Now add the remaining 3\/4 cup water and stir again. It should look like a \u201csoupy\u201d quinoa mixture. Cool for 2 to 3 minutes.<\/li>\r\n \t
  4. Spoon this mixture into a large food processor and process for about 30 seconds (allowing steam to escape) until the quinoa is 50% broken down. There should still be some texture to the dough, and it\u2019ll look like a thick, sticky paste with bits of quinoa throughout.<\/li>\r\n \t
  5. Scoop 1\/4-cup mounds of dough onto the prepared baking sheet(s) several inches apart. You should have 9 mounds. Lightly oil your hands (to prevent sticking) and press down on each mound with the palm of your hand until the dough forms a small round shape, approximately 5 inches in diameter and no more than 1\/8-inch thick. Shape the edges with your fingers so the circles are even. Grease your hands as needed to prevent sticking.<\/li>\r\n \t
  6. Transfer the baking sheet(s) to the preheated oven and bake for 20 to 23 minutes until the edges are lightly firm to the touch. Using a spatula, carefully transfer each to a cooling rack where they\u2019ll firm as they cool. Add your desired toppings (see headnote for ideas) and enjoy!<\/li>\r\n \t
  7. Storing: You can refrigerate leftover flatbread in a sealed bag for 3 to 4 days or store in the freezer for up to 1 month. The uncooked dough also freezes and thaws beautifully.<\/li>\r\n<\/ol>“,”foot_note”:”The 3-ingredient count does not include water or salt because I’m sneaky like that.\r\n\r\n \r\n\r\nMAKE IT AHEAD: The uncooked dough can be refrigerated in a sealed container for a couple of days (maybe longer?) prior to baking. The chilled dough shapes easily (you won’t need to grease your hands), but you may need a couple extra minutes bake time if working with chilled dough.”}

Easy Chocolate Hemp Protein Balls

{“head_note”:”This is the ideal snack when your sweet tooth needs something fast, but you also want the staying power of healthy fats and protein! Bursting with hemp hearts, these nut-free chocolate protein balls are nutritional powerhouses filled with protein, omega-3 fatty acids, iron, magnesium, and more. Just like your favourite little black dress, they can be dressed up or down depending on your mood. I love rolling them in hemp hearts, shredded coconut or cocoa powder. For an extra luxurious energy ball, I simply dip the balls in melted chocolate and then chill them until the coating is firm.”,”instructions”:”

    \r\n \t

  1. Place the pitted dates in a food processor and process until a ball forms.<\/span><\/li>\r\n \t
  2. Add the remaining ingredients to the processor (hemp hearts, cocoa\/cacao powder, coconut, coconut oil, salt, and chocolate, if using) and process until thoroughly combined and almost smooth. The dough should be sticky and shouldn\u2019t be crumbly when you form a ball. If it\u2019s not sticky enough, add 1 to 3 teaspoons of water a bit at a time, processing after each addition. <\/span><\/li>\r\n \t
  3. Line a plate with parchment paper. <\/span>Lightly wetting your hands if needed, shape the dough into balls and place them on the lined plate<\/span>. Roll each ball into your desired topping(s) until completely coated (if needed, lightly wet the ball before rolling so the toppings stick).<\/span><\/li>\r\n \t
  4. Freeze the balls for 20 minutes until firm or simply enjoy right away! <\/span><\/li>\r\n \t
  5. Store the leftovers in the fridge or freezer for a quick burst of energy whenever you need one (seriously, that would be all the time in this house!). The balls will keep in an airtight container in the fridge for a week and in the freezer for 4 to 8 weeks. <\/span><\/li>\r\n<\/ol>“,”foot_note”:”* If your dates are bone dry, soak them in boiled water for 15 minutes and then drain very well. Use an old towel to press out the excess water. If the \u201cdough\u201d is too sticky to shape, add some shredded coconut and process again.\r\n\r\n \r\n\r\nFor a fun twist, try changing up the flavours by adding peppermint or orange extract!”}

Next Level Vegan Enchiladas

{“head_note”:”These mild- to moderate-heat enchiladas will change your life! A delicious homemade Enchilada Sauce<\/a>\u00a0smothers a sweet potato, roasted red pepper, sun-dried tomato, and black bean filling wrapped in soft tortillas. After baking, I top it all off with a decadent Cilanto-Lime-Garlic Cashew Cream<\/a>, green onion, cilantro, red pepper flakes, and chopped avocado. This dish will blow your taste buds away, I can promise you that! Please note that the prep time includes making the enchilada sauce and cashew cream in addition to the enchiladas. Yes, it’s a labour-intensive recipe for sure, but you can save time the day of by prepping the cashew cream and enchilada sauce the day before.”,”instructions”:”

    \r\n \t

  1. Prepare the Homemade Enchilada Sauce<\/a> and soak the cashews for the Cilantro-Lime-Garlic Cashew Cream before you begin.<\/li>\r\n \t
  2. Lightly grease a large rectangular baking dish (at least 8×12 inches). Set aside.<\/li>\r\n \t
  3. Add the chopped sweet potato into a medium pot of water and bring to a boil. Reduce heat and simmer for 9 to 15 minutes, uncovered, until fork tender. Drain and set aside. You can also steam the potatoes until tender, instead of boiling.<\/li>\r\n \t
  4. In a large skillet, stir together the oil, onion, and garlic and saut\u00e9 over medium heat for around 3 to 5 minutes until the onion softens. Season with a pinch of salt and pepper.<\/li>\r\n \t
  5. Preheat the oven to 350\u00b0F (180\u00b0C).<\/li>\r\n \t
  6. Add the chopped roasted peppers, sun-dried tomatoes, cooked\/drained sweet potato, spinach, and black beans. Cook for 3 to 5 minutes over medium-high heat, until the spinach is wilted.<\/li>\r\n \t
  7. Stir in 1\/4 cup plus 2 tablespoons of homemade enchilada sauce, followed by the lime juice, chili powder, cumin, and salt. Adjust seasonings to taste, if desired.<\/li>\r\n \t
  8. Add 3\/4 cup of Enchilada Sauce onto the bottom of your casserole dish and spread it out evenly.<\/li>\r\n \t
  9. Scoop 3\/4 cup of the sweet potato and black bean filling onto each tortilla. Roll up the tortilla and place it, seam side down, in the casserole dish. Repeat for the rest. If you have any leftover filling, you can spread it on top of the tortillas. Spread all of the remaining enchilada sauce on top of the tortillas until they are completely covered in sauce.<\/li>\r\n \t
  10. Bake the enchiladas, uncovered, at 350\u2070F (180\u00b0C) for 20 to 25 minutes, until the sauce is a deep red colour and the enchiladas are heated through.<\/li>\r\n \t
  11. While the enchiladas are baking, prepare the Cilantro-Lime-Garlic Cashew Cream.<\/li>\r\n \t
  12. When enchiladas are ready to serve, add half of the cashew cream into a baggie, snip off the corner, and \u201cpipe\u201d the sauce all over the enchiladas. Alternatively, you can simply spread or dollop the sauce on top of each enchilada. Garnish with chopped cilantro, avocado, red pepper flakes, and green onion. Serve any remaining cashew cream on the side with a spoon.<\/li>\r\n<\/ol>“,”foot_note”:”
      \r\n \t

    • Make it kid-friendly:\u00a0Omit the cayenne and red pepper flakes.<\/li>\r\n<\/ul>“}

Gourmet Chia Seed Pudding

{“head_note”:”Creamy, rich, and thick chia seed pudding made from scratch! If you want to make the speedy version using store-bought almond milk and liquid sweetener, see the tip below. This makes a large batch (3 cups or so), but I discovered that chia seed pudding freezes well and it thaws beautifully in the fridge. So there\u2019s never fear of any going to waste. I like to freeze it in individual servings in freezer-safe zip bags or small glass containers, so I always have a healthy snack on hand. If you aren’t down with the tapioca-like texture of chia seed pudding, feel free to blend this pudding in your blender until smooth.”,”instructions”:”

    \r\n \t

  1. Place almonds in a bowl and cover with a couple inches of water. Soak overnight or for 8 hours. If you are in a rush, soaking for 1 to 2 hours works in a pinch. Drain and rinse almonds after soaking.<\/li>\r\n \t
  2. Place almonds in a high-speed blender along with the 3 cups filtered water, chopped vanilla bean (if using), vanilla extract, and salt. Blend on the highest speed, for about 1 minute until the almonds and vanilla bean are pulverized.<\/li>\r\n \t
  3. Place a nut milk bag on top of a large bowl and pour the almond milk into the bag. (You can also use cheesecloth placed over a fine mesh sieve, however a nut milk bag yields the smoothest result and is faster.) Squeeze the bag and press out all the milk. The pulp will remain in the bag\/cloth (you should have about 1 cup of pulp).<\/li>\r\n \t
  4. If using dates as your sweetener: Note: I only recommend using dates if your blender can pulverize them super smooth, otherwise use liquid sweetener. Rinse out the blender. Carefully pour the almond milk back into the blender and add the pitted dates. Blend on the highest speed until the dates are pulverized and the milk is super smooth. Add milk back into the bowl.<\/li>\r\n \t
  5. Whisk in the chia seeds (and the maple syrup, only if not using the dates). Place in the fridge for 2 to 3 hours, until thickened and cold. Give the mixture a good stir every once in awhile to redistribute the chia seeds.<\/li>\r\n \t
  6. Layer the chia pudding with mango, raspberries, and top with Coconut Whipped Cream. Chia seed pudding will keep in the fridge for up to 3 to 4 days. It freezes well too, just thaw in the fridge before ready to enjoy.<\/li>\r\n<\/ol>“,”foot_note”:”
      \r\n \t

    • For a quicker version, simply use 3 cups of store-bought unsweetened almond milk, 1\/2 cup chia seeds, and 2 tablespoons of pure maple syrup. Whisk everything in a mason jar and chill in the fridge for 2 to 3 hours.<\/li>\r\n \t
    • Ideas for using leftover almond pulp: Spread the pulp onto a baking sheet and dry it out by baking it at 300\u00b0F (150\u00b0C) for 25-30 minutes until lightly golden in some spots. Cool completely. Grind it in a food processor until a coarse flour forms. You can use the toasted pulp in granola recipes or any other baked goods you see fit.<\/li>\r\n<\/ul>“}

Ultimate Green Taco Wraps

{“head_note”:”Get ready to pack a ton of veggies into one irresistible, healthy meal! If you haven’t tried my lentil-walnut taco meat, this is a great recipe to do so. It’s high in protein, and the taco seasonings and chewy texture create a realistic-tasting taco base. Feel free to use tortilla wraps or corn shells instead of lettuce wraps to change it up, or you can make this recipe into a big salad, too. You can save time by cooking the lentils and prepping the taco meat in advance (or simply use canned lentils).”,”instructions”:”

    \r\n \t

  1. Cook the lentils: Rinse lentils in a fine mesh sieve. Add to a medium pot along with a few cups of water. Bring to a boil, reduce heat to medium, and simmer for 20 to 25 minutes until tender (cook time will vary depending on the type of lentils you use\u2014see package). Drain off excess water.<\/li>\r\n \t
  2. Toast the walnuts: Preheat oven to 300\u00b0F (150\u00b0C). Add walnuts onto a rimmed baking sheet and toast for 10 to 13 minutes, watching closely, until lightly golden and fragrant. Set aside to cool for a few minutes.<\/li>\r\n \t
  3. Saut\u00e9 the pepper and onion filling: Add 1\/2 to 1 tablespoon of oil into a large skillet or wok. Cook the onion and peppers over medium heat for about 15 to 20 minutes, reducing heat if necessary and stirring frequently, until translucent.<\/li>\r\n \t
  4. Prepare the taco meat: Add 1 3\/4 cups cooked lentils (you’ll have some leftover) and all the toasted walnuts into a food processor and pulse until chopped (make sure to leave texture). Stir or pulse in the oregano, cumin, chili powder, and salt. Stir in the oil and the water until combined.<\/li>\r\n \t
  5. Prepare the rest of your vegetable toppings and wash and dry the lettuce wraps.<\/li>\r\n \t
  6. Assemble: Add a large lettuce leaf onto a plate, top with taco meat, saut\u00e9ed peppers and onion, and the rest of your desired toppings.<\/li>\r\n \t
  7. Leftovers can be stored in the fridge in sealed containers to be enjoyed the next couple days. The cashew cream will keep for at least a week in the fridge. Use sour cream leftovers on sandwiches, wraps, stirred into salad dressings, on vegan nachos, or with chili or soup.<\/li>\r\n<\/ol>“,”foot_note”:”
      \r\n \t

    • * To save time, you can use one (15-ounce) can of lentils (drained and rinsed) instead of cooking the lentils from scratch. When I have time,\u00a0I love to cook French green lentils due to their\u00a0chewy texture, but regular green and brown lentils will work too. Do not use red lentils as they are much too mushy and don’t have the required chewy texture for this recipe.<\/li>\r\n \t
    • Make it nut-free: I haven’t tried this yet, but you could\u00a0try subbing the walnuts for 1\/2-3\/4 cup toasted pepita\u00a0seeds (shelled pumpkin seeds) and swapping the Cashew Sour Cream with vegan mayo (such as Vegenaise).<\/li>\r\n<\/ul>“}

Raspberry-Strawberry Chia Seed Jam

{“head_note”:”This healthy\u00a0chia seed jam is not only bursting with omega-3 fatty acids, iron, fibre, and protein, but its fresh flavour beats\u00a0any store-bought jam (in my humble opinion!). All you do is cook down frozen or fresh berries with chia seeds and a touch of sweetener. Pop it into the fridge to chill, and it’ll thicken up just like traditional jam, but with a fraction of the sweetener and time. Who knew jam could be so healthy?”,”instructions”:”

    \r\n \t

  1. Add the berries and syrup into a medium pot. Stir to combine and increase heat to medium.<\/li>\r\n \t
  2. Simmer the berries, uncovered, until the water releases and they soften, stirring frequently, about 7 to 9 minutes.<\/li>\r\n \t
  3. Mash the berries until mostly smooth (I use a potato masher) and stir in the chia seeds.<\/li>\r\n \t
  4. Continue simmering, uncovered, over low-medium heat for another 8 to 10 minutes, stirring frequently. If the chia seeds stick to the bottom, reduce the heat and stir well.<\/li>\r\n \t
  5. Once the mixture has thickened a tiny bit (remember: most of the thickening happens in the fridge!), remove from heat and stir in the vanilla.<\/li>\r\n \t
  6. Transfer the jam to a bowl and chill in the fridge, uncovered, until the jam is cool. Store leftovers in an air-tight container in the fridge for 1 to 2 weeks. Cooled jam can also be frozen. Place into a freezer-safe zip bag in the freezer for easy storage for up to 1 month. Thaw on the counter or in the fridge overnight before use.<\/li>\r\n<\/ol>“,”foot_note”:””}