- \r\n \t
- Preheat the oven to 300\u00b0F (150\u00b0C) and spread the cashews and almonds onto a large rimmed baking sheet in an even layer. Roast for 17 to 21 minutes, watching closely, until fragrant and lightly golden. Cool the nuts on the pan for about 5 minutes.<\/li>\r\n \t
- To a large heavy-duty food processor, add the roasted nuts and coconut oil and process for about 5 minutes until smooth and creamy, stopping to scrape down the bowl as needed. While processing, allow any steam to escape by removing the pusher from the feed tube\/chute so the machine is vented.<\/li>\r\n \t
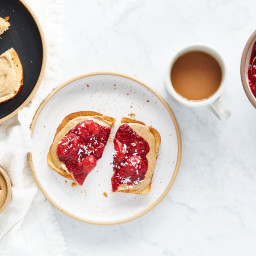
- Once the nuts break down into butter, stop and add the vanilla bean seeds, cinnamon, coconut sugar, and salt. Process another 2 to 4 minutes until super smooth and creamy. Taste the nut butter and add more coconut sugar if you prefer a sweeter flavour, or a bit more salt if you like it saltier, and process again. Transfer to a jar or container and allow the nut butter to come to room temperature before securing the lid. The flavour deepens as it cools. Refrigerate for 2 to 3 weeks. The nut butter will firm up a bit while chilled. Leave it at room temperature to soften, as needed.\u00a0Serve it on toast with\u00a0Chia Seed Jam<\/a> for the\u00a0ultimate duo!<\/li>\r\n<\/ol>“,”foot_note”:”* In lieu of seeded vanilla beans, you can use 1\/2 teaspoon vanilla bean powder or 1\/2 to 1 teaspoon pure vanilla extract (to taste). To seed a vanilla bean: Using a sharp paring knife, carefully slice a long cut down the length of the vanilla bean being careful not to cut through the bottom layer. Now, open up both sides of the cut bean to create flaps, exposing the inner seeds. Use your knife to gently scrape off the seeds from top to bottom.”}
Author Archives: Angela Liddon
Roasted Veggie Bowl with Cilantro-Garlic Rice and Sriracha Aioli
{“head_note”:”This scrumptious and satisfying bowl will help you hit your daily veggie goals with ease! The base features crispy lettuce and a comforting and fragrant jasmine rice, infused with oodles of garlic and cilantro. Load up the cozy base with roasted carrots, potatoes, zucchini, and broccoli and top it all off with a generous spoonful or drizzle of my creamy Sriracha Aioli. To boost the protein, add your favourite beans, tofu, or a sprinkle of hemp hearts and pepita seeds. The Sriracha Aioli recipe is from my latest cookbook, Oh She Glows for Dinner<\/a> (2020)<\/i>.”,”instructions”:”
- \r\n \t
- Set two oven racks near the middle of the oven. Preheat the oven to 400\u00b0F (200\u00b0C) and line 2 large rimmed baking sheets with parchment paper.<\/li>\r\n \t
- Prepare the veggies for roasting: Chop the carrots and potatoes into 1\/2-inch thick pieces and\u00a0transfer to\u00a0a\u00a0baking\u00a0sheet. Drizzle with a tablespoon of oil and toss to coat. Spread into an even layer and\u00a0sprinkle on a generous\u00a0pinch of salt and pepper. Transfer to the lower oven rack and roast for 5 minutes. Meanwhile, chop the broccoli into florets and the zucchini into 1\/2-inch thick half moons.\u00a0Transfer the broccoli and\u00a0zucchini to\u00a0the other baking sheet.\u00a0Drizzle with a tablespoon of oil and toss well to coat. Spread out into an even layer. Sprinkle on a generous pinch of salt and some freshly ground black pepper, to taste.\u00a0Once the\u00a0carrots and potatoes have roasted for\u00a05 minutes, add the\u00a0broccoli and zucchini to the oven\u00a0along with the\u00a0carrots and potatoes, and\u00a0continue roasting both baking sheets for another\u00a025\u00a0to 30 minutes, until fork tender and golden.<\/li>\r\n \t
- While the veggies roast, prepare the Cilantro-Garlic Rice: To a medium (3-quart\/2.8L) pot, add the oil and minced garlic. Stir to combine. Saut\u00e9 the garlic for a few minutes over low-medium heat, until softened. Now, add the rice and broth. Stir to combine, and bring to a boil over high heat. Immediately reduce the heat to low to low-medium, stir again, and cover with a tight-fitting lid. Cook for 12 to 14 minutes, until the water is absorbed and the rice is tender. I like to stir and scrape the bottom of the pot after the first 3 minutes of cooking to release any stuck rice (be sure to return the lid). While the rice cooks, mince the cilantro.\u00a0Set aside a small handful\u00a0of minced cilantro for\u00a0garnishing the finished bowls, if desired.<\/li>\r\n \t
- Remove the pot from the heat and stir in the minced cilantro. Cover the pot with the lid and \u201csteam\u201d the rice for an additional 4 to 6 minutes until the rice is perfectly tender. Stir in salt and pepper, to taste, until the flavours pop.<\/li>\r\n \t
- Meanwhile, prepare the Sriracha Aioli: Grate the garlic on a microplane. If you don\u2019t have a microplane, simply mince the garlic (very finely) with a knife. To a small bowl, add the mayo, grated garlic, and the Sriracha, a teaspoon at a time. Stir to combine. Taste, and add more Sriracha, as needed until your desired spice level is achieved (feel free to add more than 6 teaspoons, if you like it really spicy). I also like to stir in a tiny pinch of salt.<\/li>\r\n \t
- Assemble each bowl: Add a big handful of chopped lettuce into the base of a wide, shallow bowl. Top with a generous amount of warm Cilantro-Garlic Rice and roasted veggies. Add a spoonful of Sriracha Aioli on top (or drizzle it on top: spoon the aioli into a sandwich bag, snip off the corner of the bag, and pipe it on). Garnish with reserved cilantro (if using). Season to taste with salt and pepper and enjoy!<\/li>\r\n<\/ol>“,”foot_note”:”* Be sure to use white rice for this recipe as brown rice will not cook in this short of a timeframe.\r\n\r\n** If you are not a cilantro fan, feel free to omit it or swap it with your desired amount of minced fresh parsley.\r\n\r\n*** I use Earth Island Organic Vegenaise or my homemade Soy-Free Vegan Mayonnaise recipe.\r\n\r\n**** If you are sensitive to raw garlic, feel free to use less than what is called for in the Sriracha Aioli.\r\n\r\n \r\n\r\nTo boost the protein, add your favourite beans (chickpeas work well) or tofu, or a sprinkle of hemp hearts or pepita seeds on top of each bowl.\r\n\r\nThe total\u00a0time for this recipe, from start to finish, is just over\u00a040 minutes.”}
Heavenly Peanut Butter Balls
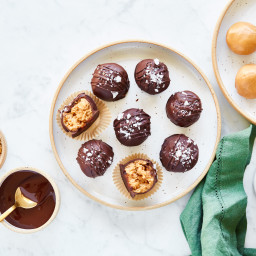
{“head_note”:”As a kid, I loved helping my mom make peanut butter balls during every Christmas season, and I still consider them to be an absolute staple in my holiday baking! My vegan version forgoes cups of powdered sugar and butter, and instead uses a few lighter ingredients with only a fraction of the sweetener employed in traditional recipes. When the holidays roll around, you’ll wonder how you ever lived without this recipe, but I have to say, they truly make the best year-round treat whenever a peanut butter and chocolate craving strikes! For a mess-free finger food, serve the Heavenly Peanut Butter Balls in mini cupcake liners. Be sure to read through all my tips in the Tips section before you begin. This recipe is adapted from my Peanut Better Balls in my cookbook, Oh She Glows Every Day<\/i><\/a> (2016).”,”instructions”:”
- \r\n \t
- Line a large flat plate or small baking sheet with a piece of parchment paper. Clear a level space in your freezer for the plate or baking sheet as we\u2019ll be transferring it there later.<\/li>\r\n \t
- Stir the jar of peanut butter before measuring. To a large bowl, add the peanut butter, maple syrup, vegan butter, and salt. Using electric mixers, beat for 1 to 1 1\/2 minutes on low speed, until the mixture is smooth and starts to thicken up a bit. The peanut butter mixture will go from runny to thickened during this time so it\u2019s important to beat it for the time suggested. Stir in the rice crisp cereal by hand until combined. Place the bowl in the freezer, uncovered, for 15 to 20 minutes so the mixture can firm up a bit.<\/li>\r\n \t
- Using your hands, roll 1 packed tablespoon of peanut butter mixture into a ball. (Or, use 1 1\/2 packed tablespoons of peanut butter mixture for large balls as shown in the photo.) Repeat for the rest until you have about 20 to 22 balls (or 13 to 14, if making large balls). Place each ball on the parchment-lined plate.<\/li>\r\n \t
- To a small pot, add the chocolate chips and coconut oil. Melt over low heat, stirring frequently, until three-quarters of the chips are melted. Remove the pot from the heat and stir until the chips are fully melted.<\/li>\r\n \t
- Using a fork, lower a ball into the melted chocolate. Roll it around until fully coated in chocolate. With the fork, lift the ball out of the chocolate and tap off excess chocolate on the side of the pot. Place the ball on the lined plate. The ball may stick to the fork a bit and that is totally fine! If needed, dip the back of a small spoon into the melted chocolate and smooth out any fork marks on the surface of the balls. Repeat this entire process for the rest of the balls, spacing the balls on the plate so they don\u2019t touch. Don\u2019t worry if a bit of chocolate pools on the bottom of the balls as we can trim it with a paring knife before serving. Keep any leftover melted chocolate in the pot as we\u2019ll be using it to drizzle on the balls later.<\/li>\r\n \t
- Place the plate in the freezer, uncovered, for around 15 minutes until the chocolate is firm.<\/li>\r\n \t
- If needed, warm the leftover melted chocolate in the pot over low heat so it\u2019s nice and runny, then turn off the heat. If the melted chocolate is still too thick, stir in a tiny amount (1\/4 to 1\/2 teaspoon) of coconut oil and the oil will thin it out. Using a spatula, scoop the chocolate to one side of the pot to form a small \u201cpool\u201d of chocolate. Dip a small spoon into the chocolate and drizzle it on top of the balls to create a fancy line design. Immediately sprinkle on a tiny pinch of large-flake sea salt.<\/li>\r\n \t
- Return the plate to the freezer, uncovered, and chill for another 15 minutes until the chocolate is firm. With a paring knife, carefully trim any pooled chocolate at the bottom of each ball, if desired. Store leftover balls in an airtight container in the fridge for 1 week or in the freezer for 1 month. If serving from the freezer, let the balls sit at room temperature for about 10 to 15 minutes before enjoying.<\/li>\r\n<\/ol>“,”foot_note”:”* I recommend using 100% natural peanut butter for this recipe. You only want to see roasted peanuts on the label (salt is fine, too, just reduce the amount of salt in the recipe, to taste). Avoid using the thick and dry peanut butter that collects at the bottom of a jar; it\u2019s simply too dry for this recipe. For best results, use peanut butter with a slightly runny and creamy consistency.\u00a0I don’t recommend using\u00a0\”no stir\” peanut butter as it contains sweetener and oil which\u00a0will throw off the flavours and texture and it has not been tested in this recipe.\r\n\r\n** I use Melt Buttery Spread in this recipe, but you can use any kind of vegan butter you like. If your butter is rock hard, let it sit at room temperature for 10 to 15 minutes before you begin so it\u2019s easier to beat into the other ingredients.\r\n\r\n*** I love Made Good Vanilla Brown Rice Crisps Cereal in this recipe. Be sure not to use puffed rice (which is larger and softer than rice crisp cereal) as it will become mushy.\r\n\r\n \r\n\r\nIf you have a tablespoon or two of melted chocolate leftover, here\u2019s a fun trick to use it up rather than throwing it out: Simply stir in a handful of raisins until fully coated in chocolate. Spread the raisins out on a parchment-lined plate and freeze. Once the chocolate is firm, break apart and enjoy some chocolate-covered raisins!”}
Mile High Freezer Fudge
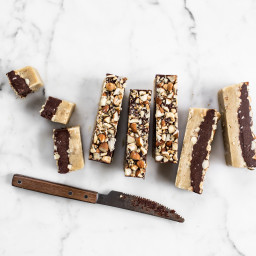
{“head_note”:”This melt-in-your-mouth, two-layer freezer fudge is sweetened naturally and made with a delightful vanilla-cashew fudge and rich chocolate-almond fudge. The toasted almond and cashew topping adds a crunchy contrast to the creamy, rich fudge. Be sure to serve this treat straight from the freezer, as it melts quickly at room temperature.\u00a0This recipe\u00a0is\u00a0from my second cookbook, Oh She Glows Every Day<\/a> (2016).”,”instructions”:”
- \r\n \t
- Preheat the oven to 300\u00b0F (150\u00b0C). Lightly grease a a 9×5-inch loaf pan. Line the pan with a piece of parchment paper (with overhang so it’s easy to lift out later on). Set aside.<\/li>\r\n \t
- Add the chopped almonds and cashews onto a small rimmed baking sheet and roast for 10 to 13 minutes, until lightly golden and fragrant.<\/li>\r\n \t
- For the Vanilla-Cashew Fudge: To a large bowl, add the coconut oil, raw cashew butter, maple syrup, vanilla bean seeds (if using), vanilla extract, and salt. Using electric beaters, beat the ingredients\u00a0on\u00a0low speed until smooth, being careful not to overmix. With a spatula, spoon the mixture into the loaf pan and spread it out evenly across the base of the pan. Sprinkle on about one-third of the roasted nuts. Gently press down on the nuts to adhere. Place the pan in the freezer on a level surface.<\/li>\r\n \t
- For the Chocolate-Almond Fudge: There\u2019s no need to clean the bowl or mixers before this step if you don’t want to. Add the coconut oil, almond butter, cocoa powder, maple syrup, vanilla, and salt. Beat on low speed until smooth. It will be quite thick, but this is normal.<\/li>\r\n \t
- Spoon the chocolate mixture on top of the Cashew-Vanilla Fudge and gently spread it out until it evenly covers the first layer of fudge. Gently press down with a spatula or spoon so it adheres to the first layer. Scatter the remaining nuts all over the top of the chocolate fudge and lightly press down on the nuts.<\/li>\r\n \t
- Place the pan in the freezer on a level surface, uncovered, for about 1 1\/2 hours, or until completely solid. Use a butter knife to slide it around the ends of the fudge to loosen. Lift the fudge slab out of the pan and slice it into small squares. Refrigerate leftovers in an airtight container for 1 to 1 1\/2 weeks, or in the freezer for 1 to 2 months. This fudge softens at room temperature, so I don’t recommend leaving it on the countertop for longer than 15 minutes or so.<\/li>\r\n<\/ol>“,”foot_note”:”1) If you don\u2019t want to make a two-layer fudge, you can simply make one of the layers. This fudge is extremely versatile so feel free to change up the flavours by subbing in your favourite nut butter, nuts, and extracts. It’s important to use natural nut\u00a0butter, however, without additives.\r\n\r\n \r\n\r\n2) Feel free to make fudge cups by layering the fudge into mini silicone cupcake molds.\r\n\r\n \r\n\r\nPhoto\u00a0credit:\u00a0Ashley McLaughlin.”}
Fail-Proof Marinara Sauce
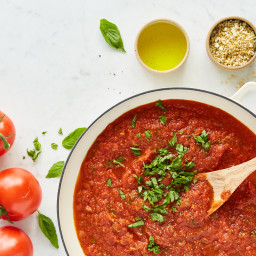
{“head_note”:”Try this incredible garlic-basil marinara sauce on top of pasta, zucchini noodles, spaghetti squash, or in my Cheesy Lentil Bolognese Casserole<\/a>. You can use diced, pur\u00e9ed, or crushed canned or jarred tomatoes depending on what you have in your pantry. You can pur\u00e9e the sauce with an immersion blender or simply leave it chunky for added texture. If you\u2019d like to change up this sauce, try adding a splash of balsamic vinegar and some red pepper flakes for a fun twist.\u00a0To instantly\u00a0turn this into a rich tomato cream sauce, stir in some Cashew Sour Cream<\/a>…yum!”,”instructions”:”
- \r\n \t
- Add the oil, onion, and garlic, along with a pinch of salt, into a large pot and stir to combine. Saute over medium heat for 5 to 6 minutes, or until the onion is softened.<\/li>\r\n \t
- Stir in the diced tomatoes with the juices (or crushed\/pur\u00e9ed tomatoes), bay leaves, oregano, salt (you can start with 1\/2 teaspoon), and pepper.<\/li>\r\n \t
- Simmer over medium heat, uncovered, for at least 30 minutes until the sauce thickens. It should reduce in volume by one-third to one-half. Discard the bay leaves after simmering.<\/li>\r\n \t
- Use a hand-held immersion blender until your desired texture is achieved. Or simply leave the sauce chunky if you prefer. You can also add it to a blender and blend as desired.<\/li>\r\n \t
- Turn off heat and stir in the finely chopped basil. Adjust salt and pepper, to taste, if desired. Store the cooled sauce in an airtight container in the fridge for up to 1 week, or in the freezer for 1 to 2 months.<\/li>\r\n<\/ol>“,”foot_note”:”* I use no-salt-added canned or jarred tomatoes. If yours contain salt, you may need to reduce the amount of salt called for in the recipe.”}
Italian Herb Parmesan-Crusted Portobellos
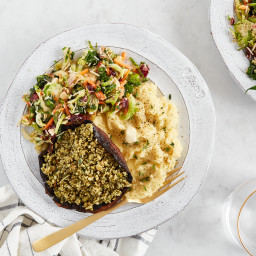
{“head_note”:”This easy recipe could turn a mushroom hater into a raving fan, and it\u2019s one of my very favourite ways to enjoy portobello mushrooms! The key is in the Italian Herb Parmesan<\/a> (made with lively fresh thyme, woody rosemary, and toasty pepitas)\u2014it gives the dish such a lovely, crunchy texture, which is the perfect complement to the hearty chewiness of the roasted mushrooms! If you have leftover portobellos, they reheat perfectly. Be sure to see my storage and reheating instructions in the tips section. This recipe is from my new cookbook,\u00a0Oh She Glows for Dinner:\u00a0Nourishing\u00a0Plant-based Meals to Keep You Glowing<\/a> (2020) by Angela Liddon. Published by Penguin Random House Canada.”,”instructions”:”
Italian Herb Parmesan
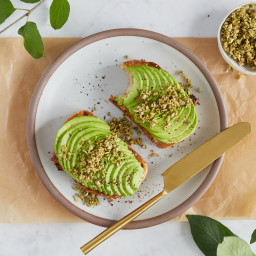
{“head_note”:”This vegan parm is a delicious flavour bomb topping!\u00a0Lemony\u00a0fresh thyme and peppery,\u00a0woody fresh rosemary\u00a0add\u00a0lovely\u00a0green, bright notes to this Italian Herb Parmesan. A touch of sherry vinegar makes it all pop. Trust me when I say that you’re going to want to eat this straight from the processor bowl! Use it with abandon on avocado or hummus toast, baked potatoes and Cashew Sour Cream, salad, pasta, roasted veggies, soup, and my Italian Herb Parmesan-Crusted Portobellos<\/a>.\u00a0This recipe is from my new cookbook,\u00a0Oh She Glows for Dinner:\u00a0Nourishing\u00a0Plant-based Meals to Keep You Glowing<\/a> (2020) by Angela Liddon. Published by Penguin Random House Canada.”,”instructions”:”
- \r\n \t
- In a food processor, process the garlic, thyme, and rosemary until finely chopped.<\/li>\r\n \t
- Add the pepitas, nutritional yeast, oil, vinegar, and salt to the food processor with the garlic and herbs and process until coarsely chopped, only 5 to 10 seconds. The parm will be a bit \”wet\” in texture due to the moisture from the oil and vinegar. Taste the parm and adjust seasonings, if desired.\u00a0Store in an\u00a0airtight container in the fridge for up to 5 days, or freeze in a freezer bag with the air pressed out for up to 2 months. There is a slight flavour loss after freezing and thawing, so I like to refresh the parmesan by stirring in a touch of sherry vinegar, salt, and olive oil, to taste.<\/li>\r\n<\/ol>“,”foot_note”:”* Make it nut-free:\u00a0Use the\u00a0pepita seed\u00a0option instead of\u00a0cashews. If making the raw cashew version, omit the oil, since the cashews naturally release more oil than pepitas do while processing, and using oil in the cashew version results in a sticky consistency (though it’s still delicious!).\r\n\r\n \r\n\r\n** Sherry vinegar is my preference in this parmesan (2 teaspoons for a bright pop!), but red wine vinegar will work in a pinch.\r\n\r\n \r\n\r\nFor convenience, I like to keep store-bought roasted pepitas on hand. If you use salted<\/em> store-bought pepitas, you may need to reduce the salt called for. To roast raw pepitas at home, spread them out over a small baking sheet and toss with 1 teaspoon olive oil. Roast at 325\u00b0F (160\u00b0C) for 10 to 13 minutes, until lightly golden.”}
Perfect Little Pumpkin Cookies with Spiced Buttercream
{“head_note”:”Why hello there, beautiful pumpkin season! These lovely pumpkin cookies are lightly crispy around the edges, tender and chewy in the middle, and the perfect light-tasting base for my Fluffy Pumpkin Pie Spice Buttercream. My recipe tester, Nicole, says they are like \u201cairy, pumpkin spiced clouds with a delightful outer shell to sink your teeth into!\u201d If you aren\u2019t in the mood for frosting, and prefer a lightly sweet, wholesome-tasting cookie, they also taste great without the buttercream. You can use store bought pumpkin pie spice for convenience, or this recipe for Homemade Pumpkin Pie Spice Mix<\/a>. In the Tips section, I\u2019ve provided sifted whole-grain spelt and all-purpose white flour swap options for the white\/light spelt flour. Be sure to check them out before you begin as the flour substitutions aren\u2019t direct 1:1 swaps. This recipe is adapted from my Easy Vegan Sugar Cookies \\with Pink Frosting<\/a>.”,”instructions”:”
- \r\n \t
- Preheat the oven to 350\u00b0F (180\u00b0C) and line one extra-large baking sheet (or two medium-sized sheets) with parchment paper.<\/li>\r\n \t
- To a small bowl, add the wet ingredients: grapeseed oil, maple syrup, pumpkin pur\u00e9e, brown rice syrup, ground flax, and vanilla. Whisk until combined.<\/li>\r\n \t
- To a large bowl, add the dry ingredients: almond flour, spelt flour, arrowroot starch, cane sugar, pumpkin pie spice, salt, and baking soda. Whisk until combined.<\/li>\r\n \t
- Pour the wet mixture over the dry mixture (being sure to scoop all of the wet ingredients stuck to the sides of the bowl), and stir until it comes together into a dense, very thick dough.<\/li>\r\n \t
- The dough will be very sticky, but this is normal! Scoop a slightly heaping 1 tablespoon of dough into your hand, and roll it into a ball. Continue with the remaining dough, placing each ball onto the baking sheet about 2 to 3 inches apart. If needed, you can lightly wet your fingers during this process. Do not flatten the balls before baking as they will spread out on their own.<\/li>\r\n \t
- Bake the cookies for 12 to 14 minutes until lightly golden (I like baking them until lightly golden as the edges get a bit crispy during cooling). Cool the cookies completely on the baking sheet. To speed up the cooling process, cool the cookies for 10 minutes on the pan then transfer the cookies to the fridge until completely cooled.<\/li>\r\n \t
- Meanwhile, prepare the Fluffy Pumpkin Pie Spice Frosting: To a large bowl, add the vegan butter. Using electric beaters, beat the butter until smooth (about 30 seconds). Add the powdered sugar, pumpkin pie spice, and salt. Starting on low speed, beat until smooth and fluffy, gradually increasing the speed as the ingredients combine. It will look very<\/i> crumbly at first, but it will eventually come together and become fluffy. If the frosting is still too dry, you can thin it with a tiny bit of almond milk (1\/2 teaspoon at a time), and continue beating until smooth. If it\u2019s too thin, you can add a little more powdered sugar and beat again until smooth.<\/li>\r\n \t
- Spread the frosting onto the completely cooled cookies, and top with a sprinkle of cinnamon or pumpkin pie spice, if desired. Serve and enjoy! Leftover cookies can be stored in an airtight container in the fridge for 1 to 2 days. The cookies will soften when sealed in a container.<\/li>\r\n<\/ol>“,”foot_note”:”* Be sure to use almond flour and not almond meal which is much coarser.\r\n\r\n \r\n\r\n** I prefer the white\/light spelt version. If you can find some,\u00a0it\u2019s so lovely in these! If you can\u2019t find it in the store, though, you can sift whole-grain spelt flour before using. The flour won\u2019t be as fine and delicate as white\/light spelt flour, but it will work in a pinch. To sift: place a large bowl on top of a kitchen scale, and tare the scale to zero. Spoon flour into a fine mesh sieve, and gently shake the sieve side-to-side until you have about 127 grams of sifted flour in the bowl. Discard the coarse flakes that remain in the sieve. Using sifted whole-grain spelt flour produces a more wholesome flavour and texture. Alternatively, you can use 3\/4 cup plus 2 tablespoons (127 grams) all-purpose white flour instead of white\/light spelt flour. When using all-purpose white flour, the cookies will taste a bit less sweet and complex compared to spelt flour.\r\n\r\n \r\n\r\nFlours are measured using the \u201cscoop and shake until level\u201d method, where you scoop the measuring cup directly into the flour and shake the cup side to side until the flour is level. I recommend weighing the flour whenever possible for the most accuracy.”}
Cozy At Home Spicy Any-Veggie Soup
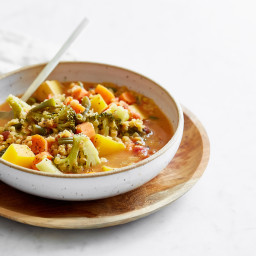
{“head_note”:”This spicy, bursting-with-flavour soup can be made with whatever veggies you have lurking in the crisper and pantry. My favourite combination of veggies is broccoli (rich in immune-boosting vitamin C), butternut squash, carrots, and frozen green beans, and I\u2019ve detailed the amounts I use in my recipe below. You can use any veggies you love as long as it totals 8 cups of chopped veggies (see my Tip below for ideas!). I\u2019ve also provided two different cooking methods: a hands-free Instant Pot method and a traditional (but still very easy) stovetop method. The beauty of this soup is that it\u2019s so simple to make\u2014we simply add the ingredients to the pot and let it cook away! The soup\u2019s spicy flavour comes from using a generous amount of red pepper flakes. I like 2 teaspoons for a moderate, zippy heat level, but if you aren\u2019t a fan of a lot of heat, start with 1 teaspoon and go from there. If you want to use my Instant Pot method, you can find the directions at the bottom of the Tips section.”,”instructions”:”
- \r\n \t
- Stovetop method: To a large pot, add the oil, water, coconut milk, diced tomatoes (with juices), broccoli, butternut squash, carrots, frozen green beans, red pepper flakes, salt (starting with 3\/4 teaspoon), garlic powder, and red lentils. Stir to combine.<\/li>\r\n \t
- Set the heat to high, cover with a tight-fitting lid, and bring the mixture to a low boil. Once it comes to a boil, remove the lid and reduce the heat to medium. Stir again, scraping off any lentils stuck to the bottom of the pot.<\/li>\r\n \t
- Simmer, covered, over medium heat for 15 to 20 minutes, stirring occasionally, until the lentils are soft and the veggies are just<\/i> fork tender. The veggies should have a touch of resistance when pierced with a fork. The cook time will vary based on the type of veggies you use.<\/li>\r\n \t
- After cooking, remove the lid and stir in the apple cider vinegar, starting with one tablespoon and adding from there, to taste (we love 2 tablespoons for a lot of brightness). Sometimes, there may be a slight separation in the soup after adding the vinegar, depending on the brand of coconut milk used. This is nothing to worry about. Season with more salt, if desired (I add another\u00a01\/4 teaspoon of fine sea salt, plus a bit of Herbamare). I also enjoy adding a bit more apple cider vinegar to my individual serving because I adore its tanginess in this soup. Serve and enjoy. Refrigerate leftovers in an airtight container for up to 4 to 5 days.<\/li>\r\n<\/ol>“,”foot_note”:”* I love fire-roasted diced canned tomatoes in this soup, but feel free to use regular canned diced tomatoes if that\u2019s what you have.\r\n\r\n** You can use practically any veggies you have on hand (most veggies should work, however, I probably wouldn\u2019t try beets or eggplant, but maybe that\u2019s just me). Veggies to try out: broccoli, cauliflower, bell peppers, carrots, sweet potatoes, yellow or red potatoes, button mushrooms, squash, saut\u00e9ed onions\/garlic\/celery, thickly sliced zucchini (with skin), kale, frozen peas, etc. Just make sure the chopped veggies total 8 cups. If using onion, celery, or garlic, be sure to saut\u00e9\u00a0them in the oil over medium heat for about 5 minutes, until softened, before adding the remaining ingredients. I have not tested\u00a0any frozen veggies\u00a0besides\u00a0frozen green beans, so I can’t\u00a0vouch\u00a0for\u00a0other ones working.\r\n\r\n*** If using French-cut frozen green beans (the thin variety), add them during the last 5 minutes of cooking to prevent them from softening too much.\r\n\r\n**** 2 teaspoons of red chili flakes results in a zippy, moderate level of heat (my fave way to make this soup!). If serving to spice-shy folks, start with 1 teaspoon (for a mild soup) and add more after cooking, if desired.\r\n\r\n \r\n\r\nINSTANT POT METHOD:\r\n\r\n1.To a 6-Quart (or larger) Instant Pot, add all the ingredients, except the red lentils and apple cider vinegar. Stir until combined.\r\n\r\n2. Now, pour the red lentils evenly overtop the mixture and gently press them into the liquid with your hands or a spoon (do not stir the lentils into the mixture as this can result in a burn notice in some machines).\r\n\r\n3. Secure the lid in the lock position and check that the Steam Release Handle is pointing to the \u201cSealing\u201d position.\r\n\r\n4. Press the \u201cPressure Cook\u201d button (or \u201cManual\u201d, on some machines) and set the cook time to 1 minute on high pressure. After a few seconds you\u2019ll hear a couple beeps and the screen will say \u201con\u201d. The cooking process has begun! (Pro tip: it will take about 25 minutes for the machine to come to pressure before the 1 minute timer is triggered.)\r\n\r\n5. You\u2019ll hear a few beeps when the 1 minute timer is up. Immediately do a \u201cQuick Pressure Release\u201d to avoid overcooking the soup (simply shift the Steam Release Handle to the \u201cVenting\u201d position to release the pressure). Once all of the pressure has been released, the float valve will sink and you won\u2019t hear steam anymore.\r\n\r\n6. Carefully open the lid. My Instant Pot defaults to the \u201ckeep warm\u201d setting, so I cancel it and turn the machine off to avoid over-cooking the veggies. Stir in the apple cider vinegar (starting with 1 tablespoon and adding more from there, to taste…we love 2 tablespoons for a nice zing). Sometimes, there may be a very slight coconut milk separation in the soup after adding the vinegar. This is natural and nothing to worry about. Season each bowl with a sprinkle of salt or Herbamare, if desired, and enjoy!”}
Obsession-Worthy Peanut Butter Cookie Ice Cream
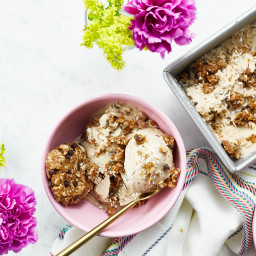
{“head_note”:”This is my favourite kind of summer indulgence! My reader-favourite Flourless Peanut Butter Cookies<\/a> meet my dreamy homemade peanut butter and coconut milk ice cream in this cooling summer treat. Chewy coconut, snappy chocolate chips, and tender bites of soft peanut butter cookies blend perfectly with a creamy vanilla and peanut butter vegan ice cream. If I\u2019d known how simple it was to make my own vegan ice cream (only 5 ingredients!), I would\u2019ve invested in an ice cream machine long ago. Well, I\u2019m making up for lost time now!”,”instructions”:”
- \r\n \t
- Chill the ice cream bowl in the freezer overnight, or for at least 12 hours. This step is very important to ensure the ice cream thickens properly.\u00a0<\/li>\r\n \t
- Prepare the Flourless Peanut Butter Cookies<\/a>. After baking, cool the cookies for 10 to 15 minutes, then transfer each one to a plate. Place in the freezer on a flat surface for a minimum of 25 minutes. As soon as you transfer the cookies to the freezer, get started on the ice cream.<\/li>\r\n \t
- Add the ice cream ingredients (entire cans of coconut milk, sugar, peanut butter, vanilla, and salt) to a blender and blend for about 8 to 10 seconds, until smooth (be sure not to blend longer than 10 seconds, as it may effect the final texture of your ice cream).\u00a0<\/li>\r\n \t
- Place the frozen ice cream bowl into the ice cream maker, insert the churning arm, cover with the lid, and turn on the machine (if the instructions for your ice cream maker are different, please follow the directions that came with your machine). Slowly pour the mixture into the bowl as it churns. Churn for about 22 minutes, until the mixture has thickened into a very thin, soft-serve texture.\u00a0<\/li>\r\n \t
- Once the cookies have been in the freezer for 25 minutes, chop 6 of the cookies into small, almond-sized chunks. Reserve the remaining 7 cookies, at room temperature, for later.<\/li>\r\n \t
- After 22 minutes of churning, slowly add the chopped cookies, a handful at a time, to the mixture while the machine is still churning. I like to use a fork to gently push the chopped cookies into the ice cream and help it along. Churn another 5 to 8 minutes, until the ice cream has thickened a bit more. It will have a thick, soft-serve texture when ready. There will be some hardened ice cream along the inside of the bowl…I like to think of this as the chef\u2019s extra helping (wink, wink)! Serve immediately, or for a firmer texture, transfer the ice cream to a loaf pan or airtight container and spread out smooth. At this stage, I like to crumble an extra cookie all over the top (and gently push it into the ice cream) to make it look extra-enticing, but this is optional. Cover and freeze for 2 hours for a more traditional ice cream firmness.\u00a0<\/li>\r\n \t
- To serve, scoop into bowls or ice cream cones. Or, if you’re feeling wild, make ice cream sandwiches with the leftover cookies…oh yea!!<\/li>\r\n \t
- Storage tip: Leftovers can be stored in an airtight container in the freezer for 3 to 4 weeks. Be sure to cover the ice cream with a piece of wrap to prevent freezer burn. To soften, let the container rest on the counter for 20 to 30 minutes before scooping.<\/li>\r\n<\/ol>“,”foot_note”:”* The cans of coconut milk do not need to be chilled beforehand.\r\n\r\n \r\n\r\nAlways follow the directions that come with your ice cream maker as there may be slight variations. My churning time is an estimate only; you may find you need more or less time with your machine! Watch closely during the last few minutes of churning. It it still looks too soft, feel free to let it churn a bit longer than the range I provide.\r\n\r\n \r\n\r\nThis is the ice cream maker that I use and love<\/a>. Pro tip: This machine is a bit noisy once the mixture starts to thicken, so I like to keep the machine in a nearby room with the door closed while it churns (don’t worry, my machine doesn’t seem too offended and still makes great ice cream!).\r\n\r\n \r\n\r\nNo ice cream maker? No problem! The blended liquid can be poured into popsicle molds for creamy frozen popsicle treats. Simply add the blended liquid to each popsicle mold, leaving at least an inch of room at the top. Now, carefully add some cookie chunks to each, pushing them down slowly into the liquid. If needed, add a bit more liquid to completely fill each mold. Secure the tops and freeze until solid. Run the popsicles under hot water to loosen them from the molds.”}