Author Archives: Angela Liddon

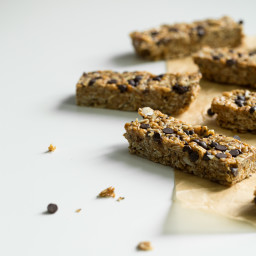
No-Bake Almond Joy Granola Bars

{“head_note”:”Easy no-bake granola bars inspired by the popular Almond Joy Chocolate bar flavour. Roasted almond butter, mini chocolate chips, and coconut unite to create one tasty bar that’s whipped up in 10 minutes (no oven required!).”,”instructions”:”

    \r\n \t

  1. Line an 8-inch or 9-inch square pan with two pieces of parchment paper, one going each way so it’s easy to lift out.<\/li>\r\n \t
  2. In a large bowl, stir together the oats, rice crisp cereal, sliced almonds, coconut, and chia seeds.<\/li>\r\n \t
  3. In a medium pot over low heat, melt the coconut oil. Remove from heat and stir in the almond butter, coconut nectar, and vanilla, until smooth.<\/li>\r\n \t
  4. Pour wet mixture over dry and stir well until thoroughly combined. Add a pinch of salt to taste and stir again.<\/li>\r\n \t
  5. Spoon mixture into the pan and roughly spread out (but don’t pack down yet). Sprinkle on the chocolate chips in an even layer. Wet hands lightly and then press down the mixture until even. Use a pastry roller to roll it out and pack it in even more.<\/li>\r\n \t
  6. Transfer pan to the freezer for about 10 minutes until firm. Slice into bars, wrap, and store in the fridge or freezer. These bars fall apart easily so I don’t recommend leaving them at room temperature for longer than a few minutes.<\/li>\r\n<\/ol>“,”foot_note”:”I do not recommend swapping the coconut nectar or brown rice syrup for any other liquid sweetener. Other sweeteners won’t be sticky enough to bind the bars.”}
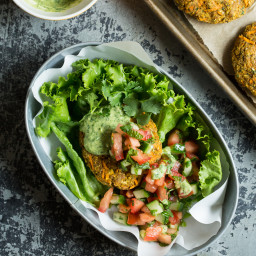
Moroccan Yam Veggie Burgers with Cilantro Lime Tahini Sauce

{“head_note”:”A flavourful\u00a0Moroccan-style veggie burger served with a tangy and fresh cilantro-lime tahini sauce. You can make these burgers soy-free by using coconut aminos and they are naturally gluten-free when using certified gluten-free rolled oats\/oat flour. Burger recipe is inspired by Ryan’s Moroccan Yam veggie burgers from the Whitewater Cooks Cookbook<\/a>.”,”instructions”:”

    \r\n \t

  1. FOR THE BURGERS: Preheat the oven to 350F. Line a large baking sheet with a piece of parchment paper.<\/li>\r\n \t
  2. Peel the yam. Using the regular-sized grate hole, grate the yam until you have 1 1\/2 lightly packed cups. I used the grater attachment disc in my food processor to save time (it takes less than 20 seconds). Place into large bowl.<\/li>\r\n \t
  3. Remove grater attachment from food processor, and add the regular \”s\” blade. Mince the garlic, cilantro, and ginger until finely chopped.<\/li>\r\n \t
  4. Add drained chickpeas and process again until finely chopped, but leave some texture. Scoop this mixture into a large bowl.<\/li>\r\n \t
  5. In a small bowl, stir together the flax and water mixture.<\/li>\r\n \t
  6. Grind the oats into a flour using a blender or a food processor. Or you can use 3\/4 cup + 1 tablespoon pre-ground oat flour. Stir this into the mixture along with the flax mixture.<\/li>\r\n \t
  7. Now stir in the oil, aminos\/tamari, salt\/pepper, and spices until thoroughly combined. Adjust to taste if desired.<\/li>\r\n \t
  8. Shape 6-8 patties, packing the mixture firmly together. Place on baking sheet. Bake for 15 minutes, then carefully flip, and bake for another 18-23 minutes until golden and firm. Cool on pan.<\/li>\r\n \t
  9. FOR THE CILANTRO SAUCE: Mince garlic in a food processor, followed by the cilantro. Add the rest of the sauce ingredients and process until smooth and creamy.<\/li>\r\n \t
  10. Serve the patties with a generous dollop of sauce and optional homemade salsa (from OSG cookbook, p.95) with a bun or lettuce wrap.<\/li>\r\n<\/ol>“,”foot_note”:”Note: I was missing a bit of crunch in these burgers, so next time I think I will add 1\/4 cup sunflower seeds into the mix.”}

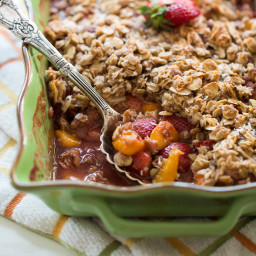
Springtime Strawberry Lime Mango Crisp (Vegan + GF)

{“head_note”:”Fresh strawberries, buttery mango and tangy lime create a naturally sweet, gooey crisp with a crunchy almond-oat-coconut topping. I love making this crisp in the springtime when mangos and strawberries are at their peak. And when I say \”crisp\”, I really like a crisp topping (which is what you’ll find here). Serve it as a healthy weekend breakfast or alongside a brunch. I especially love it after it\u2019s chilled in the fridge overnight \u2013 the syrup thickens and the leftovers are irresistible the next morning. To turn it into dessert, add a scoop of ice cream. This recipe is adapted from the Apple Crisp in The Oh She Glows Cookbook<\/a>.”,”instructions”:”

    \r\n \t

  1. Preheat oven to 375F. Lightly grease an 8-cup (2 litre) casserole dish.<\/li>\r\n \t
  2. For the filling: Place the chopped strawberries and mango in a medium bowl and sprinkle the arrowroot powder on top. Toss until the fruit is coated.<\/li>\r\n \t
  3. Stir in the sugar and zest. Drizzle on the lime juice and lightly toss to combine. Pour the fruit mixture into the prepared dish and spread out evenly.<\/li>\r\n \t
  4. For the topping: In a medium bowl, stir together the oats, almonds, almond meal\/flour, shredded coconut, cinnamon, salt. Pour on the maple syrup and melted coconut oil and stir until combined.<\/li>\r\n \t
  5. Sprinkle the topping all over the fruit mixture in an even layer.<\/li>\r\n \t
  6. Cover the dish with foil and poke a couple holes in the foil. Bake for 20 minutes, until the fruit is tender. Remove the foil and bake for another 15 to 20 minutes until the topping is golden and the filling is bubbling up around the sides.<\/li>\r\n \t
  7. Serve with a scoop of non-dairy vanilla ice cream, coconut whipped cream, or simply on its own. Store in the fridge for 3-4 days.<\/li>\r\n<\/ol>“,”foot_note”:””}

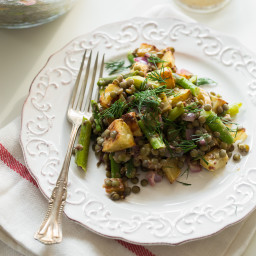
Roasted Potato and Asparagus Lentil Salad with Tangy Mustard-Lemon Dressing

{“head_note”:”Protein-packed and perfect for spring, this French green lentil salad makes a lovely side dish, main course, or spring potluck dish. Roasted potatoes and asparagus are folded into the salad along with a tangy mustard-lemon dressing. I also roasted the red onion, but I think next time I might leave the onion raw for a fresh crunch. I imagine this salad would also be fantastic with some cooked quinoa mixed in or using any seasonal vegetables you prefer. The dressing makes a lot – 2\/3 cup – so I prefer to stir in half of the dressing into the salad and then serve the rest of the dressing on the side to drizzle on top. This dressing is inspired by one I came across in It’s All Good.”,”instructions”:”

    \r\n \t

  1. Preheat the oven to 425\u00b0F (220\u00b0C) and line two large baking sheets with parchment paper.<\/li>\r\n \t
  2. Rinse lentils in a fine mesh sieve. Place lentils in a medium pot along with 3 cups of water. Bring water to a boil and then reduce heat to medium and simmer the lentils for about 18-20 minutes, or until tender. Drain off water and season lentils with salt (such as Herbamare).<\/li>\r\n \t
  3. Place chopped potatoes on one baking sheet and drizzle with 1\/2 tablespoon oil. Toss to coat and sprinkle liberally with salt and pepper.<\/li>\r\n \t
  4. Roast the potatoes for 15 minutes. Meanwhile, place the asparagus on the other baking sheet (and the red onion if you prefer to roast it too – see headnote) and drizzle with 1\/2 tbsp. oil. Sprinkle with salt and pepper.<\/li>\r\n \t
  5. After the potatoes have roasted for 15 minutes, flip the potatoes and return them to the oven along with the asparagus (and red onion if you are roasting that) for another 12-15 minutes. The potatoes should be golden on the bottom when ready and the asparagus will be tender. Add roasted veggies into a large bowl along with the lentils and gently toss to combine.<\/li>\r\n \t
  6. Meanwhile, prepare the dressing by whisking all of the dressing ingredients together. I love a tangy dressing with a bite so I used 4 tbsp. lemon juice. If you prefer a less acidic dressing you might want to add more olive oil or you can also experiment with adding a touch of maple syrup (the sweetness will offset a bit of the bite). It’s definitely a dressing you can play around with!<\/li>\r\n \t
  7. Pour half of the dressing onto the veggies and lentils in the bowl and toss to combine. Season with salt and pepper to taste. Serve the salad warm with a garnish of fresh dill (optional), with the rest of the dressing served on the side.<\/li>\r\n<\/ol>“,”foot_note”:””}

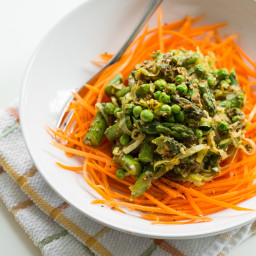
Glowing Green “Pasta” Primavera

{“head_note”:”This is my take on a lightened-up version of pasta primavera – a spring vegetable pasta dish. Rather than using pasta, I opted for fresh carrot pasta which is simply carrots that are julienned into very thin strand-like noodles. This is the julienne peeler<\/a> that I use. The vegetables are coated with a decadent, but nut- and diary-free sun-dried tomato hemp pesto and it transforms this dish into something decadent and special.”,”instructions”:”

    \r\n \t

  1. With a julienne peeler, peel the carrots into thin, spaghetti-like strands. Cover with a damp tea towel or damp paper towel to avoid it drying out.<\/li>\r\n \t
  2. Add oil to a large skillet or wok, and preheat over medium. Add sliced leek and garlic and saute for 3-4 minutes, until soft and translucent. Add a couple pinches of salt and several grounds of pepper.<\/li>\r\n \t
  3. Add the asparagus to the skillet and saute for around 8 minutes more, until tender. Increase heat if necessary. Finally, stir in the peas and cook until heated throughout.<\/li>\r\n \t
  4. Meanwhile, make the pesto. Add the garlic into a food processor and process until minced. Now add in the basil and sun-dried tomatoes and process again until smooth. Finally, add the rest of the ingredients and process again until combined and smooth.<\/li>\r\n \t
  5. Stir all the pesto into the vegetable skillet mixture and cook until heated throughout. Season to taste.<\/li>\r\n \t
  6. Serve the vegetable pesto mixture on top of the carrot pasta.<\/li>\r\n<\/ol>“,”foot_note”:”Note: If you’d like to add more protein to this dish, I recommend French green lentils. Edamame would work nicely too.”}

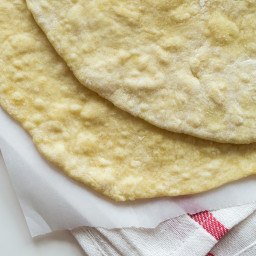
Easiest 5-Ingredient Spelt Flatbread

{“head_note”:”In no time at all, you can have a fresh, pliable spelt tortillas made with just 5 ingredients! Lightly adapted from my Organic Homemade Spelt Tortillas<\/a>.”,”instructions”:”

    \r\n \t

  1. In a large bowl, whisk together the flour, salt, and baking soda.<\/li>\r\n \t
  2. Stir in the hot water and oil until a shaggy looking dough comes together.<\/li>\r\n \t
  3. Knead the dough with your hands about 15 times, soaking up the extra flour at the bottom of the bowl as you go. If the dough is still too wet, add a touch of flour and knead again.<\/li>\r\n \t
  4. Shape dough into a ball and place in the bowl. Cover with a tea towel so it doesn\u2019t dry out.<\/li>\r\n \t
  5. Preheat a large skillet over medium heat.<\/li>\r\n \t
  6. Grab a chunk of dough just larger than a golf ball. Shape into a ball and sprinkle on some spelt flour to coat lightly.<\/li>\r\n \t
  7. Place a large nonstick baking mat on the counter and flour a rolling pin. You can also use parchment paper instead of a nonstick mat. Sprinkle the mat with a dusting of flour.<\/li>\r\n \t
  8. Roll the dough all directions into a circular shape until it’s paper thin. It\u2019s ok if it\u2019s not a perfect circle – mine usually come out all kinds of odd shapes! Drizzle the tortilla with a tiny bit of olive oil and spread it out to coat the entire surface.<\/li>\r\n \t
  9. Place the tortilla on the preheated skillet, oil side down. Cook over medium heat for around 30 seconds and then flip it with a spatula and cook for another 30 seconds or so. If you cook for too long, your tortilla might be prone to tearing or drying out, so keep that in mind.<\/li>\r\n \t
  10. Place cooked tortillas on a plate and cover with a tea towel to prevent drying. Repeat steps for the rest.<\/li>\r\n \t
  11. Store leftovers on a plate with a lightly damp paper towel spread out on top. Cover the plate with plastic wrap and place in fridge.<\/li>\r\n<\/ol>“,”foot_note”:”Note: Other flours might work besides light spelt flour, but I haven’t tested any yet. Please let us know in the comments if you try any out!”}

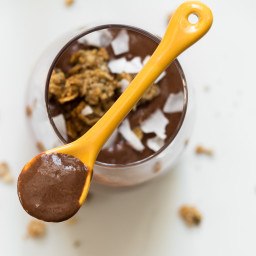
{Almost} Instant Chocolate Chia Pudding

{“head_note”:”This chocolate chia pudding is decadent-tasting yet healthy at the same time. Packed with protein, fibre, and omega-3 fatty acids this is a pudding you can feel good about! When blended with the almond milk ice cubes it’s a treat you can enjoy immediately without waiting for it to chill. The texture is a cross between a smoothie and a pudding. It will thicken up even more if you put it in the fridge for a few hours. I recommend using a high-speed blender for best results since the dates, chia seeds, and ice cubes are challenging to blend super smooth. Adapted from my healthy chocolate chia pudding<\/a>.”,”instructions”:”

    \r\n \t

  1. Fill an ice cube tray with almond milk. Freeze until solid. You can use leftovers in smoothies or for more pudding in the future!<\/li>\r\n \t
  2. To make the pudding: Add 3\/4 cup almond milk into a high speed blender. Now add the rest of the ingredients, including the almond milk ice cubes.<\/li>\r\n \t
  3. Blend on the highest speed until super smooth. Enjoy immediately or chill in the fridge where it will thicken up even more.<\/li>\r\n<\/ol>“,”foot_note”:”Add the cocoa powder to taste. Some brands will be more pungent than others. 3.5 tablespoons of cocoa powder is great with my brand (camino) however you may need to use less depending on what kind you use. My advice is to add the cocoa powder slowly to taste.\r\n\r\nYou will want around 12 tablespoons of almond milk ice cubes added to the pudding. For my tray, this equaled 4 large<\/strong> cubes.\r\n\r\nYou can skip the almond milk ice cubes and simply add a splash more almond milk. Chill in the fridge the old-fashioned way.\r\n\r\nIf your dates are firm, I suggest soaking them in hot water for at least 30 minutes before you begin. Drain well.\r\n\r\nTo turn this into a chocolate \”frosty\” add more ice cubes to make it super icy.\r\n\r\nTo make this nut-free, use a nut-free non-dairy milk of your choice.”}

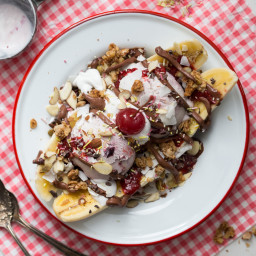
The Big Vegan Banana Split

{“head_note”:”This vegan banana split is a lovely special dessert for two. One dish, two spoons…what could be better? Feel free to change up the toppings as you see fit. I\u2019ve included what I used below, but I didn\u2019t bother putting specific amounts so just add as much as you\u2019d like. The chocolate date sauce is not to be missed. Even if you just make one thing out of this recipe, make the chocolate sauce. It\u2019s amazing on ice cream or just by the spoonful. I expect it would be great on top of brownies too.”,”instructions”:”For the chocolate date sauce:\r\n

    \r\n \t

  1. Soak the pitted dates in a bowl of water for 30 minutes, or until super soft. Drain. You can probably skip this step if you have a Vitamix and are using soft dates to begin with (I did).<\/li>\r\n \t
  2. Add all the sauce ingredients into a high speed blender (including the entire can of coconut milk). Blend on high until super smooth. Adjust to taste, if desired. If it’s not sweet enough you can always add more pitted dates.<\/li>\r\n \t
  3. Refrigerate until ready to use. It will firm up in the fridge a bit so you can melt it over low heat on the stove top if desired or just enjoy as is. Store in the fridge for up to 2 weeks.<\/li>\r\n<\/ol>\r\nFor the banana split:\r\n
      \r\n \t

    1. Prep all of your desired toppings in advance.<\/li>\r\n \t
    2. Place the sliced banana in a large oblong bowl (or simply any old bowl will do!).<\/li>\r\n \t
    3. Add a couple scoops of ice cream and a dollop of coconut whipped cream.<\/li>\r\n \t
    4. Add the rest of your desired toppings and enjoy immediately!<\/li>\r\n<\/ol>“,”foot_note”:”For the Coconut Whipped Cream recipe, see this post<\/a>.\r\n\r\nFor the Strawberry Chia Seed Jam recipe, see page 287 in The Oh She Glows Cookbook<\/a>.\r\n\r\nFor the Ultimate Nutty Granola Clusters recipe, see page 31 in The Oh She Glows Cookbook<\/a>.\r\n\r\nThe brand of all-natural maraschino cherries I used is Tillen Farms.\r\n\r\nThe brand of all-natural sprinkles I used is Let’s Do Organic!”}

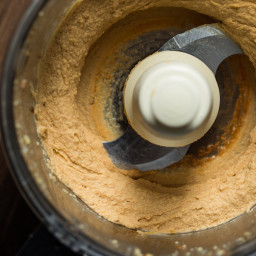
Sun-Dried Tomato Hummus

{“head_note”:”A quick and easy flavourful hummus that comes together in minutes! If you don’t have any sun-dried tomatoes on hand, feel free to make it without.”,”instructions”:”

    \r\n \t

  1. Mince garlic in a food processor.<\/li>\r\n \t
  2. Add the rest of the ingredients (except the salt) and process until smooth. Add salt to taste and process again until combined.<\/li>\r\n<\/ol>“,”foot_note”:”Tip: For a super-smooth hummus, pop off the chickpea skins (and discard) before beginning.”}

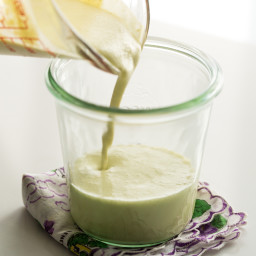
Creamy Lemon Dill Dressing

{“head_note”:”This creamy lemon-dill dressing comes together in seconds and it’s such a fresh compliment to a spring salad. If you aren’t a dill fan, feel free to leave it out. It’s still tasty either way! I recommend making this dressing the day before you plan to use it (or at least a few hours before if you can) because it thickens up in the fridge when chilled (however, it’s not absolutely necessary to chill it first).”,”instructions”:”

    \r\n \t

  1. Soak the cashews in water for 2-8 hours before starting (to soften). You can skip this step if you have a Vitamix. Drain and rinse cashews before starting.<\/li>\r\n \t
  2. Add all the ingredients into a high speed blender and blend until completely smooth. Adjust ingredients to taste if desired.<\/li>\r\n<\/ol>“,”foot_note”:”Notes: You can use dried dill weed instead of fresh dill. Add it in small amounts at a time, to taste (I would start with 1\/4-1\/2 teaspoon and add from there).\r\n\r\nI prefer my dressing tangy, so I opt for more lemon juice. For a less tangy dressing, you can reduce the amount I used or you can add a touch of sweetener to taste.\r\n\r\nFor a nut-free dressing, try my Lightened-Up Lemon Tahini Dressing<\/a>.”}