Author Archives: Angela Liddon

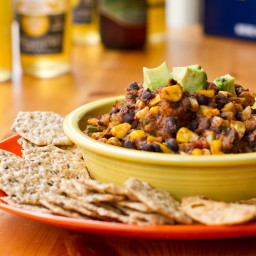
Black Bean Chili Dip

{“head_note”:”Reminiscent of a hot bowl of black bean chili, this chunky dip is great to pair alongside your favorite corn chips or crackers. I love Food Should Taste Good blue corn chips or sweet potato chips. To garnish, add some chopped green onion, avocado, cilantro, or your favorite cheeze.”,”instructions”:”

    \r\n\t

  1. In a large skillet over medium heat, add a bit of oil and saut\u00e9 the chopped onion and garlic for about 5-7 minutes. Meanwhile, remove seeds from jalapeno and chop finely (I use gloves so the seeds don\u2019t sting my fingers). Add in the chopped jalapeno and saut\u00e9 for another few minutes.<\/li>\r\n\t
  2. Add in the drained and rinsed black beans, salsa, and corn. Stir well and cook for a few minutes. Now add the chili powder, cumin, and salt all to taste. Stir in the nutritional yeast if using. Cook on low until heated through and serve warm with corn chips. Garnish with green onion, chopped avocado, or fresh cilantro.<\/li>\r\n<\/ol>“,”foot_note”:””}
Endurance Crackers

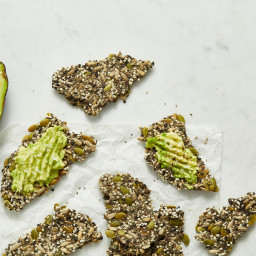
{“head_note”:”These Endurance Crackers are extremely light, healthy, and crispy while providing long-lasting energy. I love serving them with hummus (obviously) or smashed avocado and sea salt. Feel free to change up the seasonings and spices as you wish. These crackers are inspired by the ChcolaTree Organic Oasis in Sedona.”,”instructions”:”

    \r\n \t

  1. Preheat the oven to 300\u00baF (150\u00b0C). Line a large baking sheet with parchment paper.<\/span><\/li>\r\n \t
  2. In a large bowl, combine the chia seeds, sunflower seeds, pepita seeds, and sesame seeds.<\/li>\r\n \t
  3. Add the water, garlic, and salt. Stir with a spatula until combined. Allow the mixture to sit for a couple of minutes until the chia seeds absorb the water. After the 2-minute rest, when you stir the mixture, you shouldn\u2019t see a pool of water on the bottom of the bowl.<\/li>\r\n \t
  4. With the spatula (and a hand, if necessary), spread the mixture onto the prepared baking sheet in two small rectangles, about 12×7 inches each and 1\/8 to 1\/4 inch thick. Sprinkle additional salt on top.<\/li>\r\n \t
  5. Bake for 35 minutes. Remove from the oven and carefully flip each rectangle with a spatula. Bake for 25 to 35 minutes more, until lightly golden around the edges. Watch closely near the end to make sure they don\u2019t burn. Let cool for 10 to 15 minutes on the pan and then break the rectangles into crackers and let cool completely on the pan. Store in an airtight container or jar on the counter for up to 2 weeks. You can also freeze the crackers in freezer bags for up to 1 month.<\/li>\r\n<\/ol>“,”foot_note”:”
      \r\n \t

    • *\u00a0If the crackers soften while storing (this can happen in humid environments), toast them in the oven on a baking sheet at 300\u00baF (150\u00b0C) for 5 to 7 minutes. After cooling, this should return them to their former crispness!<\/li>\r\n<\/ul>“}

On The Glow Basic Oatmeal Squares

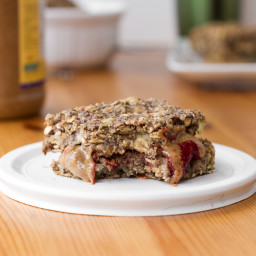
{“head_note”:”Think of this oatmeal square as basic baked oatmeal that can be dressed up any way you like. Each large square contains a tablespoon of flax and a teaspoon of chia seeds as well as 7 grams of fibre and 6 grams of protein. Feel free to add in nuts, dried fruit, chocolate, and other mix-ins as you desire. Just be careful about frozen fruit. When I made a trial with frozen blueberries they became quite soggy. Use fresh blueberries and you should be fine.”,”instructions”:”

    \r\n\t

  1. Preheat oven to 350F and line an 8 inch square pan with two pieces of parchment paper.<\/li>\r\n\t
  2. In a blender or food processor, blend\/process 1 cup of the oats until a flour forms. Or you can just use 1 cup of oat flour.<\/li>\r\n\t
  3. In a large bowl, mix together the dry ingredients: oat flour, 1.5 cups rolled oats, chia, flax, baking powder, salt, cinnamon. In a smaller bowl, whisk together the wet ingredients: milk, syrup, nut\/seed butter, banana, vanilla until no clumps remain. Add wet to dry and stir until combined. Add dry sweetener to taste if desired. Fold in any nuts or dried fruit that you desire.<\/li>\r\n\t
  4. Pour mixture into prepared pan and smooth out. Bake for 35-40 minutes until lightly golden along edge and it springs back slowly when touched. I baked them for 40 minutes, but baking time may vary. Place pan on cooling rack for 10 minutes, carefully remove, and cool on rack before slicing.<\/li>\r\n<\/ol>“,”foot_note”:””}

Crispy Breaded Tofu Strips and Sweet Potato Fries

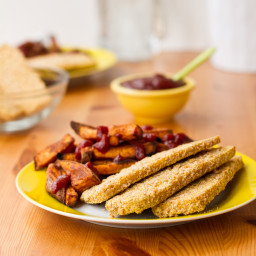
{“head_note”:”These crispy strips could turn anyone into a believer\u2026even my chicken finger loving husband.\r\n\r\nInspired by cornmeal tofu in Veganomicon<\/a>“,”instructions”:”

    \r\n\t

  1. Press tofu: Rinse the tofu with water and place a couple kitchen towels on the counter. Wrap the tofu with another towel, place another towel on top, and finally several heavy cookbooks on top. Let sit for at least 20 minutes to soak out the water.<\/li>\r\n\t
  2. Meanwhile, whisk together the milk and cornstarch in a shallow dish. In another bowl, mix together the cornmeal, breadcrumbs, salt, and spices. Set aside. Preheat oven to 400F and grease 2 baking sheets with oil. Slice the potato into fries and then coat with 1 tsp oil, 1\/2 tsp cinnamon, 1\/4 tsp cumin, and a couple pinches of salt. Lay out on greased baking sheet.<\/li>\r\n\t
  3. Slice tofu into 8-9 strips, lengthwise, depending on how thick you want it. With one hand dip the tofu strip into the milk mixture and then into the cornmeal\/breadcrumb mixture. Use other hand to sprinkle dry mixture all over the tofu. Coat both sides entirely and then place on baking sheet. Repeat with the rest.<\/li>\r\n\t
  4. Bake tofu on middle rack and fries on bottom rack at 400F. Bake for 20 minutes, then flip the tofu and fries, and then bake for another 15-20 minutes until crispy. Remove tofu and broil the fries for a few minutes, watching carefully, until golden and charred in some spots. Remove and serve with ketchup!<\/li>\r\n<\/ol>“,”foot_note”:””}

Chickpea Salad Wrap

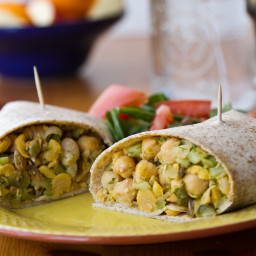
{“head_note”:”Eric asked me if it really tastes like tuna. \u201cUmm\u2026no\u2026\u201d I said after careful thought, \u201cbut it actually tastes better!\u201d Who needs tuna when it tastes this good? It\u2019s fresh, crunchy, filling, and has a great pop of dill. If you\u2019ve had a jar of dill pickles sitting in your fridge for years, now is the time to use them.”,”instructions”:”

    \r\n\t

  1. Preheat oven to 325F and toast the sunflower seeds for about 11 minutes.<\/li>\r\n\t
  2. Mix everything into a bowl, mashing up the chickpeas slightly with a fork, and season with salt (I used Herbamare) and pepper, to taste. Stuff into a wrap or pita, or enjoy with crackers or rice cakes.<\/li>\r\n<\/ol>“,”foot_note”:””}

Healthy Chocolate Chia Pudding

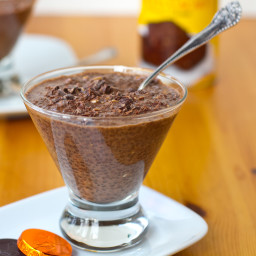
{“head_note”:”I make this pudding when I want something indulgent tasting, but don\u2019t feel like eating a ton of sugar. It satisfies and energizes me while letting me get on with my day. I love mixing carob powder and cocoa powder for a more complex chocolate flavour. The carob powder also adds a natural sweetness that I love. If you don\u2019t have carob, I suggest using a bit more cocoa powder and sweetener since it will be less sweet without the carob. Serve cold or heated up!\r\n\r\nAdapted from Repair and Recover Chia Pudding<\/a>“,”instructions”:”

    \r\n \t

  1. In a large bowl, whisk together all of the ingredients (starting with 1 & 1\/4 cup almond milk) until the clumps are gone. Place in fridge for 1-2 hours, until thick or overnight. Stir well, add more milk if desired to achieve the thickness you desire, and serve chilled. Alternatively you can heat in the microwave and serve it warm. It\u2019s nice with a spoonful of coconut cream mixed in or a mashed banana too.<\/li>\r\n<\/ol>“,”foot_note”:””}
Oh Mega Carrot Cake Breakfast Cookies

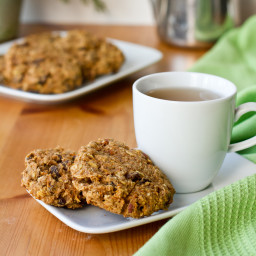
{“head_note”:”Like a healthy breakfast muffin in carrot cake cookie form. Coconut oil, maple syrup, and fresh ginger work well to create a nice carrot cake flavour, however if you are without those ingredients you can try subbing in another light tasting oil of your choice, other liquid sweetener, and ground ginger (maybe 1\/4 tsp?).\r\n\r\nAdapted from Itty Bitty Carrot Cake Cookies<\/a>, which was adapted from 101 Cookbooks<\/a>.”,”instructions”:”

    \r\n \t

  1. Preheat the oven to 325F and toast the pecans for 10-11 minutes. Meanwhile, prepare the batter. In a large bowl, mix together the flax, flour, oats, baking powder, salt, cinnamon, and raisins.<\/li>\r\n \t
  2. Grate the carrots and ginger using the finest grate. In a smaller bowl, melt the coconut oil in the microwave for about 45-60 seconds. You want the oil hot so it doesn\u2019t clump up when adding the cold wet ingredients. Now add in the maple syrup, carrots, applesauce, grated ginger, and vanilla. Stir well.<\/li>\r\n \t
  3. Remove pecans from the oven and add to the dry ingredients. Increase oven temp to 350F. Now add the wet ingredients to the dry and mix well. The dough will be very sticky, so not to worry.<\/li>\r\n \t
  4. With a spoon, scoop about 13 cookies onto a lined baking sheet. They don\u2019t spread much so you can put them an inch apart. Bake for 14-15 minutes at 350F and allow to cool on baking sheet.<\/li>\r\n<\/ol>“,”foot_note”:””}
Triple Lentil Recovery Soup

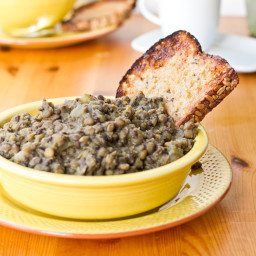
{“head_note”:”Packed with over 25 grams of protein per serving, this soup will aid with post-workout recovery and get you back in the game in no time.”,”instructions”:”

    \r\n\t

  1. In a large skillet or pot, add the oil and saut\u00e9 the onion and garlic over low-medium heat for about 6-7 minutes.<\/li>\r\n\t
  2. Add in the celery and saut\u00e9 another few minutes. Stir in the spices and cook for another couple minutes on low.<\/li>\r\n\t
  3. Now, rinse and drain the lentils and stir into skillet\/pot. Add the broth and stir well. Increase heat and bring to a boil. Reduce heat to low, cover, a simmer until thick and lentils are cooked, about 45 minutes to an hour. Watch closely and stir frequently so it doesn\u2019t stick to the pot. Add more broth to thin out if desired. You can also use an immersion blender to blend some of the soup a bit. I did this, but left it mostly chunky. Add salt and pepper to taste.<\/li>\r\n<\/ol>“,”foot_note”:””}
Dinosaur Dill Crunch Salad

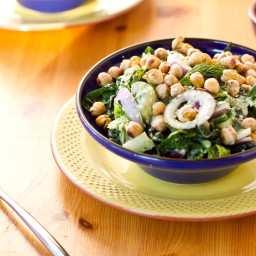
{“head_note”:”Dinosaur kale (also known as Lacinato or Tuscan kale) is the dainty and sweeter sister of traditional curly kale. It blends beautifully in this salad while letting the flavours of the dill shine. As a result of it\u2019s soft texture and pleasant taste, you don\u2019t have to marinate the dressing on the leaves for long. The healthy lemon dill tahini dressing is very low in oil and packs in 1 & 1\/2 cups of fresh dill to sneak in more greens. I topped the salad with my favourite crunchy salt and vinegar chickpeas. Their tangy and salty flavour compliments the dill dressing nicely while adding a bit of a crunch!”,”instructions”:”

    \r\n\t

  1. Salt and vinegar chickpeas: Preheat oven to 425F and line baking sheet. In a pot, bring 2 cups white vinegar to a boil and add pinch of salt. Add in drained and rinsed chickpeas and bring to a boil for 1 minute (no longer). Some skins may fall off and that\u2019s normal. Turn off heat and let the chickpeas sit in the vinegar for 30 minutes. Drain the chickpeas, place into pot, and light coat with a tiny bit of oil and a few pinches of kosher salt. Place on pan and roast for 35-40 minutes at 425F, until golden and crispy. Halfway through baking, give the pan a shake to rotate the peas. Keep an eye on them to avoid burning, especially near the end. Leave on pan until ready to eat. They are best served fresh as they get soft when stored.<\/li>\r\n\t
  2. Dill dressing: In a mini chopper or food processor, mince the garlic. Now add in the rest of the ingredients, except for the dill, and process until smooth. Give the dill a rough chop and add into processor and process until smooth. Should keep in an air-tight container for 5-8 days in the fridge.<\/li>\r\n\t
  3. Salad: Prep all salad ingredients and add into a large bowl. Massage your desired amount of the dressing into the leaves and let it \u201cmarinate\u201d until ready to serve. Add roasted chickpeas on top along with a drizzle of more dressing and sesame seeds.<\/li>\r\n<\/ol>“,”foot_note”:”Note: If omitting the nutritional yeast, reduce the tahini by 1\/2-1 tbsp as the yeast takes a bit of edge of the strong tahini flavour.\r\n\r\n \r\n\r\nDressing makes just over 1 cup”}

Coffee Shop Worthy Caramel Vanilla Bean Hazelnut Milk

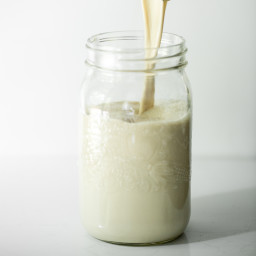
{“head_note”:”Decadent, luxurious, and totally splurge-worthy, this homemade hazelnut milk is fit for a high end coffee shop and it pairs perfectly in a cup of coffee or black tea. I use a mix of soaked hazelnuts and almonds, but feel free to use all hazelnuts if you prefer. It’s lightly flavoured with notes of caramel (from Medjool dates), cinnamon, and a whole vanilla bean and I imagine you could turn it into a chocolate hazelnut milk quite easily by adding a bit of dutch-processed cocoa powder. This recipe is lightly adapted from my Homemade Almond Milk recipe<\/a>.”,”instructions”:”

    \r\n \t

  1. Place hazelnuts and almonds in a bowl and cover with water. It\u2019s preferred to soak them overnight (for 8-12 hours) in the water, but you can get away with soaking for 1-2 hours in a pinch.<\/li>\r\n \t
  2. Rinse and drain the soaked hazelnuts and almonds. Place nuts into a blender along with water, pitted dates, vanilla bean, cinnamon, and salt (if using).<\/li>\r\n \t
  3. Cover and blend on highest speed for 1 minute or so.<\/li>\r\n \t
  4. Place a nut milk bag (here is the bag I love<\/a>) over a large bowl and slowly pour the milk mixture into the bag. Gently squeeze the bottom of the bag to release the milk. This process can take 3-5 minutes, so be patient. You should be left with about 1 cup of pulp in the bag. See my tips below on using the leftover pulp.<\/li>\r\n \t
  5. Rinse out blender and pour the milk back in. Now, pour it easily into a Mason jar and secure with lid. Chill in the fridge. It will stay fresh for 2-3 days. Give the jar a good shake before enjoying. Drink it alone, use it in cereal or smoothies, make hot oatmeal, and one of my favourites – use as a creamer in coffee or black tea.<\/li>\r\n<\/ol>“,”foot_note”:”1) If your dates or vanilla bean are dry\/stiff, soak in water to soften before use. You can also use another sweetener of your choice like maple syrup instead of dates. Same goes for vanilla \u2013 feel free to use vanilla extract for a more subtle vanilla flavour.\r\n\r\n2) Ideas for using leftover pulp: stir into oatmeal or muffin batter, add to smoothies, make crackers, or you can even dehydrate it and then blend it up to make hazelnut meal. You can freeze it for a later use too.\r\n\r\n3) You might be wondering \u2013 If I don\u2019t have a nut milk bag<\/a> can I use a fine mesh sieve?<\/em> Yes you can. I don’t find the milk gets as smooth compared to using a nut milk bag, but if you strain it several times, it comes out decent. Also, feel free to try a cheesecloth (you can even line the sieve with a layer of cheesecloth).”}