Author Archives: Angela Liddon

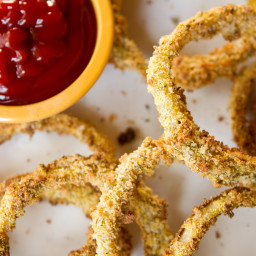
Crispy Baked Onion Rings

{“head_note”:”Crispy, flavourful, and good-for-you, these onion rings make a great snack or addition to any meal. I could also see a big batch of these being made for a party served with a homemade dip. To make these gluten-free, use gluten-free bread crumbs and gluten-free flour (and of course, double check the rest of your ingredients). Also, keep in mind, you\u2019ll have coating leftover that isn\u2019t used up.\r\nInspired by Fresh<\/a> and my Crispy Tofu Strips<\/a>.”,”instructions”:”

    \r\n \t

  1. Preheat oven to 425\u00b0F and line a large baking sheet with parchment paper or spray with cooking oil. Slice onion into rings, 3\/4 inch in width (larger than shown in pictures as I made mine too thin), and reserve about 15-22 or so, wrapping up the leftovers for another use.<\/li>\r\n \t
  2. In a shallow dish, whisk together the batter ingredients (flour, broth, cornstarch).<\/li>\r\n \t
  3. In another shallow dish, whisk together the coating ingredients (cornmeal, breadcrumbs, nutritional yeast, salt, sesame seeds, garlic powder, and herbs).<\/li>\r\n \t
  4. With a fork, dip an onion ring into the batter, coating all sides. Now transfer it to the coating mixture and toss it around a bit. Use a clean & dry hand to scoop up coating and sprinkle it all over the ring. If at any time your hands get sticky or coated, simply rinse and dry before starting again. Place onion rings on prepared baking sheets and repeat for the rest. Don\u2019t worry if things get messy or they don\u2019t coat \u201cperfectly\u201d\u2026just consider them rustic and call it a day! You will have coating leftover that isn\u2019t used up.<\/li>\r\n \t
  5. 5. Bake for about 18 minutes at 425\u00b0F, flipping once after 10 minutes. You can broil them for a minute or two at the end to brown. Serve with your favourite dip or ketchup. These are best served immediately.<\/li>\r\n<\/ol>“,”foot_note”:””}
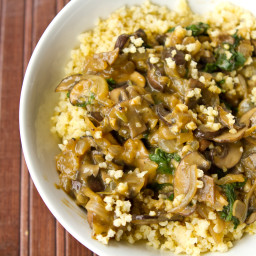
Cozy Millet Bowl with Mushroom Gravy and Kale

{“head_note”:”Feeling cozy? Snuggle up with this comforting bowl of vegan goodness. The dish feels rich without the heaviness that usually comes with traditional gravy.”,”instructions”:”

    \r\n\t

  1. Toast millet (optional): In a pot or skillet with a lid, toast the millet over medium heat, stirring frequently, until it starts popping. Be careful you don\u2019t burn it. The goal here is a light toast. Remove from heat. Cook millet: Bring a medium-sized pot of 1 cup water, a pinch of salt, and 1\/2 cup uncooked millet to a low boil. Reduce heat to low and cover with tight-fitting lid (with no air holes). Simmer for 15-20 minutes or so. Remove from heat and let sit for 5 minutes covered. Remove lid and fluff with fork. Set aside.<\/li>\r\n\t
  2. Meanwhile, grab a large skillet and heat oil over medium heat. Add in chopped onions and garlic and saut\u00e9 for about 5 minutes.<\/li>\r\n\t
  3. Add the sliced mushrooms and saut\u00e9 for about 12 minutes longer, stirring as necessary. Now stir in the rosemary, nutritional yeast, and tamari. Cook for a few minutes.<\/li>\r\n\t
  4. In a small bowl, whisk together the broth and cornstarch until clumps are gone, and then stir into the mushroom mixture. Stir in kale. Cook for another 5-6 minutes or so, until slightly thickened. Portion millet into two bowls and serve the mushroom gravy on top.<\/li>\r\n<\/ol>“,”foot_note”:”This mushroom gravy just screams comfort food. Check out this deliciousness\u2026″}

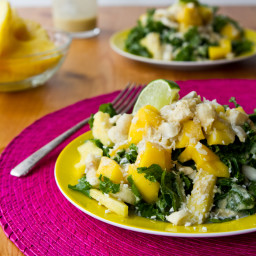
Tropical Mango, Banana, Pineapple Kale Salad with Creamy Pineapple Lime Coconut Dressing

{“head_note”:”The next best thing to going on a tropical vacation. Let\u2019s call this a staycation salad, shall we?”,”instructions”:”1. In a blender, blend all dressing ingredients until smooth.\r\n2. Meanwhile, prepare the kale and add about 2\/3 of the dressing to the kale and massage it in with your fingers. While it marinates, chop the fruit.\r\n3. Mix everything together, top with coconut and mac nuts, and serve.”,”foot_note”:””}

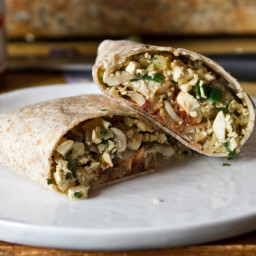
High Protein Vegan Breakfast Burrito

{“head_note”:”This burrito is a great way to change up your normal breakfast routine. Best of all, it makes 4 servings so you can store the leftover scramble in the fridge and simply heat and go for a quick breakfast all week long. Feel free to play around with the ingredients and seasonings depending on what you have in your fridge. Don\u2019t like tofu? Try swapping it out for black beans or chickpeas!”,”instructions”:”

    \r\n\t

  1. Press tofu: Rinse the tofu with water and place a couple kitchen towels on the counter. Wrap the tofu with another towel, place another towel on top, and finally place several heavy cookbooks on top. Let sit for at least 20 minutes to soak out the water. Alternatively, you can use a tofu press if you have one.<\/li>\r\n\t
  2. Meanwhile, heat a large skillet with 1 tsp oil over medium heat. Saut\u00e9 garlic and onion for a few minutes over medium heat. Add in the diced potato and mushrooms and saut\u00e9 for 12 minutes, reducing heat if necessary and stirring frequently so it doesn\u2019t stick to the bottom.<\/li>\r\n\t
  3. Remove tofu from towels and dice on chopping board. You want the tofu very small (see picture below). Now, reduce heat to low and stir in the nutritional yeast, tofu, fresh herbs, lemon juice, and season with salt and pepper to taste. Continue cooking on low until potato is cooked through, only a few more minutes, if necessary.<\/li>\r\n\t
  4. Add 3\/4 cup of the mixture on a large tortilla wrap, spoon on salsa, and top with Daiya cheese and chopped green onion if desired.<\/li>\r\n<\/ol>“,”foot_note”:”This baby packs in the protein. Add a wrap and it\u2019s easily over 22 grams of protein per burrito.”}

Homemade Vegan Caesar Cocktail

{“head_note”:”Is this a vegan version of a Caesar cocktail or is it an adapted version of the Bloody Mary? I can\u2019t decide. Whatever you call it, this is one fantastic drink with a whopping 4 servings of vegetables per 500 ml glass. Be sure to add the seasonings to taste and you can\u2019t go wrong.”,”instructions”:”

    \r\n \t

  1. In a large bowl or pitcher, add the vegetable juice. Now whisk in the rest of the ingredients all to taste.<\/li>\r\n \t
  2. Grab two 500-ml glasses and rim the edge with a lime wedge. Now dip glass rim into a shallow bowl of celery salt. Pour drink into glasses and garnish with a lime wedge, celery stalk, and ice. Serve immediately.<\/li>\r\n<\/ol>“,”foot_note”:””}
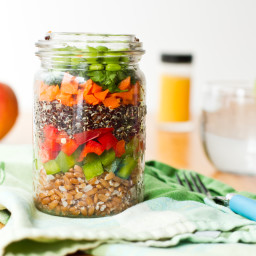
Make Ahead Layered Salad With Oil-Free Orange Ginger Dressing

{“head_note”:”Just like the Whole Foods salad, but now made in the comfort of your own home. With some advance prep work, you can enjoy this salad all week long.\r\n\r\nInspired by Whole Foods”,”instructions”:”

    \r\n\t

  1. In a medium-sized pot, add quinoa and 1.5 cups water. Bring to a boil, reduce heat to low, cover, and simmer, until fluffy, about 15-20 minutes, watching closely so it doesn\u2019t burn. Do the same for the wheatberries, in another pot, but add 2 cups of water and cook until tender and chewy, likely cooking for about 5 mins longer than the quinoa.<\/li>\r\n\t
  2. Meanwhile, chop the vegetables. In a bowl or jar, whisk together the dressing ingredients and set aside.<\/li>\r\n\t
  3. When the grains have cooked, grab your 500-ml mason jars (if layering), and add into each: 1\/2 cup wheatberries, 1\/4 cup green pepper, 1\/4 cup red pepper, 1\/2 cup quinoa, 1\/4 cup carrots, 2 tbsp parsley, and 1\/4 cup edamame per mason jar. You may have to push it down a bit. Repeat as necessary. Makes enough for 4 mason jars, with a bit leftover. Alternatively, you can just mix the salad together into a big bowl along with the dressing. Will keep in the fridge for 5-6 days.<\/li>\r\n<\/ol>“,”foot_note”:”Dressing makes four 1\/4 cup servings”}

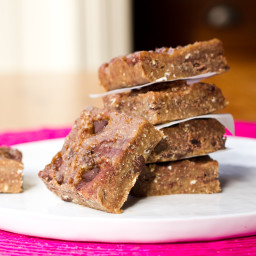
Vegan Cookie Dough Freezer Fudge

{“head_note”:”Attention all cookie dough lovers! This fudge tastes just like cookie dough, but better. The sweet almond and oat base gives this dough a rich and buttery flavour, while doing without all the refined ingredients. I call this freezer fudge because it needs to be kept in the freezer to stay firm. Slice it up into squares, store in an air-tight container, and you have cookie dough \u201cfudge\u201d whenever the craving strikes. To make gluten-free, just swap the oats for certified gluten-free oats.”,”instructions”:”

    \r\n \t

  1. In a medium-sized pot, heat the coconut oil over medium heat. Stir in the milk and sugar and bring to a low boil. Immediately, reduce heat to low and stir for a couple minutes until sugar is dissolved. Stir in the mashed banana. Turn off heat and stir in the salt and vanilla. Set aside.<\/li>\r\n \t
  2. In a high speed blender, blend the oats until a flour forms. Add to a large bowl. Repeat process for the almonds, being sure not to over-process them as you don\u2019t want the oils to release. Add to bowl and gently break apart any almond flour clumps with your fingers. Stir in the cinnamon.<\/li>\r\n \t
  3. Pour wet mixture over the dry mixture and stir well until no flour remains. Place bowl in the freezer for 30 minutes. Remove and stir in the chocolate chips.<\/li>\r\n \t
  4. Line an 8-inch square pan with two pieces of parchment paper (one going each way). Scoop the cookie dough into the pan. Dip a spoon in water and spread it out until smooth. This dough will be very hard to spread, but don\u2019t worry. Place in the freezer for 1 hour and then cut into squares and enjoy straight from the freezer. Store in the freezer in an air-tight container.<\/li>\r\n<\/ol>“,”foot_note”:””}
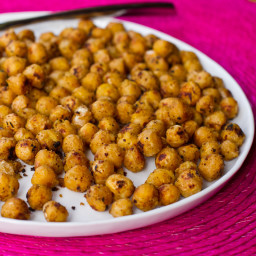
“Battered” Fried Chickpeas

{“head_note”:”Bored of plain chickpeas? The nutritional yeast and seasonings give the chickpeas a thin coating and a ton of flavour, perfect for popping into your mouth. Keep in mind that the chickpeas don\u2019t get crispy, but they do firm up a bit. I used garlic powder instead of fresh garlic in this recipe because the powder gives it more of a coating, like flour would. Add them to a salad, mix them up with chickpea pesto in a wrap, or just eat them plain. Note: You can also scale down the recipe depending on how many chickpeas you have to use up.”,”instructions”:”

    \r\n\t

  1. Heat 1 tbsp oil in a medium-sized skillet over medium heat.<\/li>\r\n\t
  2. Meanwhile, drain and rinse the chickpeas. When the skillet has pre-heated (chickpeas should sizzle on it), carefully add the drained chickpeas to the skillet. Be very careful as they will sizzle and crackle in the oil and it may splash you.<\/li>\r\n\t
  3. Fry the chickpeas, stirring every 20 seconds or so, over medium heat. After a few minutes, stir in the rest of the ingredients to taste. The chickpeas will have a thin coating on them. Fry for about 5-6 more minutes, stirring frequently and making sure they don\u2019t burn. If they are starting to burn, reduce heat. They should be golden and lightly charred in some parts.<\/li>\r\n<\/ol>“,”foot_note”:”Enjoyed with the chickpea basil pesto, they did not last long!”}

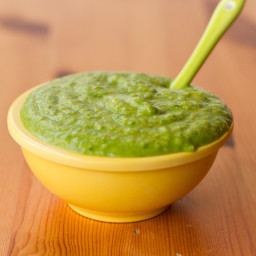
Chickpea Basil Pesto

{“head_note”:”If your food processor isn\u2019t broken, it\u2019s all downhill from here. Use this flavourful, lightened-up pesto on sandwiches, fried chickpeas, wraps, tofu, crackers, and more”,”instructions”:”

    \r\n\t

  1. With the food processor running, drop in the peeled garlic cloves through the top opening until minced.<\/li>\r\n\t
  2. Scrape down the sides of the bowl, and add in the oil, lemon juice, and basil. Process until smooth, stopping to scrape down the bowl as needed.<\/li>\r\n\t
  3. Add in the chickpeas and optional nutritional yeast. Process again until smooth. Add salt to taste and process. You can add a bit more oil or water to achieve your desired consistency. Scoop into a jar or air-tight container. Will keep in the fridge for 1 week or so.<\/li>\r\n<\/ol>“,”foot_note”:””}
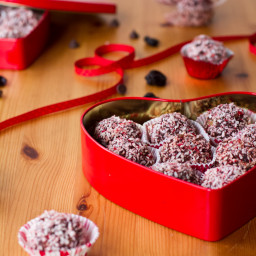
Dark Chocolate Cherry Walnut Truffles

{“head_note”:”Similar to my Chocolate Macaroon Truffles<\/a>, but with a slight tart cherry flavour, hint of almond extract, and walnut crunch. To make the truffles, I soaked and blended dried tart cherries with a bit of sweetener (my immersion blender mini processor worked great for this) and folded it into the truffle mixture with a touch of almond extract. To dress them up for Valentine\u2019s Day, roll the truffles in pink-dyed shredded coconut. Be sure to use a great tasting chocolate here for the best outcome.”,”instructions”:”

    \r\n \t

  1. Preheat the oven to 325\u00b0F and toast the chopped walnuts for 12 minutes. Set aside.<\/li>\r\n \t
  2. Meanwhile, soak the cherries in a bowl of water for about 10 minutes. Drain and add to food processor (or mini immersion processor like I used) along with 2 tbsp agave or other sweetener. Process until finely chopped.<\/li>\r\n \t
  3. In a medium-sized pot, heat the chocolate chips over low heat, stirring as necessary. Add in the coconut milk and stir well. Add toasted walnuts, cherry mixture, and almond extract. Stir again until combined. Now add the kosher salt to taste. The salt should give the sweetness a bit of a pop. Add a touch more sweetener if necessary to achieve your desired taste.<\/li>\r\n \t
  4. Spoon the truffle mixture into a bowl and place in the freezer, uncovered, for 90 minutes, stirring every half hour. After 90 mins, stir again and transfer bowl to the fridge for another 20 minutes until chocolate is firm and workable.<\/li>\r\n \t
  5. In a small bowl, mix together the coconut and food colouring until pink. When the truffle mixture is firm enough to handle, roll into small balls (you can use wet fingers if necessary- it will be very sticky!) and then roll into coconut mixture until you have about 23 balls. Store in an air-tight container in the freezer or fridge (they will become very soft at room temperature). They should keep for a couple weeks in the freezer in an air-tight container. I like to place mine in a baggy first, then in a container, to prevent freezer burn.<\/li>\r\n<\/ol>“,”foot_note”:””}