Author Archives: Angela Liddon

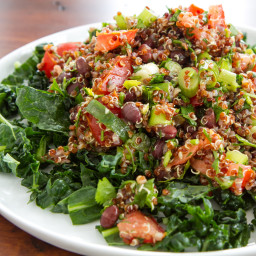
Adzuki Bean and Quinoa Tabbouleh Salad with a Twist

{“head_note”:”Inspired by Fresh Restaurant\u2019s All Star Salad.”,”instructions”:”

    \r\n\t

  1. Adzuki beans: Soak the dry beans overnight in water OR use the quick soak method like I did: Place beans in a pot and cover with water. Bring to a boil and then turn off the heat and let it sit for 1-2 hours. After soaking, drain and rinse the beans and then place back into the pot with new water, covering the beans with water by about 2-3 inches. Bring water to a boil and then reduce heat to low-medium, simmering for about 35-45 minutes. Watch closely and add more water if necessary. Alternatively, you can use canned beans for a time-saver.<\/li>\r\n\t
  2. Sweet potato: Meanwhile, preheat oven to 425F. Line a baking sheet with parchment paper. Slice a sweet potato into 1cm rounds. Lay flat on baking sheet at bake for about 15 minutes each side, watching closely so it doesn\u2019t burn.<\/li>\r\n\t
  3. Quinoa: Add 3\/4 cup of dry quinoa and about 1 & 1\/4 cups water in a medium-sized pot. Stir. Bring to a boil and then reduce heat to low and cover with lid, simmering for about 15-20 minutes and watching closely. Quinoa will be light and fluffy when ready and the water will be absorbed.<\/li>\r\n\t
  4. Dressing: Whisk together all dressing ingredients and season to taste. Or feel free to use a mini processor if you have one.<\/li>\r\n\t
  5. Tabbouleh: Combine the drained & cooked beans, quinoa, and chopped vegetables in a large bowl. Pour on the entire amount of dressing and stir well. Season to taste. Makes about 5.5-6 cups and should keep for at least a few days in the fridge.<\/li>\r\n\t
  6. To assemble the salad: Add 1 cup shredded kale onto a plate or large bowl. Spoon on 1.5 cups of tabbouleh on top. Garnish with goji berries, pepita and hemp seeds, and a handful of sprouts (all optional). Finally, add the grilled or baked sweet potato rounds on the side.<\/li>\r\n<\/ol>“,”foot_note”:””}
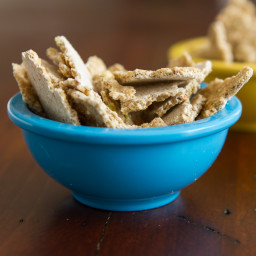
Vanilla Cinnamon Buckwheat Crispies

{“head_note”:”Inspired by: One Lucky Duck”,”instructions”:”

    \r\n\t

  1. Place buckwheat groats in a bowl and cover with water. Soak for 1-2 hours. Drain and rinse.<\/li>\r\n\t
  2. Place all ingredients into a food processor except for the salt. Process until mostly smooth. Add salt to taste and adjust sweetener if preferred.<\/li>\r\n\t
  3. Spread out the entire mixture onto 1-2 dehydrator trays lined with non-stick dehydrator mats. Spread out very thin.<\/li>\r\n\t
  4. Dehydrate for about 8 hours at 105F. When you are able to lift off the mixture, do so and break it up into a bunch of small pieces. Dehydrate for another 1-2 hours, or until crisp. Enjoy immediately and store the leftovers for 2-3 days in a container or baggie.<\/li>\r\n<\/ol>“,”foot_note”:””}
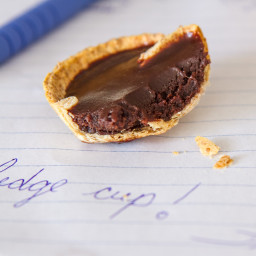
One Bite Cookie ‘n Fudge Cups

{“head_note”:”Adapted from: Chocolate covered strawberries from scratch<\/a>, chocolate chip cookie pota\u2019dough dip<\/a>, and one-bite pizzas with loaded pizza sauce<\/a>.”,”instructions”:”

    \r\n \t

  1. For the tortilla cups: Preheat the oven to 375\u00b0F and grab a mini cupcake tin. No need to grease it as they will pop right out.<\/li>\r\n \t
  2. With a cookie cutter (or even kitchen sheers), cut 2.5-inch circles out of the wraps and push into the mini cupcake molds. Repeat for the rest & save the scraps for making cinnamon toast crunch.<\/li>\r\n \t
  3. Bake at 375\u00b0F for 10-12 minutes, watching very closely near the end. They should be golden and crisp, but not too brown. If using regular-sized cupcake tins, cut your tortilla into quarters and push one into each mold. Cooking time may vary if using larger cupcake tins.<\/li>\r\n \t
  4. For the fudge sauce: In a small pot, whisk together the maple syrup, coconut oil, nut butter, and sifted cocoa powder over low to medium heat. Whisk for a couple minutes until all the coconut oil is melted and remove from heat immediately.<\/li>\r\n \t
  5. To assemble: Add 1 teaspoon of fudge sauce into each baked cup. Twirl the cup around so it coats all sides. You can also double the fudge sauce and fill the cups if preferred. Place on a plate lined with parchment paper (to catch drippings) and into the freezer for about 15 minutes, or until firm. Remove and serve with a dollop of chilled Chocolate Chip Cookie Pota\u2019Dough Dip on top. This is optional, but recommended! Store in a container in the fridge.<\/li>\r\n<\/ol>“,”foot_note”:””}
Healthy Chocolate Chip Cookie Pota’Dough Dip

{“head_note”:”At first glance, you\u2019d never guess that potatoes make up the base of this healthy, yet extremely decadent tasting, cookie dough dip! Cooked potatoes are pureed to create a silky, creamy, and luxurious dip, naturally sweetened with maple syrup. Cashew nut butter, vanilla, and fine grain sea salt enhance the cookie dough flavour, all topped off with dark chocolate chips. Make sure you use piping hot, freshly cooked potatoes for the silkiest dip texture. Cold, leftover potatoes result in a fluffy mashed potato texture which I did not care for in the slightest. Keep in mind that you will be able to detect the potato flavour slightly (less so when chilled), but we didn\u2019t seem to mind one bit.”,”instructions”:”

    \r\n \t

  1. Peel and roughly chop the potatoes. Cook the potatoes in a pot of water on the stove-top until tender, about 20 minutes. Drain.<\/li>\r\n \t
  2. In a food processor, immediately add the cooked potatoes (still hot), nut butter, vanilla, and maple syrup. Do not use cold potatoes or the texture will be like mashed potatoes instead of a silky dip. Process until smooth for at least a couple minutes, stopping to scrape down the bowl as necessary. Make sure no clumps remain. You want it super smooth. Adjust sweetness if necessary and add salt to taste.<\/li>\r\n \t
  3. Place mixture in the fridge for a minimum of 30 minutes (preferably an hour) to chill and then stir in the chocolate chips just before serving. Serve the dip with graham crackers, fresh fruit, cookies, cinnamon sugar pita chips, or my favourite way, a spoon.<\/li>\r\n<\/ol>“,”foot_note”:”Tips and Substitution questions: This recipe tastes best without any ingredient subs. Changing the ingredients may result in a reduced cookie dough flavour or strange texture. 1) I used yellow-skinned potatoes, however white skinned potatoes might also work. I\u2019ve been told sweet potatoes result in a \u201csweet potato pie\u201d taste and strange texture. I also don\u2019t suggest using red or baking potatoes. 2) You may want more or less sweetener than I used depending on your taste buds. Adjust to taste. I don\u2019t suggest swapping out the sweetener with honey as a reader said it didn\u2019t produce a great flavour. 3) For gluten-free, be sure to check all your labels to ensure they are certified GF.”}

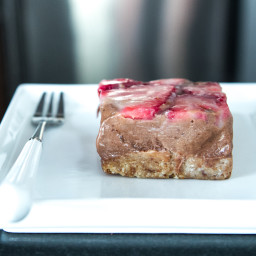
No-Bake Chocolate Coconut Ice Cream Torte

{“head_note”:”No-bake. All-natural. Vegan. Gluten-free option. Soy-free. Refined sugar-free. Chocolate Coconut Ice cream. Lovely almond-oat-date-coconut oil base. Fresh, seasonal berries on top. It\u2019s light enough for summer, but rich enough for a special treat.”,”instructions”:”

    \r\n\t

  1. Grease a 10 inch springform cake pan with coconut oil very well. I used a springform pan so it would be easy to slice and get out of the pan. Set aside.<\/li>\r\n\t
  2. In a food processor, process the crust ingredients together until crumbly and sticky. You want it to look a bit coarser than sand. Press this mixture into the prepared cake pan, evenly and firm.<\/li>\r\n\t
  3. In the processor (give it a quick wipe!), add all the torte ingredients except the agave, salt, and strawberries. Process until super smooth. Add the agave and salt to taste. Adjust sweetness if necessary. Pour this mixture on top of the prepared crust and smooth out.<\/li>\r\n\t
  4. Carefully place the torte in the freezer (uncovered is fine) for several hours until firm. I\u2019m not entirely sure how long it will take to set since I started mine in the fridge. When it\u2019s ready and firm enough, place on the counter for about 10 minutes to soften up a bit. Slice, garnish with berries, and serve immediately. Will melt quickly! I sliced my pieces into squares\/triangles and made about 16 pieces.<\/li>\r\n<\/ol>“,”foot_note”:”I weighed the medjool dates with the pits still in them. I suggest weighing them if possible since medjool dates vary in size so much. For gluten-free version, use certified GF oats and check all other ingredients.”}

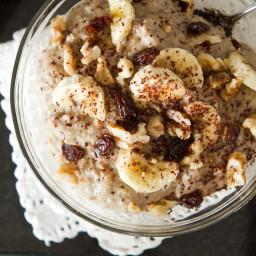
Gooey Banana Bread Batter Instant Steel Cut Oatmeal

{“head_note”:”Just like eating a big bowl of gooey banana bread batter, only better for you! If you like gooey, porridge-like breakfasts, you will go crazy for this one.\r\nInspired by Let Them Eat Vegan<\/a>.”,”instructions”:”

    \r\n\t

  1. In a high-speed blender, grind the steel cut oats and chia seeds into a flour. Remove and place into a medium-sized pot.<\/li>\r\n\t
  2. Stir in 2.5 cups of the milk and increase the heat to low-medium. Now stir in the mashed banana, the chopped banana, and 1 tbsp of maple syrup. Heat for 4-5 minutes, adding more milk if desired and reducing temperature if necessary.<\/li>\r\n\t
  3. Remove from heat and stir in the cinnamon (to taste), a pinch of salt, vanilla, and dash of nutmeg (optional).<\/li>\r\n\t
  4. Portion into bowls and top with chopped walnuts, raisins, and 1 tsp of pure maple syrup per bowl.<\/li>\r\n<\/ol>“,”foot_note”:””}

Chocolate Covered Strawberries From Scratch

{“head_note”:””,”instructions”:”

    \r\n\t

  1. Wash and pat the strawberries dry. Set aside.<\/li>\r\n\t
  2. In a small pot, whisk together the maple syrup, coconut oil, nut butter, and cocoa powder over low to medium heat. Whisk for a couple minutes until all the coconut oil is melted and remove from heat.<\/li>\r\n\t
  3. Dip strawberries into the chocolate mixture, coating most of the strawberry. Place onto a plate lined with parchment paper or on a wire rack. Repeat for the rest and sprinkle with coconut. Chill in the fridge to set.<\/li>\r\n\t
  4. If making the pink frosting: with a mini food processor, combine the icing sugar, strawberry, and jam until smooth. You may need to add a bit more icing sugar depending on the consistency of your jam. If you don\u2019t have a mini processor I suggest not using the whole strawberry and just mixing in a bit more jam into the icing sugar until the right consistency is achieved.<\/li>\r\n\t
  5. Spoon the frosting into a baggie and snip off the end. Pipe frosting onto the strawberries and place back in the fridge until firm.<\/li>\r\n<\/ol>“,”foot_note”:””}
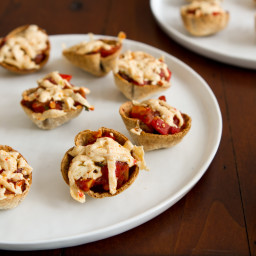
Easy One-Bite Pizzas with Loaded Pizza Sauce

{“head_note”:”I suggest serving these warm out of the oven, but you\u2019ll be happy to know that the crispy tortilla bowls didn\u2019t turn to mush after sitting for a couple hours in the fridge. They hold up very well and taste incredible straight from the fridge, cold, like leftover pizza! Have fun playing around with the toppings and mix-ins. Just like a regular pizza, it\u2019s very versatile depending on what you have in your fridge. Feel free to use the loaded pizza sauce on a regular pizza too!”,”instructions”:”

    \r\n\t

  1. For the tortilla bowls: Preheat the oven to 375F and grab a mini cupcake tin or a regular sized tin. No need to grease it as they will pop right out.<\/li>\r\n\t
  2. With a cookie cutter (or even kitchen sheers), cut 2.5-inch circles out of the wraps and push into the mini cupcake molds. Repeat for the rest & save the scraps for later.<\/li>\r\n\t
  3. Toast at 375F for 10-12 minutes, watching very closely. They should be golden and crisp, but not too brown. If using regular-sized cupcake tins, cut your tortilla into quarters and push one into each mold. Cooking time may vary if using larger cupcake tins.<\/li>\r\n\t
  4. For the sauce (skip if using store-bought): In a large skillet, heat the oil over medium heat. Now add in the chopped onion and garlic, and saut\u00e9 for a few minutes, reducing heat if necessary.<\/li>\r\n\t
  5. Add in the chopped mushrooms and red pepper and saut\u00e9 for another 8-10 minutes over medium heat.<\/li>\r\n\t
  6. Now stir in the crushed tomatoes and tomato paste, along with the basil, oregano, and thyme. Reduce the sauce and simmer for about 10 minutes until thickened. Season with salt and pepper to taste.<\/li>\r\n\t
  7. To assemble: Preheat your oven to the highest broil setting. Add a couple teaspoons of pizza sauce into the center of each bowl. Sprinkle with cheeze and place into the oven to broil on high for 1-2 minutes, or until the cheeze bubbles a bit. Watch very closely or it will burn. Serve warm!<\/li>\r\n<\/ol>“,”foot_note”:””}

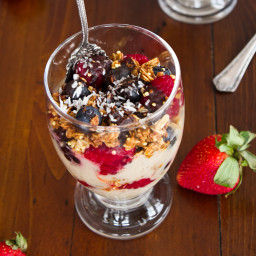
Easy Berry Parfaits

{“head_note”:””,”instructions”:”

    \r\n\t

  1. Peel and freeze your bananas until solid, preferably overnight. In a food processor, drop in the frozen banana chunks and process until creamy and smooth. Stop and scrape down the sides of the bowl as necessary. You can also give it a splash of almond milk to help it along. Nut butter is also a nice add in too.<\/li>\r\n\t
  2. Add the banana soft serve, granola, and fresh fruit in layers in a couple glasses or parfait dishes. Pour the chocolate sauce on top and serve immediately.<\/li>\r\n<\/ol>“,”foot_note”:””}