Author Archives: Angela Liddon

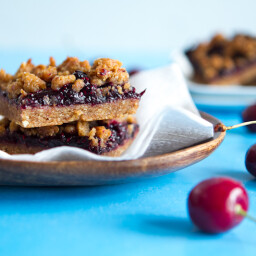
Triple Almond Cherry Crumble Squares

{“head_note”:”These are so wholesome I found them on my breakfast plate crumbled over blueberry vegan overnight oats<\/a> one morning. Enjoy them on their own or serve with a scoop of ice cream for dessert. I used agave in this recipe because I was out of maple syrup and it worked great. Feel free to use whichever you wish, keeping in mind that agave is a bit sweeter per tablespoon so you might need an extra tablespoon of maple syrup if you go that route. Be sure to poke holes in the dough with a fork before baking. I didn\u2019t do this and the dough puffed up on me in the middle, but it was easily fixed with a poke once out of the oven.\r\n\r\n \r\n\r\nAdapted from my Raspberry Almond Thumbprint Cookies<\/a>.”,”instructions”:”

    \r\n \t

  1. Preheat the oven to 350\u00b0F and line an 8-inch square pan with two pieces of parchment paper, one going each direction.<\/li>\r\n \t
  2. Place almonds into a high-speed blender and grind into flour, making sure not to process too long or the oils will release. Or use store bought almond meal (use approx 1.5 cups + 2 tbsp almond meal).<\/li>\r\n \t
  3. In a large bowl, whisk the dry ingredients together (almond meal, rice flour, ground flax, baking powder, and salt). Use your fingers to break up any clumps of almond meal. In a small bowl, mix together the almond butter, agave, and almond extract. Add wet mixture to dry mixture and stir until thoroughly combined. I got in there with my hands and kneaded the dough together a few times!<\/li>\r\n \t
  4. Set aside 1\/2 cup of packed dough for crumbling on top of the jam later. Press the rest of the dough into the prepared pan. You may need to lightly wet your fingers as it\u2019s sticky! Smooth it out and poke it with a fork about 8-10 times all over.<\/li>\r\n \t
  5. Pre-bake the almond base for 8 minutes at 350\u00b0F. Remove and set aside.<\/li>\r\n \t
  6. Meanwhile, prepare the chia seed jam (or just use about 3\/4-1 cup jam of choice). Add pitted cherries and agave into a medium-sized pot. Bring to a low boil and reduce heat to medium-low. Simmer for about 10 mins, stirring frequently. Stir in chia seeds and cook until thickened, about 5 mins more. Remove from heat and stir in the almond extract. Try not to burn your tongue shoveling it in your mouth!<\/li>\r\n \t
  7. Spread jam over the almond base and smooth out. Now crumble the reserved dough on top. Bake at 350\u00b0F for another 12-13 minutes or so, watching closely. Crumble topping will be golden when ready. Cool in pan on a wire rack before attempting to remove, about 30-45 mins. If you are impatient like me, just cut yourself a square right out of the pan while you wait!<\/li>\r\n<\/ol>“,”foot_note”:””}
Spicy BBQ Chickpea Burgers

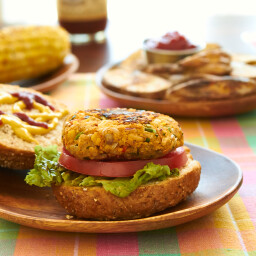
{“head_note”:”Vegan veggie burgers are a sensitive bunch, so take caution if adapting this recipe. If you enjoy Our Perfect Veggie Burger recipe<\/a>, you should also love of this one. This burger is less dry than the former with more moisture overall. As I mentioned above, you can probably use a food processor to speed things up, just be careful not to over-process the ingredients as the vegetables can release a lot of water when processed.”,”instructions”:”

    \r\n \t

  1. Methods to prepare chickpeas: 1) Soak dry chickpeas overnight, or for at least 8 hours, in a large bowl filled with water. When ready, drain and rinse the chickpeas. Place in a medium-sized pot with 3 cups of fresh water. Cover with lid and bring to a boil. Remove lid and place a small piece (~1\u201d x 2\u201d) of kombu (optional) into the pot with 1\/8th tsp salt. Cover again and simmer on low-medium for about 50 minutes, watching carefully after about 35-40. When cooked, chickpeas will be tender and some may have split open. Drain and rinse. Discard kombu. 2) Alternatively, you can use canned chickpeas or 3) the quick-soak method: Add 3 cups water and 1 cup dry chickpeas into a pot. Cover, bring to a boil, and immediately turn heat off. Keep covered and let sit for 1 hour. After 1 hour, drain and rinse chickpeas. Add into rinsed pot with 3 cups fresh water. Cook the same as method 1) above.<\/li>\r\n \t
  2. To cook rice: In a strainer, rinse the rice. Add 1\/2 cup dry rice into a pot with 1 cup water. Bring to a boil. Reduce heat to low, cover with lid, and simmer for about 25-30 minutes, watching closely and giving it a stir after 20. Add a touch more water if necessary.<\/li>\r\n \t
  3. Toast seeds: Preheat oven to 300\u00b0F. Toast sunflower and pepita seeds for about 12 minutes, or until lightly golden in colour. Set aside.<\/li>\r\n \t
  4. Chop vegetables. Finely chop the garlic, peppers, onion, and parsley. Grate carrot. Stir in half the salt. Set aside.<\/li>\r\n \t
  5. Mash chickpeas and rice: When chickpeas are ready, drain and rinse. Add the cooked chickpeas and rice into a large bowl. Make sure your rice is HOT as it helps it stick together and bind. Do not use cold rice. With a potato masher, mash very well, leaving some chunks for texture. You will need to use a lot of elbow grease to mash this up, but you want it really sticky so it\u2019s worth it! You can also pulse in a food processor.<\/li>\r\n \t
  6. Mix it all up: Preheat a large skillet over medium-high heat. With a wooden spoon, stir in the chopped vegetables into the mashed chickpea\/rice mixture. Now stir in the seeds, BBQ sauce, breadcrumbs, and ground flax. Add the salt and red pepper flakes to taste.<\/li>\r\n \t
  7. Shape patties & cook: Form 6-8 patties and pack dough together tightly. Spray the preheated skillet with oil. Cook the patties for about 4-5 minutes per side over medium-high heat (time will vary based on your temp). Burgers should be browned and firm when ready. You can also try grilling the patties (try pre-baking patties for 15 mins in the oven at 350\u00b0F before grilling).<\/li>\r\n<\/ol>“,”foot_note”:””}
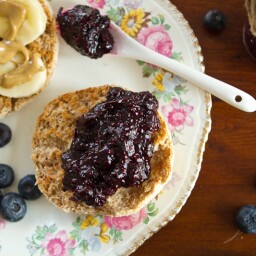
Magical Blueberry Vanilla Chia Seed Jam

{“head_note”:”Adapted from my strawberry chia seed jam<\/a>.”,”instructions”:”

    \r\n \t

  1. In a medium-sized non-stick pot, bring the blueberries and 3 tbsp of maple syrup to a low boil. Stir frequently, and reduce heat to low-medium to simmer for about 5 minutes. Lightly mash the blueberries with a potato masher or fork, leaving some for texture.<\/li>\r\n \t
  2. Stir in the chia seeds until thoroughly combined and cook the mixture down until it thickens to your desired consistency, or about 15 minutes. Stir frequently so it doesn\u2019t stick to the pot.<\/li>\r\n \t
  3. Once the jam is thick, remove from heat and stir in the vanilla extract. Add more maple syrup to taste if desired. Enjoy on toast, English muffins, oatmeal, vegan overnight oats, oat bars, tarts, cookies, banana soft serve, smoothies, and more. The jam should keep for at least a week in an air-tight container in the fridge.<\/li>\r\n<\/ol>“,”foot_note”:””}
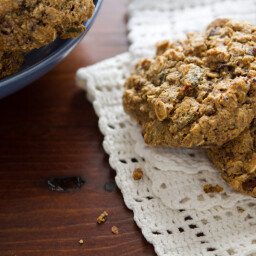
Happy Trails Adventure Cookies

{“head_note”:””,”instructions”:”

    \r\n \t

  1. Preheat oven to 325\u00b0F and toast pecans for 8-10 minutes, watching closely. Remove and set aside to cool. Turn oven temp to 350\u00b0F. Line a large baking sheet with parchment or grease with oil. Set aside.<\/li>\r\n \t
  2. Meanwhile, in a large bowl, whisk together the dry ingredients. In a separate smaller bowl, whisk together the wet ingredients.<\/li>\r\n \t
  3. In a mini processor (or by hand) process\/chop the pecans into small crumbs, just smaller than the size of peas. Stir into the dry ingredients.<\/li>\r\n \t
  4. Add the wet ingredients to the dry and stir well until combined. The dough will be very sticky, but not to worry. Fold in the mix-ins.<\/li>\r\n \t
  5. With lightly wet hands, grab about 2 tbsp dough and shape into a ball, packing firmly. Place on prepared baking sheet about 2 inches apart. Repeat for the rest, wetting hands every 4 cookies or so.<\/li>\r\n \t
  6. Bake at 350\u00b0F for 10-12 minutes (I baked for 11.5 mins). Cool on baking sheet for at least 10 minutes. When completely cooled, store in a glass jar or freeze for maximum freshness.<\/li>\r\n<\/ol>“,”foot_note”:”To make these gluten-free, using certified GF oats and check all other ingredients.\r\n\r\nIf you eat honey, you can probably use it as a sub for brown rice syrup. I do think the cookies need either brown rice syrup or honey for the cookies to hold together and retain that nice chewy texture. I don\u2019t recommend subbing it for more maple syrup.”}

Sneaky Red Lentil “Hummus”

{“head_note”:”Make this spread as a fun alternative to chickpeas! It\u2019s not only similar in appearance, but taste too. Red lentils also tend to be easier to digest, so if you have problems with chickpeas I encourage you to give this a try.”,”instructions”:”

    \r\n \t

  1. Pick through the lentils to make sure there are no pebbles and rinse in a small colander. In a medium-sized pot, add the lentils and 1 & 1\/4 cup water. Bring to a boil, reduce heat to low, and cover, simmering until the water is absorbed or about 10-13 minutes. Stir the lentils frequently to prevent them from sticking to the pot.<\/li>\r\n \t
  2. With the food processor running, drop in the clove of garlic to mince. Add the cooked lentils, along with the lemon juice, tahini, and olive oil. Process until smooth. Add a touch of water if necessary to thin out.<\/li>\r\n \t
  3. Add salt to taste and other herbs and seasonings if desired.<\/li>\r\n<\/ol>“,”foot_note”:””}
Easy Overnight Buckwheat Parfait

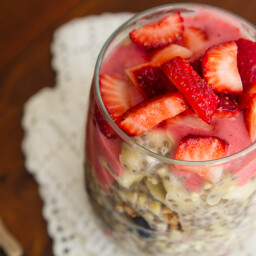
{“head_note”:”Similar to vegan overnight oats, but with a fun, crunchy texture. Roll out of bed and enjoy this no-cook parfait all summer long with barely any effort at all. Buckwheat and chia seeds are both high in protein and fibre and chia seeds contain all kinds of healthy omega fats. Add in some fruit and you have yourself a well-balanced breakfast.”,”instructions”:”

    \r\n \t

  1. Add the buckwheat groats into a bowl and cover with water. Stir. Place in the fridge overnight, or for at least a few hours, uncovered is fine.<\/li>\r\n \t
  2. In a separate bowl, whisk together the chia seeds, almond milk, banana, and optional cinnamon and vanilla. Whisk well until no chia clumps remain. Place in fridge overnight, uncovered is fine.<\/li>\r\n \t
  3. In the morning, rinse the buckwheat with cold water in a strainer until no slimy bits remain. Add rinsed and strained buckwheat into the chia mixture and stir well. Top with your desired toppings or make a parfait. Just before serving, drizzle a small amount of pure maple syrup on top to bring it all together.<\/li>\r\n<\/ol>“,”foot_note”:””}
Layered Raw Taco Salad for Two

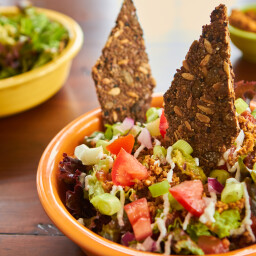
{“head_note”:”I like to think of this salad as a vitamin in a bowl<\/strong>. It\u2019s not only delicious, but literally bursting with nutrients and health. It lasted all of 3 minutes in front of me\u2026maybe less. Eric, who is not a guacamole fan, surprised me by devouring it also.\r\n\r\nDon\u2019t let the long ingredient list put you off; the entire recipe took me about 30 minutes or so. Feel free to adapt this salad depending on what you have in your kitchen.”,”instructions”:”

    \r\n \t

  1. Taco meat:<\/strong> In a food processor (or by hand), pulse (or chop) the ingredients until combined. Make sure to leave the walnuts chunky. Remove and set aside.<\/li>\r\n \t
  2. Cream sauce:<\/strong> Drain and rinse the soaked nuts. Add them into a processor and process. Stream in about 1\/2 cup water and a couple tbsp of lemon juice. Add more water as needed to achieve your desired consistency. The nut sauce should be super smooth and not grainy. Add salt to taste.<\/li>\r\n \t
  3. Guacamole:<\/strong> In a medium-sized bowl, mash the avocado flesh with a fork, leaving some chunks. Stir in the chopped tomato, red onion, lime juice, and seasonings to taste.<\/li>\r\n \t
  4. To assemble:<\/strong> (per bowl) Add a hefty base of greens in a large bowl followed by a heaping 1\/4 cup scoop of guacamole in the middle.<\/li>\r\n \t
  5. Spoon on 2 tbsp of salsa over the greens followed by half of the taco meat.<\/li>\r\n \t
  6. Add a couple tbsp of cream into a plastic baggie, snip off end, and pipe over top the taco meat.<\/li>\r\n \t
  7. Garnish with a chopped green onion and leftover chopped tomato and red onion. Place a few crackers into the salad before serving. If you find yourself with leftover lemon and lime juice like I did, place juice into a glass, fill with water, add liquid sweetener to taste, and serve over ice.<\/li>\r\n<\/ol>“,”foot_note”:”Walnut Taco Meat yields scant 1\/2 cup\r\n\r\n \r\n\r\nCashew or Macadamia cream yields 1 heaping cup\r\n\r\n \r\n\r\n3 Minute Guacamole yields 3\/4 cup”}

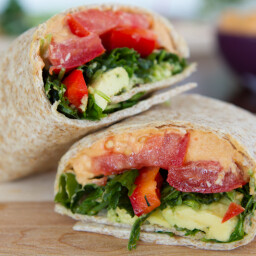
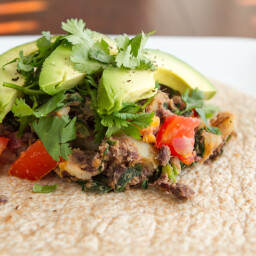
Spicy Potato ‘n Black Bean Burritos

{“head_note”:””,”instructions”:”

    \r\n \t

  1. In a medium-sized pot, add the chopped potatoes and cover with water. Bring to a boil and then reduce heat to medium. Gently boil\/simmer for about 12-15 minutes, or until just tender.<\/li>\r\n \t
  2. Meanwhile, preheat a large skillet with 1 tsp oil and saut\u00e9 the red onion over medium heat for a few minutes. After boiling the potatoes, drain and gently mash them up a bit, leaving some chunks for texture.<\/li>\r\n \t
  3. Add potatoes to the skillet mixture and saut\u00e9 for another 5-10 minutes or so, reducing heat if necessary.<\/li>\r\n \t
  4. Add in the diced jalapeno, tomato, chili powder, lime, and cumin. Season generously with salt and pepper and stir well, heating for a few minutes more.<\/li>\r\n \t
  5. Finally, stir in the kale and black beans and saut\u00e9 until heated through. Adjust seasonings to taste and portion on large or x-large tortilla wraps. Top with avocado, cilantro, and salsa\u2026or whatever you wish! Use leftovers on a salad for a fun twist.<\/li>\r\n<\/ol>“,”foot_note”:””}

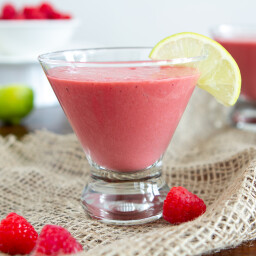
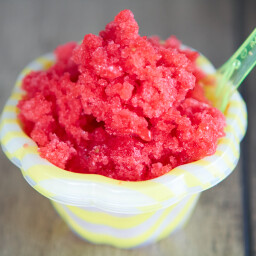
Summer Fever Strawberry Lime Granita

{“head_note”:”If you\u2019ve ever been afraid of making granita, fear not. It\u2019s incredibly easy and the outcome is surprisingly gourmet. It\u2019s also the perfect solution for summer fruit on its last legs. Strawberries, raspberries, peaches, apricots, cherries, etc should all work well. I fell in love with this strawberry lime flavour and I encourage you to try this out too. I used agave nectar in an effort to forgo sugar and I was really pleased with the outcome.”,”instructions”:”

    \r\n \t

  1. In a food processor, combine all ingredients and process until smooth. Adjust agave or lime juice to taste.<\/li>\r\n \t
  2. Pour mixture into a 9-inch square pan (or equivalent non-stick pan) and place into freezer for a couple hours, uncovered is fine. After a couple hours, scrape the mixture with a spoon or fork to break it up a little. You can repeat this process in another hour. It should be ready after 4-5 hours of freezing, but this may vary based on your freezer.<\/li>\r\n \t
  3. When it\u2019s firm enough, scrape\/shave it with a fork or spoon and serve it all fancy in a parfait glass \u2013 or my favourite way \u2013 straight from the pan! It\u2019s the best when it gets a bit melty and gooey. Oh man\u2026watch out! Cover and freeze leftovers in the freezer until ready to enjoy. I didn\u2019t bother covering it because I don\u2019t plan on it lasting long.<\/li>\r\n<\/ol>“,”foot_note”:””}