Author Archives: Angela Liddon

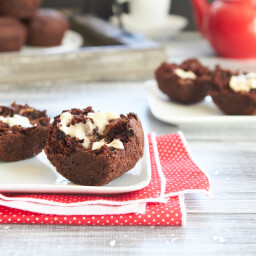
Oil-Free Chocolate Zucchini Walnut Muffins

{“head_note”:”Lightly sweet, whole wheat, and oil-free, these muffins make a special breakfast or take along snack. I love them with a pat of soy-free Earth balance to add a bit of moisture. Whole Wheat Pastry Flour works well in this recipe to create light muffins that are still 100% whole grain. You can also use all-purpose flour if that\u2019s all you have on hand. I don\u2019t recommend subbing the pastry flour for regular whole wheat flour as the muffins will likely turn out too dry and dense\r\n\r\n \r\n\r\nAdapted from: Oil-Free Zucchini Bread<\/a>.”,”instructions”:”

    \r\n \t

  1. Preheat oven to 350\u00b0F and lightly spray muffin with oil or grease with Earth Balance.<\/li>\r\n \t
  2. Mix flax egg in a small bowl and set aside. Grate zucchini using a grater box (regular grate size). Set aside.<\/li>\r\n \t
  3. Mix almond milk and apple cider vinegar (or sub fresh lemon juice) in a small bowl and set aside. It will curdle, but this is the point as we\u2019re making vegan buttermilk.<\/li>\r\n \t
  4. In a large mixing bowl, mix together the dry ingredients (flour, cocoa powder, baking powder, baking soda, salt, and sugar).<\/li>\r\n \t
  5. Mix together the wet ingredients (flax egg, almond milk mixture, maple syrup, and vanilla) and then pour over dry ingredients. Stir until just combined. Fold in the chocolate chips, walnuts, and shredded zucchini.<\/li>\r\n \t
  6. Spoon batter into prepared muffin tin filling each tin 3\/4 of the way full. Bake for about 15-17 minutes at 350\u00b0F, or until muffins slowly spring back when touched. A toothpick should come out mostly clean. Cool in tin for 5 minutes. With a knife, loosen around the muffin edge and transfer to a cooling rack until completely cool.<\/li>\r\n<\/ol>“,”foot_note”:””}
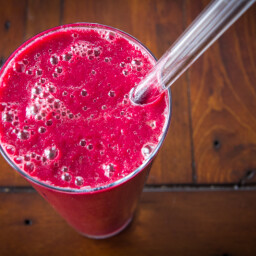
Neon Pink Smoothie Juice

{“head_note”:”I call this smoothie juice because it\u2019s a cross between a smoothie and a veggie juice. The texture comes out thick and foamy, but you have the added benefits of the fibre in there to move the digestive track right along. These juices aren\u2019t overly sweet or filling, so I enjoy them as an addition to a normal breakfast or simply as a refreshing drink on its own.”,”instructions”:”

    \r\n \t

  1. In a high-speed blender, add the cucumber and blend on low speed to break it up. Now add the beet and apple. Blend, starting on a lower speed, and gradually increase the speed. I used my Vitamix plunger stick a lot to push it down and stir it as it was coming together. If needed, add a bit of water.<\/li>\r\n \t
  2. Blend on highest speed for 1-2 minutes. Add in citrus juice to taste and about 4 ice cubes. Blend again until smooth.<\/li>\r\n \t
  3. Serve immediately.<\/li>\r\n<\/ol>“,”foot_note”:””}

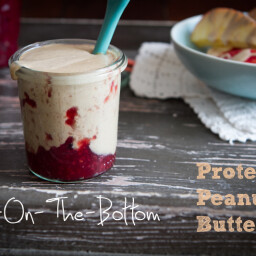
Fruit-On-The-Bottom Protein Peanut Butter

{“head_note”:””,”instructions”:”

    \r\n \t

  1. In a food processor, add peanut butter, almond milk, protein powder, cinnamon, and vanilla. Process until smooth, stopping to scrape down the bowl as needed.<\/li>\r\n \t
  2. Add sweetener to taste and process again until blended. Add a pinch of salt if desired.<\/li>\r\n \t
  3. Scoop into a jar and swirl in your favourite jam. Will keep in the fridge in a sealed container for at least 1.5-2 weeks. This spread will thicken up considerably once chilled.<\/li>\r\n<\/ol>“,”foot_note”:””}
Peanut Butter, Jam, and Banana Soft Serve Popsicles

{“head_note”:”These are soft, ice cream like popsicles with swirls of PB and jam throughout. For a fun twist, try stirring in some shaved chocolate. When freezing, shaved chocolate is nice because you don\u2019t have to bite into big frozen chocolate chips.”,”instructions”:”

    \r\n \t

  1. In a food processor, add 4 roughly chopped frozen bananas along with a few tablespoons of almond milk. Whirl in the processor until smooth, stopping to scrape down the sides of the bowl as needed.<\/li>\r\n \t
  2. Now add in two tablespoons of peanut butter and process again until combined & smooth.<\/li>\r\n \t
  3. Remove bowl from base and stir in the jam and another tablespoon of peanut butter, leaving thick ribbons of jam and PB throughout the soft serve. Do not overmix.<\/li>\r\n \t
  4. Spoon the soft serve into popsicle molds (it made enough for 6 small popsicles for me, however this will vary based on the size of your molds). Push the mixture all the way to the bottom with the end of a spoon. Freeze for at least 6-8 hours, or overnight. Run hot water over the mold to help the popsicle slide out. I found they were a bit difficult to get out of the mold, but I\u2019m not sure if that was due to my strange shaped popsicle mold or simply the consistency of the popsicle.<\/li>\r\n<\/ol>“,”foot_note”:””}
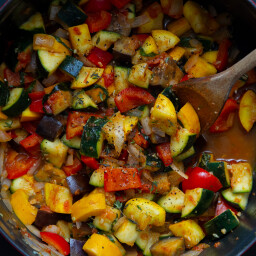
Ratatouille-Inspired Summer Veggie Dish

{“head_note”:””,”instructions”:”

    \r\n \t

  1. In a large cast-iron pot or skillet, heat the oil, garlic, and onion over medium heat for about 5 mins, stirring frequently and reducing heat if necessary.<\/li>\r\n \t
  2. Add the chopped zucchini, eggplant, and red pepper, as they are ready to go in. Season with salt and pepper and cook over medium heat for about 10 minutes. I like giving the veggies a sprinkle of Herbamare to bring out the flavours.<\/li>\r\n \t
  3. Stir in about 3\/4-1 cup of your favourite marinara sauce (I used The Linen Collection Marinara from Costco!) along with fresh herbs. Cook until vegetables are tender, but still a bit firm and not overcooked \u2013 about 5-7 more minutes.<\/li>\r\n \t
  4. Serve with a crunchy baguette, rice, potatoes, couscous, quinoa, or simply as a side.<\/li>\r\n<\/ol>“,”foot_note”:””}
Summer Veggie Rolls with Spicy Peanut Lime Sauce

{“head_note”:””,”instructions”:”

    \r\n \t

  1. Press the tofu while you prepare the filling and sauce. For pressing instructions, see here.<\/li>\r\n \t
  2. For the filling: Julienne the vegetables (slice into long thin strips). Set aside, along with peanuts.<\/li>\r\n \t
  3. For the sauce: In a mini processor, process the sauce ingredients until smooth. Adjust to taste. You may prefer more sweetener, tamari, oil, or lime juice. Or mince everything by hand and whisk.<\/li>\r\n \t
  4. Slice pressed tofu into long thin strips. You likely won\u2019t need the entire block.<\/li>\r\n \t
  5. Set up a roll making station and gather all of your ingredients in one area. Place a tea towel on the counter and fill a very large bowl with hot tap water. Dip one rice paper wrapper into the water and carefully submerge it once it gets soft. Hold it under water for about 10 seconds, or until soft, and remove from water carefully. Place it onto the tea towel and unfold any corners that may have rolled up.<\/li>\r\n \t
  6. Add the filling ingredients in the centre of the wrapper (see pictures in post). Be careful not to overfill or the wrappers will tear. Sprinkle with peanuts and a sprinkle of salt.<\/li>\r\n \t
  7. Roll the two sides of the rice wrapper inward and then flip the bottom over top the filling and roll forward. Place roll on a plate and cover with damp paper towels. Repeat for the rest.<\/li>\r\n \t
  8. Serve the rolls immediately with the peanut dipping sauce. If you have any leftover vegetables enjoy them dipped in the sauce on the side. Sauce should keep for at least a week in a sealed container in the fridge. Rolls will keep for 1-2 days in the fridge.<\/li>\r\n<\/ol>“,”foot_note”:””}
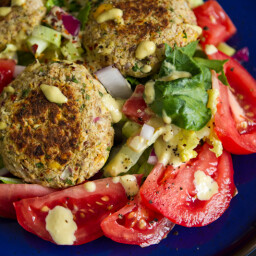
Falafel with a Twist

{“head_note”:””,”instructions”:”

    \r\n \t

  1. If cooking chickpeas from scratch soak overnight (or for 8 hours) and then follow these directions for cooking. Alternatively, use 2 & 1\/4 cup canned chickpeas. Note: A reader suggests mashing the canned chickpeas (if using) with a potato masher instead of processing them. This will prevent them from forming a paste.<\/li>\r\n \t
  2. In a food processor, with the processor running, drop in 3 garlic cloves to mince. Now add most of the chickpeas (reserving about 1\/4 cup to stir in later), and process a few seconds to chop. Now add the onion, lemon juice, and herbs. Process until just combined, being careful not to over-process. You want to leave texture. Preheat a large skillet over medium-high heat.<\/li>\r\n \t
  3. Scoop the mixture into a large bowl. Stir in the ground flax, breadcrumbs, cumin, reserved chickpeas, and salt and pepper to taste. Shape into patties, about 1\/4 cup each and really pack the dough in tightly so it holds together.<\/li>\r\n \t
  4. Grease pre-heated skillet with cooking oil and then cook the patties on medium-high heat for about 5 minutes on each side, or until golden. For the salad: Add chopped tomato, red onion, a drizzle of hot sauce, cucumbers, falafel, and my Lightened Up Lemon Tahini Dressing.<\/li>\r\n<\/ol>“,”foot_note”:””}

Peanut Butter Bomb Smoothie for Two

{“head_note”:””,”instructions”:”

    \r\n \t

  1. In the blender, grind the rolled oats into a flour or just use oat flour. In a food processor, process together the ingredients for the crunch balls (except for the rice crisp cereal). Adjust to taste. If batter is dry, add a touch more liquid. Stir in the cereal and form into tiny balls. I made about 19. Store leftovers in freezer.<\/li>\r\n \t
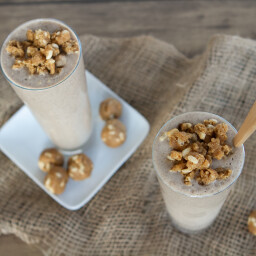
  2. In a blender, add the smoothie ingredients, except for the crunch balls, and blend until smooth. Add ice if desired. Pour into two glasses and top with crumbled crunch balls. Serve immediately with a spoon!<\/li>\r\n<\/ol>“,”foot_note”:”Peanut butter crunch balls yield is 19-20 mini bites”}

Speedy Summer Hemp Power Salad

{“head_note”:””,”instructions”:”

    \r\n \t

  1. Chop vegetables and place into a large bowl.<\/li>\r\n \t
  2. In a mini processor, process the dressing ingredients together until mostly smooth. You can also mash\/chop\/mix the dressing ingredients by hand.<\/li>\r\n \t
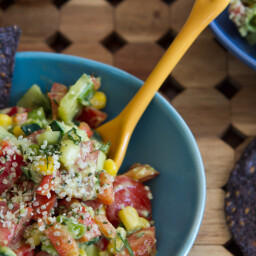
  3. Pour dressing onto vegetables and stir well. Now, stir the hemp seed into the salad. Season to taste and serve. Sprinkle with hemp seed on top because it\u2019s pretty! This salad is best served immediately. With time, water will release from the vegetables and pool at the bottom.<\/li>\r\n<\/ol>“,”foot_note”:””}

Grilled Tofu with Pineapple Salsa and Coconut Rice

{“head_note”:””,”instructions”:”

    \r\n \t

  1. Press Tofu: Remove tofu from package and rinse with water. Press the tofu for at least 20 minutes following these directions<\/a>. After pressing, slice the tofu block down the middle, lengthwise to make two halves. Now slice each piece diagonally to make 4 triangles total. Brush each side with cooking oil and then season generously. If you don\u2019t enjoy plain tofu try using a marinade prior to cooking.<\/li>\r\n \t
  2. Coconut Rice: Preheat oven to 300\u00b0F. Toast shredded coconut for about 8-12 minutes until golden. Rinse brown rice in colander and then place into a medium-sized pot. Add one 400ml can coconut milk (equal to 1 & 3\/4 cups). Stir. Bring to a boil and then reduce heat immediately to low. Cover with lid and cook for about 25-30 minutes until most of the coconut milk is absorbed and rice is tender. Remove from heat, keep lid on, and let it \u201csteam\u201d for another 10 minutes or so. Stir in brown sugar and optional coconut oil. Garnish with toasted shredded coconut.<\/li>\r\n \t
  3. Salsa: Meanwhile, add all salsa ingredients into a large bowl, adjusting to taste. My pineapple was very watery, so I dumped the pineapple into a colander and let the water drain for about 10 minutes prior to using. Feel free to do this too or just leave it as is.<\/li>\r\n \t
  4. Grill tofu: Preheat the BBQ grill for about 15-30 minutes (depending on your grill) on high. Turn heat down to medium\/low. Carefully, grease the grill with a cooking oil safe for high heat (e.g., canola, sunflower, safflower, or sesame). Grill the tofu for about 5 minutes on each side (this will vary). Be sure not to overcook the tofu or it will be dry.<\/li>\r\n \t
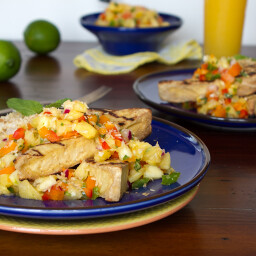
  5. To serve: Spoon coconut rice on a plate and sprinkle with a dash of nutmeg if desired. Add grilled tofu next and then spoon over a generous amount of pineapple salsa. Sprinkle everything with more toasted coconut and garnish with mint leaves. Feel free to serve with a bit of BBQ sauce on the side to spruce up the tofu.<\/li>\r\n<\/ol>“,”foot_note”:””}