Author Archives: Angela Liddon

Quick and Easy Creamy Tomato Mushroom Pasta

{“head_note”:”A quick and easy tomato mushroom pasta thrown together in 20 minutes.”,”instructions”:”

    \r\n \t

  1. Bring a large pot of water to a boil. Add in your pasta and cook until Al dente, about 7-10 minutes.<\/li>\r\n \t
  2. Meanwhile, heat a large skillet or wok over medium heat. Saut\u00e9 the garlic and onion in the olive oil for about 5 minutes, or until translucent.<\/li>\r\n \t
  3. Stir in the sliced mushrooms and diced tomato and cook for another 8-10 minutes or so over medium-high heat, until some of the water cooks off.<\/li>\r\n \t
  4. Stir in the fresh basil, nutritional yeast, tomato paste, oregano, thyme, red pepper flakes. Add salt to taste. Simmer for another 5 minutes or so and adjust seasonings to taste if desired.<\/li>\r\n \t
  5. Drain pasta and add back into the pot. Stir in the pasta sauce, heat, and serve immediately with Cheezy Garlic Bread<\/a> if you\u2019d like.<\/li>\r\n<\/ol>“,”foot_note”:””}

Vegan and Gluten Free Chocolate Cake Balls

{“head_note”:””,”instructions”:”

    \r\n \t

  1. Chill can of coconut milk overnight in the fridge. Preheat oven to 350\u00b0F and spray a muffin tin with oil. You can also bake a whole cake instead of cupcakes, but the cooking time will likely be longer.<\/li>\r\n \t
  2. In a large bowl, stir the milk with the apple cider vinegar. Let it sit for a few minutes to curdle \u2013 this makes vegan buttermilk.<\/li>\r\n \t
  3. With an electric beater, beat in the oil, vanilla, and sugar into the almond milk mixture.<\/li>\r\n \t
  4. Add the dry ingredients (gluten-free flour, cocoa powder, baking soda, salt). Beat mixture until smooth.<\/li>\r\n \t
  5. Evenly distribute the batter among the cupcake tin. I like to use an ice cream scoop with a spring release button. Bake cake at 350\u00b0F for about 20-23 minutes, or until the cake springs back when touched.<\/li>\r\n \t
  6. Cool cupcakes for 5 minutes in the tin and then carefully transfer to a cooling rack for another 10 minutes. Crumble cake into a large bowl.<\/li>\r\n \t
  7. Scoop out coconut cream from the can (if you need a refresher, see this post). Add a little bit of cream at a time to the crumbled cake and mix it in with your hands. You will only need to use enough to make it come together (I used about 1\/2 \u2013 3\/4 cup coconut cream) and you don\u2019t want to oversaturate the cake with cream.<\/li>\r\n \t
  8. Shape dough into 1-inch balls and freeze the balls for 30-60 minutes until firm.<\/li>\r\n \t
  9. Melt chocolate and coconut oil in a small pot over lowest heat. When 2\/3 of the chips are melted, remove from heat, and stir until chips are melted. Dip the balls into the chocolate with a fork and swirl around until fully coated. Tap off excess and transfer to a cooling rack so the chocolate can drip off (put paper towel underneath). Sprinkle with chopped nuts, coconut, or sprinkles. Transfer to fridge or freezer until the chocolate is set. Store in the fridge until ready to enjoy.<\/li>\r\n<\/ol>“,”foot_note”:”Note: I imagine coconut oil or extra virgin olive oil both work fine as subs for grapeseed oil.”}

Bananas Foster Baked Oatmeal

{“head_note”:””,”instructions”:”

    \r\n \t

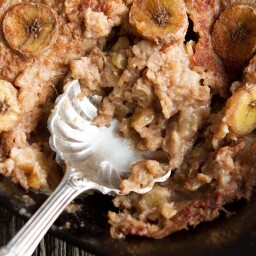
  1. Preheat oven to 350\u00b0F and lightly grease a 5-6 cup casserole dish.<\/li>\r\n \t
  2. Stir all of the oatmeal ingredients in a large bowl until combined. Set aside while you prepare the Banana Foster.<\/li>\r\n \t
  3. Add coconut oil, maple syrup, and Kahlua into a skillet. Increase heat to medium and whisk until combined. When the mixture starts to simmer and bubble, add the chopped bananas and stir well until coated in syrup. Sprinkle on cinnamon. Saut\u00e9 for about 5 minutes, reducing heat if necessary, until the bananas soften. Remove from heat and stir in the vanilla.<\/li>\r\n \t
  4. Stir the banana mixture into the oatmeal mixture and scoop it into your casserole dish. Bake uncovered for about 40-45 minutes at 350\u00b0F or until the top is golden and with a thin firm layer on top and a soft middle. You will think it\u2019s undercooked at first, but the oatmeal will firm up as it cools. Straight from the oven it has the texture of stove-top oatmeal, but when cooled you can pretty much slice it into squares. I\u2019ve also been known to eat this cold straight from the fridge for a snack.<\/li>\r\n<\/ol>“,”foot_note”:””}

Hasselback Potatoes

{“head_note”:”An easy, (mostly) fuss-free Hasselback potato.”,”instructions”:”

    \r\n \t

  1. Preheat oven to 425\u00b0F.<\/li>\r\n \t
  2. Wash potatoes and pat dry.<\/li>\r\n \t
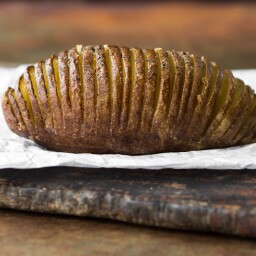
  3. Thinly slice the potatoes, but don\u2019t slice all the way through. I leave about 1-2cm or so at the bottoms un-cut.<\/li>\r\n \t
  4. Grab your thinly sliced garlic and stuff each slice with a small piece of garlic. I used 1 clove per potato. Stuffing with garlic helps expand the potato allowing the oil to drizzle right in.<\/li>\r\n \t
  5. Drizzle all over with oil. Sprinkle generously with Herbamare (or fine grain sea salt) and freshly ground black pepper.<\/li>\r\n \t
  6. Bake at 425\u00b0F for 50-70 minutes until tender, depending on the size of your potato. My Russets took about 70 minutes. When I use Yukon Gold, they only take about 50 minutes. Keep an eye on them, time will vary.<\/li>\r\n \t
  7. Serve with any desired topping you wish \u2013 pesto, salsa, vegan sour cream<\/a>, hummus<\/a>, ketchup, or simply enjoy with a pat of non-dairy butter.<\/li>\r\n<\/ol>“,”foot_note”:””}
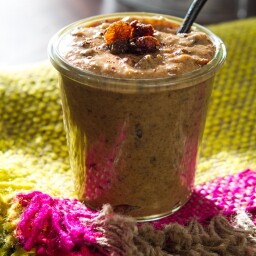
Vanilla-Cinnamon Almond Milk

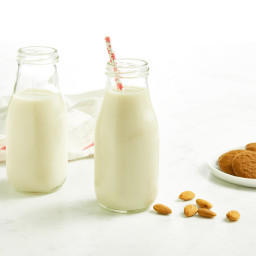
{“head_note”:”Creamy, lightly sweet, and so satisfying\u2014homemade almond milk is a true luxury! My favourite flavour combo is a whole vanilla bean, a couple Medjool dates, cinnamon, and a pinch of sea salt. The secret to an intense vanilla flavour is blending the entire vanilla bean; just chop it up and toss the whole bean into the blender. Not to worry if you don’t have one on hand though: a half a teaspoon of vanilla extract will work just fine in a pinch. This milk is delicious served with cookies, cereal, in a smoothie, or simply on its own.”,”instructions”:”

    \r\n \t

  1. Place almonds in a bowl and cover with a couple inches of water. Soak the almonds in water overnight (about 8 to 10 hours). For a quick-soak method, soak the almonds in boiled water for 1 hour. Rinse and drain well.<\/span><\/li>\r\n \t
  2. Place drained almonds into a blender along with the filtered water, pitted dates, and chopped vanilla bean.<\/li>\r\n \t
  3. Blend on the highest speed for 1 minute.<\/li>\r\n \t
  4. Place a nut milk bag over a large bowl and slowly pour the almond milk mixture into the bag. Gently squeeze the bottom of the bag to release the milk. This process can take a few minutes so be patient!<\/li>\r\n \t
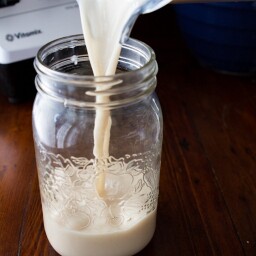
  5. Rinse out blender and pour the milk back in. Whisk in the cinnamon and sea salt.<\/li>\r\n \t
  6. Using a funnel, pour into a large glass jar and secure lid. Store in the fridge for up to 3 to 4 days. I recommend storing in the coldest spot in the fridge (typically the back) rather than on a door. Shake the jar very well before drinking as the mixture separates when sitting.<\/li>\r\n<\/ol>“,”foot_note”:”
      \r\n \t

    • * If your dates or vanilla bean are dry\/stiff, soak in very hot\u00a0water for 30 minutes before using. Drain well. You can use another sweetener of your choice like maple syrup instead of the pitted dates.<\/li>\r\n<\/ul>“}

Easy BBQ Tofu

{“head_note”:”A super easy BBQ Tofu recipe that comes together in minutes.”,”instructions”:”

    \r\n \t

  1. Press tofu for at least 30-45 minutes, or if you are able, overnight in a tofu press. I got a Tofu Xpress<\/a> recently and it\u2019s my new best friend.<\/li>\r\n \t
  2. Preheat a skillet over medium-high heat. Slice tofu into about 32 rectangles (or as many as you desire).<\/li>\r\n \t
  3. Add 1 tbsp of oil to the skillet and then carefully add the tofu. Be careful as the oil can splatter. Spread tofu out into a single layer, season with salt, pepper, and garlic powder, and fry for about 5 minutes over medium-high heat. (Tediously) flip each piece of tofu (a couple forks works for me) and fry for another 5-6 minutes, or until golden all over and charred in some spots. I like to cook it until it\u2019s nice and crisp.<\/li>\r\n \t
  4. Remove from heat and stir in the BBQ sauce to coat the tofu. Serve immediately with more sauce on the side if desired.<\/li>\r\n<\/ol>“,”foot_note”:””}
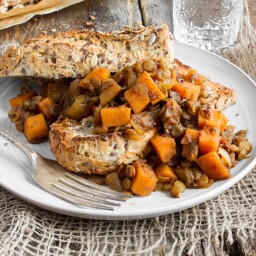
Maple Baked Lentils with Sweet Potato

{“head_note”:”My spin on maple baked beans using hearty, chewy lentils! \u00a0A bit of apple cider vinegar rounds out the sweetness of the dish and I encourage you to adjust the amounts to your own taste as you may like more or less pop from the vinegar. Serve this over some toasted bread, or even with a salad, and you have yourself a budget-friendly vegan meal during the peak of winter. To save on cook time, make the lentils beforehand and simply mix everything together and pop into the oven.”,”instructions”:”

    \r\n \t

  1. Rinse and drain lentils. In a large oven-safe pot or Dutch oven*, add lentils along with 4 cups of water. Turn heat to high and bring to a boil. Reduce heat to low-medium and simmer for about 30 minutes, uncovered, stirring often. Add more water if necessary. Lentils are ready when they are just tender (but not mushy) and most of the water is absorbed.<\/li>\r\n \t
  2. Preheat oven to 375\u00b0F. Add onion, garlic, apple, sweet potato, tomatoes (with juice), maple syrup, blackstrap molasses, mustard, salt, and pepper to the pot with the lentils. Stir well to combine. Add half of the apple cider vinegar (you\u2019ll add the rest later if desired).<\/li>\r\n \t
  3. Cover with lid (or tin foil in a pinch) and bake at 375\u00b0F for 20-25 minutes. Remove from oven, uncover, and stir. Bake for another 8-12 minutes, uncovered, until the sweet potato is tender. Stir in the rest of the apple cider vinegar if desired and season with salt and pepper to taste before serving.<\/li>\r\n \t
  4. Serve over toasted bread or with a salad.<\/li>\r\n<\/ol>“,”foot_note”:”If you don\u2019t have an oven-safe pot or Dutch oven, simply transfer the mixture into a casserole dish and cover with tin foil before baking.\r\n\r\nDice the sweet potato small to decrease cook time.”}

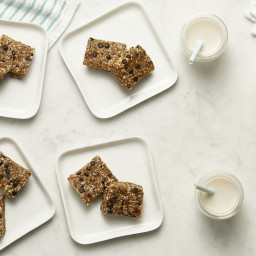
Chocolate Chip Cookie Dough Energy Bars

{“head_note”:”These are my take on the popular Chocolate Chip Cookie Dough Larabars. Now you can make them at home for a fraction of the cost! I like to store them in the freezer so I have an energy bar ready whenever I need a pick me up. For thick squares, press the dough into a 9×5-inch loaf pan. For thinner bars, use an 8×8-inch square pan.”,”instructions”:”

    \r\n\t

  1. Add cashews into a food processor and process for 3 to 4 seconds, until a coarse meal forms.<\/li>\r\n\t
  2. Add in the pitted dates and vanilla. Process until the mixture comes together, for about 15 seconds, or longer if needed. The mixture should stick together easily when you squeeze it between your fingers. If it doesn\u2019t stick or it\u2019s still a bit crumbly, add a very small amount of water (1 teaspoon at a time) and process it again. I usually add between 1 to 2 teaspoons of water.<\/li>\r\n\t
  3. Finally, add the salt, to taste, and the chocolate chips, and process briefly to combine.<\/li>\r\n\t
  4. Line a loaf pan or an 8-inch square pan with a piece of parchment paper so that there’s overhang to lift out the bars after freezing. Scoop the mixture into the pan and smooth out with your hand until it\u2019s level. Push down firmly all over the mixture. The more you pack it down the better the bars will hold together. Roll out with a pastry roller if you have one.<\/li>\r\n\t
  5. Freeze, uncovered, for at least 15 to 20 minutes and then slice into bars. For on-the-go, wrap bars in plastic wrap or tin foil and store in the fridge or freezer. I prefer these straight from the freezer. Most of all, hide from other members of the family!<\/li>\r\n<\/ol>“,”foot_note”:”
      \r\n\t

    • *If your dates are stiff or dry, soak the dates in boiling water for 30 minutes before beginning. Drain well and quickly pat dry before use.<\/li>\r\n<\/ul>“}

Homemade Oat Milk

{“head_note”:””,”instructions”:”

    \r\n \t

  1. Rinse and drain 1 cup of steel-cut oats. [I\u2019ve heard you can also use oat groats.} Place oats into a bowl and cover with water. Soak for around 20 minutes. You can soak longer (even overnight) if desired.<\/li>\r\n \t
  2. After soaking, rinse and drain the oats very well. This step is very important because you want to rinse off any of the oat slime that has occurred from soaking. Yes, oat slime is a thing…it happens.<\/li>\r\n \t
  3. Scoop oats into your blender and add 3 cups water. I prefer using 3 cups of water as opposed to 4 cups because it yields a creamier\/thicker milk. Feel free to add more water if you wish, just know the more water you add the thinner your milk will be.<\/li>\r\n \t
  4. Cover with lid and turn the blender on a low speed, increasing the speed gradually, and blend at the highest speed for about 8-10 seconds only. You don\u2019t need to completely pulverize the oats.<\/li>\r\n \t
  5. Place a fine sieve over a large bowl and pour the oat milk very slowly into the sieve. You might have to do this in a couple batches depending on the size of your sieve.<\/li>\r\n \t
  6. With a spoon, gently push down on the oat pulp so the milk flows through. This helps push the milk into the bowl, leaving the oat pulp behind in the sieve.<\/li>\r\n \t
  7. Scoop the oat pulp into a small bowl and set aside. Clean out your blender and sieve with a good rinse of water until no pulp residue remains.<\/li>\r\n \t
  8. Place sieve over top of your blender and pour the milk in once again and strain.<\/li>\r\n \t
  9. Rinse out the bowl and sieve once again. Strain the milk through the sieve into the bowl (optional). If you don\u2019t want to strain again, simply add in your mix-ins and blend on low.<\/li>\r\n \t
  10. I whisked in 1.5 tbsp maple syrup, 1 tsp vanilla, 1\/4 tsp fine grain sea salt (enhances sweetness), and 1\/4 tsp cinnamon. These mix-ins turn your oat milk from bland to hmm-this-could-be-decent-when-cold.<\/li>\r\n \t
  11. I strained my milk one last time into a clean blender. Then I poured the milk from the blender into a clean mason jar for storage in the fridge.<\/li>\r\n<\/ol>“,”foot_note”:”Notes: This should last in the fridge in a sealed container\/jar for 4-5 days. Use it in smoothies, oatmeal, cereal, baking, or drink it straight. If you want to use it in a savoury recipe, you can omit the sweetener, vanilla, and cinnamon. Homemade milk does separate (remember there are no added emulsifiers!), so be sure to give your milk a very good shake (or stir) before using. No biggie. A little non-dairy milkshake never hurt anyone. I just don\u2019t want you to be alarmed when you see the heavier ingredients sitting at the bottom of the jar.\r\n\r\nThis should last in the fridge in a sealed container\/jar for 4-5 days. Use it in smoothies, oatmeal, cereal, baking, or drink it straight. If you want to use it in a savoury recipe, you can omit the sweetener, vanilla, and cinnamon.”}

Chunky Cinnamon Raisin Peanut Butter

{“head_note”:”One of my all-time favourite homemade nut butters, if not the favourite!”,”instructions”:”

    \r\n \t

  1. Place 2 cups of peanuts and macadamia nuts into food processor and process until the mixture resembles peanut butter, stopping to scrape down the side of the bowl if necessary. This can take up to 10 minutes.<\/li>\r\n \t
  2. Process in the cinnamon, salt, Sucanat, and vanilla, adding gradually. The sweetener will at first thicken the peanut butter quite a bit, but keep processing and the heat will eventually melt the sugar and smooth out the nut butter once again. If it still looks too thick, keep processing!<\/li>\r\n \t
  3. Pulse in the raisins and 1\/3 cup of reserved peanuts, leaving it very chunky.<\/li>\r\n<\/ol>“,”foot_note”:”
      \r\n \t

    • Macadamia nuts, thanks to their high oil content, create a super silky and decadent nut butter, however this recipe should work without it. It just might come out a bit thicker.<\/li>\r\n \t
    • I do not recommend subbing the dry granulated sugar for a liquid sweetener like maple syrup. Maple syrup has ruined batches of my nut butter in the past because it can thicken and create a strange texture in nut butter. If you don\u2019t have Sucanat, brown sugar may work but you probably won\u2019t need to use as much.<\/li>\r\n<\/ul>“}