Author Archives: Angela Liddon

3-Layer Nut-Free Dream Cups

{“head_note”:”These dream cups are free of nuts, but you’d never know it! The bottom layer is made up with pure coconut butter. It adds a firm, snappy texture contrast to the naturally sweetened sunflower seed butter and homemade chocolate layers. Try these cups as a nut-free alternative to my popular Raw Almond Butter Cups<\/a>.”,”instructions”:”

    \r\n \t

  1. If necessary, melt the coconut butter over the lowest heat in a saucepan until liquid.<\/li>\r\n \t
  2. Spoon a scant teaspoon of melted coconut butter into a mini silicone cupcake mold and spread out evenly. You can probably use mini paper liners if you don’t have silicone. Repeat for the rest (I made 8 mini cups). Place in the freezer.<\/li>\r\n \t
  3. Prepare the middle layer: In a small bowl, stir together the sunflower butter, maple syrup, oil, vanilla (if using), and salt until smooth. Add a scant tablespoon of filling on top of each coconut butter layer. Smooth out and place in the freezer.<\/li>\r\n \t
  4. Prepare the top layer: Add the coconut oil into a small saucepan and melt over low heat. Remove from heat and whisk in the cocoa powder, maple syrup, and salt until smooth.<\/li>\r\n \t
  5. Add a tablespoon of melted chocolate on top of each cup. Top with a teaspoon of large flake coconut and gently press down.<\/li>\r\n \t
  6. Freeze for about 25 minutes until solid. Allow to sit at room temperature for 5 minutes before enjoying. Store leftovers in the fridge, or for longer storage, the freezer.<\/li>\r\n<\/ol>“,”foot_note”:”To make homemade coconut butter, process 3-4 cups of unsweetened shredded coconut in a heavy-duty food processor for 7-10 minutes, until smooth and liquid. Make sure the coconut you are using isn’t stale or it won’t turn into butter. Leftovers will keep in the fridge in an air tight container for at least a month, but often much longer. You can also use store-bought coconut butter.”}

Happy Digestion Smoothie

{“head_note”:”This green smoothie is packed with digestion-enhancing and immune-boosting foods like pineapple, parsley, ginger, and avocado. Don’t worry though; its sweet flavour makes it friendly for green smoothie newbies! If you are adverse to the spiciness of ginger, I recommend starting with half the amount and adding to taste from there. This smoothie also keeps well overnight. I will often make\u00a0a double batch, save leftovers in a small mason jar in the fridge overnight, and enjoy it the next morning.”,”instructions”:”

    \r\n \t

  1. Add all ingredients into a blender and blend on the highest speed until super smooth.<\/li>\r\n<\/ol>“,”foot_note”:”
      \r\n \t

    • Feel free to add a handful of baby spinach to boost the nutrient power even more.<\/li>\r\n \t
    • Fresh mint also gives this smoothie a nice digestion boost (not to mention a delicious minty flavour).<\/li>\r\n<\/ul>“}

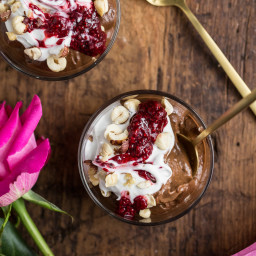
Raw Chocolate Pudding

{“head_note”:”This raw, completely natural, no-sugar-added banana cacao almond butter pudding will make your heart skip a beat! It won’t give you a sugar crash either. I expect that kids will love this recipe too. If you don’t have raw cacao powder you can try using unsweetened cocoa powder, although you will likely have to adjust the amount to taste. I recommend adding it 1 tablespoon at a time and taste testing as you go. Roasted almond butter would also work lovely. And because I will probably be asked – the banana flavour does come through quite a bit in this pudding.”,”instructions”:”

    \r\n \t

  1. Add all pudding ingredients into a food processor and process until smooth, stopping to scrape down the sides of the bowl as needed. I like to let the machine run for a couple minutes to get it super smooth.<\/li>\r\n \t
  2. Portion the pudding into a container and chill in the fridge for an hour or so. Or you can serve it right away with the recommended toppings. Best enjoyed within 12-24 hours or so.<\/li>\r\n<\/ol>“,”foot_note”:”Tips: 1) You want to avoid using overly ripe, brown bananas in this recipe or the banana flavour will overwhelm. Yellow with a few spots is best. 2) If you want an \”instant\” cold pudding, refrigerate the bananas and avocado prior to making this pudding. 3) For the coconut whipped cream recipe, see here<\/a>. 4) For toasted hazelnuts, roast the nuts at 300F for 10-14 minutes until the skins start to fall off the nuts. Place toasted nuts in an old tea towel and rub vigorously to remove the skins. 5) For my Raspberry Chia Seed Jam recipe, see here<\/a>. 6) I don’t recommend using an avocado that is bruised as it will be bitter. A soft, but still green, avocado is perfect for this recipe.”}

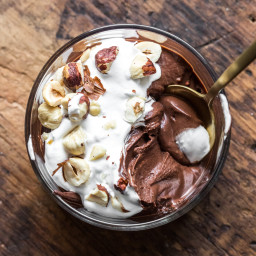
Vegan Chocolate Mousse with Whipped Cream and Toasted Hazelnuts

{“head_note”:”Did you know that you can make an intense chocolate mousse with just chocolate and water? The brilliant technique of melting chocolate with water and then whisking it into a mousse over a chilled bowl was created by Herv\u00e9 This. The original recipe says to nestle the bowl of melted chocolate in a larger bowl filled with ice, but I found this took a large amount of ice (we usually don’t have more than a tray or two on hand) and plenty of whisking time. So I ultimately settled on my own method which is placing a mixing bowl in the freezer for a few hours (or overnight) and whisking the melted chocolate directly in the frozen bowl. My mousse whipped up in exactly two minutes and thirty seconds and I didn’t have to use a single piece of ice…which is awesome because filling up the ice cube tray is the bane of my existence! I can’t emphasize enough that you need to use a good-quality chocolate that you love the taste of because the mousse is going to taste exactly like the chocolate you select. I used a 70% dark chocolate, but anything between 55-70% would be nice. Just check that it’s dairy-free.\u00a0 I also recommend reading over the entire recipe before you begin as it moves rather quickly once you are in the whisking stage. This recipe is inspired by the Magic Chocolate Mousse recipe in the cookbook, Vegan Chocolate<\/em> by Fran Costigan.”,”instructions”:”1. Place a medium mixing bowl in the freezer for a few hours or overnight. This step is necessary so the chocolate can be whipped into mousse.\r\n\r\n2. In a medium pot, add the water, chocolate, salt, and oil. Melt the chocolate over low heat, stirring frequently, until the mixture is smooth. Remove from heat and stir in the vanilla and sweetener.\r\n\r\n3. Place a small cereal-sized bowl next to you on the counter. Remove the \u201cfrozen\u201d mixing bowl from the freezer. Immediately pour the melted chocolate mixture into the frozen bowl. With a metal whisk, whisk the chocolate vigorously, until the chocolate just<\/em> starts to thicken (this took me exactly 2 mins. and 30 seconds – any longer and it would have seized up). As soon as you see that the mixture is thickening and you can start to see lines in the chocolate from the whisk, immediately pour the chocolate into the bowl beside you. The chocolate goes from semi-liquid to solid in seconds if chilled too long. Now whisk it for a few seconds in the cereal bowl and then divide the chocolate into the ramekins. Note: If you leave the chocolate in the frozen bowl too long and it hardens up too much, you can whip it with electric beaters until smooth or you can melt it again and start the process over. If the chocolate gets grainy you will have to melt it again and start over.\r\n\r\n4. Prepare the coconut whipped cream<\/a> and hazelnut topping.\r\n\r\n5. Add a scoop of whipped cream and a handful of toasted, chopped hazelnuts on top of the mousse. Finish with a small pinch of flaked sea salt, if desired.\r\n\r\n6. Leftover mousse will keep in the fridge for several days.”,”foot_note”:”

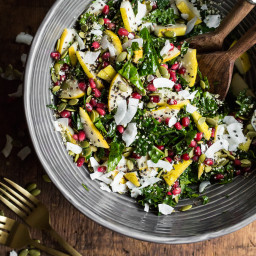
Superfood Crunch Salad with Homemade Balsamic Apple Vinaigrette

{“head_note”:”Shredded Lacinato kale is tossed in a tangy balsamic, apple cider, maple, and garlic dressing and then topped with sliced pear, pomegranate arils, pepita, hemp, and black sesame seeds, and large flaked coconut. Whenever the dull winter weather has you feeling blah, whip up this vibrant dose of nutrients and you’ll be feeling better in no time.”,”instructions”:”

    \r\n \t

  1. In a medium bowl, whisk together the dressing ingredients. Adjust to taste if desired.<\/li>\r\n \t
  2. Remove all of the stems from the kale leaves and compost the stems (or if you are hard core you can save them for smoothies). Finely chop the kale leaves into tiny \”shredded\” pieces. The smaller the more tender the leaves will feel. Wash and spin dry. Place kale into a large salad bowl. You should have about 8-10 cups of kale for this salad.<\/li>\r\n \t
  3. Toss the kale in all of the dressing until everything is coated nicely. The kale will reduce in volume substantially.<\/li>\r\n \t
  4. Add the toppings (as much as you want – I recommend lots!), sprinkle with cinnamon, and serve immediately. Or let the dressing marinate the kale for a half hour or so. This salad is best served fresh, but it will keep chilled in the fridge for a day. if you don’t think you will eat that quickly, I recommend making a half batch at a time or simply store the kale and dressing separately until ready to mix and consume.<\/li>\r\n<\/ol>“,”foot_note”:””}

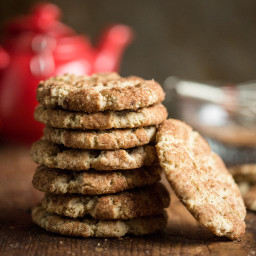
Snickerdoodles (vegan + gluten-free)

{“head_note”:”Classic Snickerdoodles made vegan and gluten-free! These cookies are crispy around the edge, chewy in the middle, and coated in a cinnamon sugar. I KNOW. For a non-gf version, try my other Snickerdoodle recipe<\/a> made with whole wheat pastry flour.”,”instructions”:”

    \r\n \t

  1. Preheat oven to 375\u00b0F and line a baking sheet with parchment paper. In a small bowl or mug, mix the flax and water to make the flax egg. Set aside.<\/li>\r\n \t
  2. \u00a0In a medium sized bowl stir together the sugar, melted coconut oil, and vanilla until incorporated. Add in the flax egg and stir until combined.<\/li>\r\n \t
  3. In another bowl, whisk the dry ingredients together (oat flour, almond flour, sorghum flour, arrowroot powder, baking soda, cream of tartar, salt, and pinch of cinnamon). Add the wet mixture to the dry mixture and stir well. The dough will be very dry at first, but it will come together if you get in there with your hands and knead it a few times. Add the optional almond milk if your dough is too dry. You need to be able to form balls of the dough without it cracking, but you don’t want it super wet either (or it will spread out too much when baking).<\/li>\r\n \t
  4. Mix the cinnamon and sugar together in a small bowl. Take about 1.5 tablespoons of dough and roll into a ball. Roll in cinnamon sugar and place on baking sheet at least a couple inches apart. Repeat for the rest.<\/li>\r\n \t
  5. Bake for 10-11 minutes. (I baked for 10 minutes and the edges were slightly crispy after cooling.) For a soft cookie, bake less time. For a crispy cookie bake longer. Cool for about 3 minutes on the baking sheet and then transfer to a cooling rack until completely cool.<\/li>\r\n<\/ol>“,”foot_note”:”
      \r\n \t

    • If you don’t have store-bought oat flour you can make it at home. Simply add rolled oats into a high speed blender and blend on the highest speed until a fine flour forms.<\/li>\r\n \t
    • I don’t recommend subbing the cane sugar for coconut or Sucanat sugar – in my previous trials it came out too dry.<\/li>\r\n<\/ul>“}

Festive Stuffed Mushrooms With Pistachio-Arugula-Avocado Pesto

{“head_note”:”These festive stuffed mushrooms are easy to throw together and are decadent and light at the same time. Packing in 6 vegetables, it’s an appetizer that won’t weigh you down!”,”instructions”:”375F bake mushrooms for 12 mins + 5 mins after stuffing”,”foot_note”:”For an entree, try stuffing Portobello mushrooms and serving it with quinoa or rice.”}

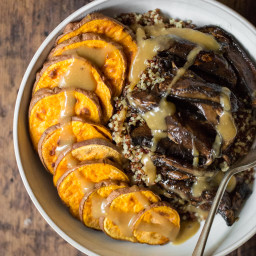
Chickpea Miso Gravy Bowl with Sweet and Tangy Portobello Mushrooms

{“head_note”:”A warm and cozy gluten-free quinoa bowl made with roasted sweet potatoes, chickpea miso gravy, and balsamic garlic Portobello mushrooms. I used chickpea miso, coconut aminos, and soy-free vegan butter which makes this recipe soy-free. As for swaps, feel free to use your preferred light miso, low-sodium tamari, and your preferred vegan butter (just note the recipe will contain soy if using these alternatives). Inspired by my cozy millet bowl<\/a>.”,”instructions”:”

    \r\n \t

  1. For the gravy: In a medium saucepan, melt the butter over low heat. Stir in the sorghum flour (it will form a chunky paste, but that’s normal). In a small bowl, whisk the broth, miso, and potato starch until completely smooth. Pour it into the saucepan and increase heat to medium-high, whisking vigorously until smooth and no lumps remain. Whisk in coconut aminos, salt, and pepper, to taste. Reduce heat to medium-low to avoid burning. Once thickened, remove from heat until ready to use (you can quickly reheat before serving). You can always add a bit more broth if it’s too thick for your liking.<\/li>\r\n \t
  2. For the sweet potatoes: Preheat oven to 375\u00b0F and line a baking sheet with parchment paper. Slice a large sweet potato into 1-cm rounds. Place on baking sheet and drizzle with olive oil. Toss to coat and spread out into an even layer. Season with salt and pepper. Roast for 20-35 minutes, until tender and lightly golden in some spots, flipping once half way through roasting.<\/li>\r\n \t
  3. For the quinoa: Add 1 cup of quinoa into a pot with 1.5 cups of vegetable broth or water. Bring to a low boil. Reduce heat to medium-low and simmer, covered, for 13-16 minutes, until the water absorbs and the quinoa is fluffy. Remove from heat, season with salt, and keep lid on until ready to consume.<\/li>\r\n \t
  4. For the mushrooms: Remove stems from Portobello mushrooms by twisting them off. Discard stems or save for future use. With a small spoon, scoop out the black gills and discard. With a damp cloth, wipe the cap to remove any debris. Slice into long, 1\/2-inch wide strips. In a large wok or saucepan, whisk together the vinegar, garlic, and coconut aminos. Add sliced mushrooms and toss until coated in the liquid. Turn heat to medium-high and cook down the mushrooms for 10-15 minutes, stirring frequently and reducing heat when necessary. You want to cook the mushrooms until all the water cooks off the bottom of the pan. Season with salt and pepper to taste.<\/li>\r\n \t
  5. To assemble: Add a couple scoops of cooked quinoa into a bowl. Layer on roasted sweet potato rounds. Top with mushrooms and drizzle on gravy. Season with a herbed salt (such as Herbamare) and black pepper to finish.<\/li>\r\n<\/ol>“,”foot_note”:”
      \r\n \t

    • In the gravy, you can probably sub regular all-purpose flour for the sorghum flour with similar results. Add more broth if it’s too thick. Other flours may work too.<\/li>\r\n \t
    • You can probably sub low-sodium Tamari for the coconut aminos and cornstarch for the potato starch. I haven’t tried these yet, but I can’t see why the swaps wouldn’t work!<\/li>\r\n \t
    • The amount of mushrooms might seem like a lot, but remember the mushrooms cook down and reduce in size a lot! You don’t want to use anything less than 4 cups of sliced mushrooms.<\/li>\r\n \t
    • Feel free to customize this bowl with leftovers you have in the fridge.<\/li>\r\n<\/ul>“}

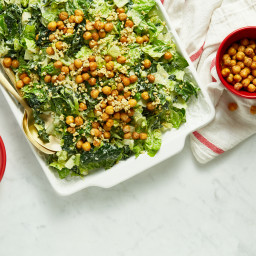
Crowd-Pleasing Vegan Caesar Salad

{“head_note”:”This is a delicious, creamy vegan Caesar salad that will wow any crowd! Everyone who\u2019s tried it goes absolutely nuts over it, and it\u2019s my most popular salad recipe on the blog. To take it over the top, I garnish the salad with a generous amount of crunchy Roasted Chickpea Croutons and a delectable Nut and Seed Parmesan Cheese for the ultimate vegan Caesar salad. The dressing recipe easily doubles for a larger group and it\u2019ll keep in the fridge in a sealed container for a few days so you can make it in advance.”,”instructions”:”

    \r\n \t

  1. Soak cashews in a bowl of water overnight, or for at least a few hours. Drain and rinse.<\/span><\/li>\r\n \t
  2. Roast chickpea croutons: Preheat oven to 400\u00b0F (200\u00b0C). Drain and rinse chickpeas. Place chickpeas in a tea towel and rub dry (it’s okay if some skins fall off). Place onto large rimmed baking sheet. Drizzle on oil and roll around to coat. Sprinkle on the garlic powder, salt, and optional cayenne. Toss to coat. Roast for 20 minutes at 400\u00b0F (200\u00b0C), then gently roll the chickpeas around in the baking sheet. Roast for another 10 to 20 minutes, until lightly golden. They will firm up as they cool.<\/li>\r\n \t
  3. Prepare the dressing: Add the cashews and all other dressing ingredients (except salt) into a high-speed blender, and blend on high until the dressing is super smooth. You can add a splash of water if necessary to get it blending. Add salt to taste and adjust other seasonings, if desired. Set aside.<\/li>\r\n \t
  4. Prepare the Parmesan cheese: Add cashews and garlic into a mini food processor and process until finely chopped. Now add in the rest of the ingredients and pulse until the mixture is combined. Salt to taste.<\/li>\r\n \t
  5. Prepare the lettuce: Destem the kale and then finely chop the leaves. Wash and dry in a salad spinner. Place into extra large bowl. Chop up the romaine into bite-sized pieces. Rinse and then spin dry. Place into bowl along with kale. You should have roughly 5 cups chopped kale and 10 cups chopped romaine.<\/li>\r\n \t
  6. Assemble: Add dressing onto lettuce and toss until fully coated. Season with a pinch of salt and mix again. Now sprinkle on the roasted chickpeas and the Parmesan cheese. Serve immediately.<\/li>\r\n<\/ol>“,”foot_note”:”
      \r\n \t

    • Be sure to check the label to ensure your Worcestershire Sauce is gluten-free (if necessary) as not many are. I use Wizard`s Gluten-Free Organic Worcestershire Sauce.<\/li>\r\n \t
    • The dressing thickens when chilled, so be sure to leave it at room temperature to soften before using.<\/li>\r\n<\/ul>“}

5-Minute Oatmeal Power Bowl

{“head_note”:”My favourite bowl of hot oatmeal, ready in less than 5 minutes! Soaking the oatmeal mixture overnight cuts down the cook time the morning of\u2014all you have to do is heat it on the stove for a minute or two. Don’t forget to mix the ingredients the night before. For a fall twist, add a pinch of cinnamon, ground ginger, and allspice on top of each bowl. Total fall comfort food!”,”instructions”:”

    \r\n \t

  1. The night before: Grab a medium bowl and mash the banana until smooth. Now stir in the chia, oats, cinnamon, milk, and water until combined. Cover and refrigerate overnight.<\/span><\/li>\r\n \t
  2. In the morning: Scoop the oat mixture into a medium pot. Increase heat to medium-high and bring to a simmer. Reduce heat immediately to medium-low, and stir frequently until heated throughout and thickened. At the end of cooking, stir in flax, if using.<\/li>\r\n \t
  3. Pour oats into bowl. Garnish with your desired toppings. Get cozy!<\/li>\r\n<\/ol>“,”foot_note”:”
      \r\n \t

    • The ground flax is optional because it creates a bit of a strange texture (almost like a flax egg) in this oatmeal. I don’t mind it, but some people might. If you think you will, just leave it out or sprinkle some ground flax on top instead.<\/li>\r\n \t
    • I love topping my oats with spices\u2014a pinch of cinnamon, ground ginger, and allspice create my perfectly spiced bowl.<\/li>\r\n<\/ul>“}