Author Archives: Angela Liddon

Lemon-Tahini Dressing

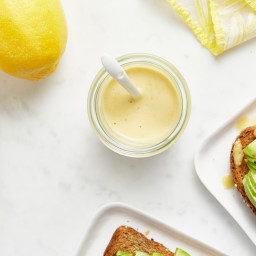
{“head_note”:”This lemon-tahini dressing is so good that you\u2019ll find yourself inventing new ways to use it again and again. Try it drizzled over my avocado toast, wraps, crispy tofu cubes, and of course served on salads. I love bold and tart salad dressings, so I use the lower end of the suggested oil amount. I recommend tasting and adjusting the amounts to your taste. You can even start with 7 tablespoons of lemon juice, and add more from there if you desire.”,”instructions”:”

    \r\n \t

  1. Add garlic clove(s) in a mini food processor and process until minced.<\/li>\r\n \t
  2. Add the rest of the ingredients and process until smooth. Adjust dressing to taste, if desired. Dressing will thicken slightly as it sits. It will keep in the fridge for a week or a bit longer. Stir well before use.<\/li>\r\n<\/ol>“,”foot_note”:””}
Purple Paradise Shake

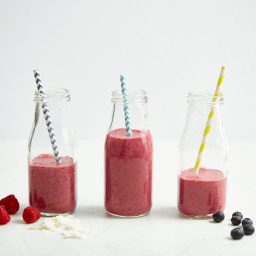
{“head_note”:”Frozen blueberries and raspberries lend this smoothie its stunning mulberry hue. Coconut butter\u00a0lends additional creaminess, and pure maple syrup offsets a bit of tartness from the raspberries. This is a great smoothie to serve when the temperatures are rising and you need a mid-day refresher.”,”instructions”:”

    \r\n \t

  1. Add all the ingredients into a high-speed blender and blend on high until smooth.<\/li>\r\n \t
  2. Adjust sweetness if desired. Serve and enjoy a sip of paradise!<\/li>\r\n<\/ol>“,”foot_note”:””}

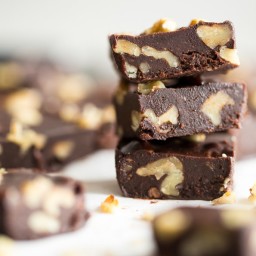
Seductive Raw Chocolate Walnut Fudge

{“head_note”:”My Aunt Elizabeth made this raw chocolate fudge for our big family get together last week and it disappeared incredibly fast. Us ladies were all begging for the recipe which she adapted from the Company\u2019s Coming Superfoods cookbook. This version below is an adaptation of both the original and Elizabeth\u2019s version, swapping ingredients as I saw fit and cutting down the portion in half since it made so much. Even though this doesn\u2019t have the texture of traditional fudge (it\u2019s more like raw chocolate), no one seemed to complain. It softens at room temperature (and melts in your mouth!), so serve it straight from the freezer and chill leftovers as soon as possible. If you are a raw food purist and want a completely raw fudge use raw cacao powder and agave in place of the cocoa powder and maple syrup. Either way, it\u2019s downright seductive.”,”instructions”:”

    \r\n \t

  1. With electric beaters, beat together the coconut oil and almond butter.<\/li>\r\n \t
  2. Sift in the cocoa powder and beat again until combined.<\/li>\r\n \t
  3. Pour in the maple syrup, vanilla, and salt and beat until smooth.<\/li>\r\n \t
  4. Stir in the walnuts.<\/li>\r\n \t
  5. Line a loaf pan with a piece of parchment paper. Scoop the chocolate mixture into the pan and spread out until even. I took another handful of walnuts, broke them up, and sprinkled over the top of the fudge for extra crunch and good looks.<\/li>\r\n \t
  6. Freeze for about 1 hour, or until solid. Slice into small squares and prepare to be seduced.<\/li>\r\n<\/ol>“,”foot_note”:””}

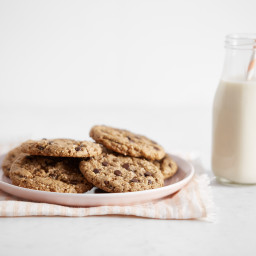
Crispy Peanut Butter Chocolate Chip Cookies

{“head_note”:”These gluten-free and vegan chocolate chip cookies\u00a0are crispy, chewy, and perfect for dunking into a glass of almond milk! Ready in a half hour, you’ll turn to this recipe again and again due to its quick prep time and irresistible flavour.”,”instructions”:”

    \r\n \t

  1. Preheat oven to 350\u00b0F (180\u00b0C) and line a baking sheet with parchment paper.<\/li>\r\n \t
  2. In a small bowl, mix together the ground flax and water. Set aside for a few minutes so it can thicken.<\/li>\r\n \t
  3. With an electric mixer or in a stand mixer, beat the buttery spread and peanut butter until combined.<\/li>\r\n \t
  4. Add both sugars and beat for 1 minute more. Beat in the flax mixture and vanilla extract until combined.<\/li>\r\n \t
  5. Now, beat in the dry ingredients (baking soda, baking powder, salt, oat flour, and almond meal) one by one.<\/li>\r\n \t
  6. Stir in the chocolate chips, reserving about 1 tablespoon for pressing into the top of the dough balls.<\/li>\r\n \t
  7. Shape 1-inch balls of dough (smaller than golf balls) and place on the baking sheet 2 inches apart. You can also use a retractable cookie scoop. If chocolate chips aren\u2019t sticking to the dough, just press them in with your fingers. There is no need to flatten the balls as the cookies spread out while baking. Press reserved chips into the tops of the dough balls.<\/li>\r\n \t
  8. Bake for about 11 to 13 minutes until spread out and lightly golden. The cookies will be very soft coming out of the oven, but they will crisp up\u00a0as they cool. Allow to cool for 5 to 10 minutes on the baking sheet and then transfer to a cooling rack for another 10 minutes.<\/li>\r\n<\/ol>“,”foot_note”:”
      \r\n \t

    • * I use soy-free Earth Balance.<\/li>\r\n \t
    • ** Be sure to stir the peanut butter well before using. Also, avoid using the dry nut butter that’s often found at the bottom of the jar. It’s simply too thick and dry for this recipe and will result in cookies that don’t spread.<\/li>\r\n \t
    • *** For \”pretty\” cookies, reserve 1 tablespoon of chocolate chips for pressing into the tops of the dough balls before baking. I use Enjoy Life mini chocolate chips.<\/li>\r\n<\/ul>“}

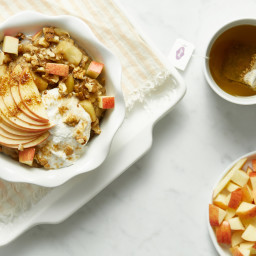
Apple Pie Oatmeal

{“head_note”:”A warm embrace on a cold winter day, this Apple Pie Oatmeal will remind you of delicious apple pie, but will leave you feeling energized and ready to tackle the day ahead. The leftovers (if there are any!) taste amazing chilled, too.”,”instructions”:”

    \r\n \t

  1. In a medium sized pot over medium heat, whisk together the oats, apple, chia seeds, cinnamon, ginger, salt, milk, maple syrup, and applesauce until combined.<\/li>\r\n \t
  2. Cook over medium heat for about 9 to 15 minutes, stirring often. When the mixture thickens and the oats soften, it is ready.<\/li>\r\n \t
  3. Stir in the pure vanilla extract and lemon juice (if using).<\/li>\r\n \t
  4. Pour into a dish and serve with your desired toppings.<\/li>\r\n<\/ol>“,”foot_note”:””}
Hot Detox Tonic

{“head_note”:”Get ready to feel warm, energized, and ready to tackle the day! This is my new go-to hot beverage of choice when I want to hit the reset button, amp up my metabolism, and boost circulation. It comes together fast with ingredients that I tend to keep on hand. I love to drink this throughout the day, but it\u2019s especially effective when consumed on an empty stomach after waking. I use a ginger tea bag for a quick option, but I provide a fresh ginger option below too. Also, if you ever have some kicking around, fresh mint is an invigorating, tummy-soothing addition.”,”instructions”:”

    \r\n \t

  1. Grab an extra large mug or a small teapot (3-cup capacity). Place ginger tea bag inside.<\/span><\/li>\r\n \t
  2. Boil 2 cups of water and pour all the water into the mug\/teapot. Cover and steep the ginger tea for 7 to 8 minutes.<\/li>\r\n \t
  3. Remove tea bag. Set aside the tea bag to cool. Once the tea bag has cooled a bit you can gently squeeze it into the pot to infuse the tea with even more ginger flavour.<\/li>\r\n \t
  4. Add the cinnamon, turmeric, and cayenne. Whisk until combined.<\/li>\r\n \t
  5. Add the vinegar and drop in the lemon wedge. Whisk to infuse the lemon.<\/li>\r\n \t
  6. Add maple syrup to taste, and whisk to combine.<\/li>\r\n \t
  7. Serve immediately and enjoy!<\/li>\r\n<\/ol>“,”foot_note”:”
      \r\n \t

    • * For the fresh ginger version: Pop the fresh grated ginger into a tea ball or mesh tea steeper, and steep tea for about 6 to 7 minutes. Proceed as usual.<\/li>\r\n \t
    • ** The spices tend to settle at the bottom of the mug\/pot. Simply whisk it now and then to redistribute.<\/li>\r\n<\/ul>“}

10-Spice Mix Gift Jars

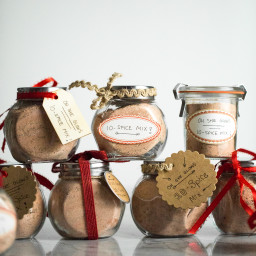
{“head_note”:”This 10-Spice mix takes just a few minutes to throw together, and it can be used in a variety of dishes, such as soups, stews, pastas, potatoes, salad dressings, and more! I love using it in my 10-Spice Vegetable Soup with Cashew Cream<\/a> (also see: page 137, The Oh She Glows Cookbook) which is one of my most loved soups of all-time (and a reader favourite, too!) These spice jars make a quick and easy holiday gift that won’t set you back much money. Just pair the spice mix with the soup recipe or, if they don’t have it, The Oh She Glows Cookbook with the page bookmarked.”,”instructions”:”

    \r\n \t

  1. Gather 8-9 (3\/4 cup\/175 ml capacity) glass jars.<\/li>\r\n \t
  2. Add all of the spices into an extra-large bowl (I used a huge Caesar salad bowl) for easier mixing.<\/li>\r\n \t
  3. Whisk together all of the spices until thoroughly combined. It takes a while to mix it all together, but keep going until you don\u2019t see any clumps or patches of spice.<\/li>\r\n \t
  4. Divide the spice mix between small jars using a funnel.<\/li>\r\n \t
  5. Secure lid, tag, and ribbon on each jar.<\/li>\r\n \t
  6. Print off the\u00a010-Spice Vegetable Soup recipe<\/a> and give the recipe (or The Oh She Glows Cookbook) with the jar for a fun gift! Shake the jar before each use.<\/li>\r\n<\/ol>“,”foot_note”:”1) To make the soup: If the gift recipient doesn\u2019t have a high powered blender such as a Vitamix (which can get the cashew cream in the soup very smooth), I recommend making a note for them that they can substitute 3\/4 cup of cashews for 1\/2 cup of raw cashew butter. It\u2019ll blend much easier.\r\n\r\n \r\n\r\n2) I bought my spices in bulk at a bulk food store called Bulk Barn. I also found the jars there too. You can also find small jars for a good price at the Dollarstore.”}

Homemade Nutella Hot Chocolate

{“head_note”:”A nutty, plant-based twist on traditional hot cocoa. This recipe features my homemade nutella<\/a> nut butter which makes this drink so creamy and decadent! I also love adding 55-60% dark chocolate into the mix for even more chocolate flavour. For a luxurious twist, try stirring in a bit of full-fat coconut cream into the hot cocoa, or serve it topped with some vegan marshmallows.”,”instructions”:”

    \r\n \t

  1. Prepare the Homemade Mocha Nutella<\/a>.<\/li>\r\n \t
  2. Break up the chocolate into chunks. In a medium pot, add the almond milk and chocolate pieces. Increase heat to medium-low. Whisk occasionally until all of the chocolate is melted.<\/li>\r\n \t
  3. Whisk in the maple syrup, cocoa powder, nutella, and salt until super smooth. Heat over medium-low and remove from heat just before it simmers. If you can’t get the hot cocoa smooth enough by whisking (this will depend in large part by how smooth your homemade nutella is) you can transfer it into a blender (with lid ajar) and blend until smooth.<\/li>\r\n \t
  4. Adjust the sweetness to taste, if necessary. Serve and enjoy! Leftovers will keep in a sealed container in the fridge for 2 days or longer.<\/li>\r\n<\/ol>“,”foot_note”:”

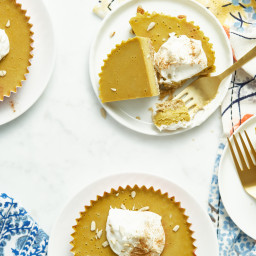
Pumpkin Pie Tarts with a Cookie Crust

{“head_note”:”This is a luxurious and creamy nut-free version of my favourite Raw Pumpkin Pie from The Oh She Glows Cookbook <\/i>(page 247\u2013248). After many trials, I ended up using a combination of sunflower seed butter and full-fat coconut cream to replace the cashews in the original recipe, and it worked out so well! The pie has a light coconut flavour, but it’s balanced out nicely by the earthy sunflower seed butter. As a bonus, this filling doesn\u2019t use any whole nuts or whole seeds so you don\u2019t need a Vitamix (or other high powdered blender) to get the filling super smooth. I used 4 tart-sized (about 4-inches diameter) \”freestanding\” baking cups which I found at Target, but you can also use a standard muffin tin lined with paper liners (or simply greased well) to make mini tarts. I’d imagine a 7- to 9-inch springform cake pan would work well too. The dough is a bit difficult to shape into a traditional pie crust (with high sides) so that’s why I went with a flat crust for this recipe. If you don’t mind fiddly things, then by all means take a stab at the regular pie crust. Also, the paper liners are easily removed if you remove them while the pies are frozen.”,”instructions”:”

    \r\n \t

  1. Preheat oven to 350\u00b0F (180\u00b0C). Grab 4(4-inch diameter) baking paper cups, or 12 standard muffin paper liners and set aside. You can also use a 7- to 9-inch springform cake pan greased and lined with a circle of parchment paper. <\/li>\r\n \t
  2. Add the sunflower seeds into a skillet and toast the seeds over medium heat for 5 to 8 minutes, until lightly golden and fragrant. Remove from heat. <\/li>\r\n \t
  3. For the crust: Add the toasted sunflower seeds, oats, and salt into a food processor and process until finely chopped, resembling a coarse flour. Now, add the melted oil, maple syrup, and sunflower seed butter, and process until the mixture comes together into a heavy dough. The dough should stick together very easily when pressed between your fingers. If it’s still a tad too dry, add the optional water and process again until it comes together. I find that I always need 2 teaspoons of water, but it’ll depend on your ingredients\u2019 moisture content. <\/li>\r\n \t
  4. Divide the dough equally between the liners, crumbling it all over each base. (Note: I reserved about 1\/2 cup of the dough for sprinkling on the pies when serving.) Lightly wet your fingers. Starting at the centre, press the dough into the base to form a crust. If the dough starts to stick to your hands at any time, lightly wet your hands and shake off the excess water. Once the crust is all pressed in, poke the base with a fork about 2 to 3 times to allow the air to escape while baking. I place the 4 liners onto a baking sheet so it’s easy to remove them from the oven. <\/li>\r\n \t
  5. Bake the crusts for around 10 to 12 minutes until lightly golden around the edges. Place baking sheet on a cooling rack and cool the crusts for at least 15 to 20 minutes, or longer if you have the time. <\/li>\r\n \t
  6. For the filling: Open the chilled can of coconut milk. Scoop off 1\/2 cup of the white coconut cream only (not the water) and place it into a blender. (You can save the remaining contents of the can for a smoothie or other use.) Add the pumpkin pur\u00e9e, maple syrup, melted oil, sunflower seed butter, vanilla, pumpkin pie spice (to taste; I use 2 teaspoons), and salt. Blend, starting at a low speed and increasing the speed, until smooth. <\/li>\r\n \t
  7. Divide the filling equally among the cooled crusts. Carefully, transfer the baking sheet (or muffin tin, if making 12 mini tarts) into the freezer on a flat surface. Chill until firm, about 3 to 5 hours. There’s no need to cover it. <\/li>\r\n \t
  8. After the tarts are solid, carefully remove the paper liners. Here you can transfer the pies to the fridge for a mousse-like texture, but I prefer the texture when frozen after sitting on the counter for 5 to 10 minutes before serving.<\/li>\r\n \t
  9. Serve with coconut whipped cream on top, if desired. This pie filling softens a great deal at room temperature, so it’s best not to leave leftovers on the counter. Return them to the fridge or freezer for best results.<\/li>\r\n<\/ol>“,”foot_note”:”

Mouth-Watering Crispy Brussels Sprouts

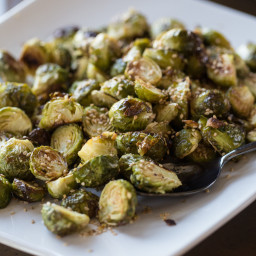
{“head_note”:”This is my current go-to method for preparing Brussels sprouts. I lightly coat them in melted coconut oil, season with sea salt and Harissa spice blend, and then roast until charred and crispy. Keep in mind that the amount of roasting time will vary depending on your oven and how fresh the Brussels sprouts are. It’s best to keep an eye on the first batch. After roasting I love to drizzle the smallest amount of melted coconut oil on top and then toss them again – this just takes them over the top on the mouth-watering scale and it also rehydrates them after roasting. This recipe can be changed up so many ways too. For a festive twist, try drizzling Pomegranate molasses or Balsamic reduction on top (you can skip the Harissa for a more neutral flavour) and serve with fresh pomegranate arils. We also love dipping the sprouts in roasted red pepper hummus or a sweet Barbecue sauce.”,”instructions”:”

    \r\n \t

  1. Preheat the oven to 400F and line a large baking sheet with parchment paper.<\/li>\r\n \t
  2. With a paring knife, trim off the ends of the sprouts, then slice in half lengthwise, and pick off any loose outer leaves. Place the prepped sprouts into a large bowl.<\/li>\r\n \t
  3. Add the oil onto the sprouts in the bowl and stir or toss with hands until throughly coated. Add the Harissa and salt, and stir until combined.<\/li>\r\n \t
  4. Spread the Brussels sprouts onto the prepared baking sheet in a uniform layer. Garnish with freshly ground black pepper.<\/li>\r\n \t
  5. Roast the sprouts for 20 minutes, then flip with spatula, and continue roasting for another 5-15 minutes until browned to your liking. I tend to \”overcook\” these because I like them crispy and charred (I usually brown mine more than the photos show). Smaller sprouts will brown faster than larger ones.<\/li>\r\n \t
  6. Drizzle with a teaspoon or so of melted coconut oil and quickly toss to coat. This infuses with flavour and moistens them a bit after roasting. Sometimes I also sprinkle on toasted sesame seeds if I have some on hand. Taste and add another tiny pinch of salt, if desired, and serve immediately – the hotter the better.<\/li>\r\n<\/ol>“,”foot_note”:”*If using melted coconut oil, make sure that your Brussels sprouts are at room temperature before mixing in the oil. If the sprouts are chilled from the fridge, the oil will harden when mixing. Keep in mind that using virgin coconut oil will impart a very light coconut flavour. You can use flavourless refined coconut oil if you prefer.\r\n\r\n**I found the Harissa spice blend at Whole Foods in the US (it\u2019s the Whole Foods Market brand). It contains: paprika, caraway, chilis pepper, cayenne pepper, coriander, cumin, garlic, peppermint, sea salt. I\u2019ve also been told that it can be found at Bulk Barn and Sobey\u2019s in some Canadian locations.\u00a0You can also find it online\u00a0here<\/a>.”}