Author Archives: Angela Liddon

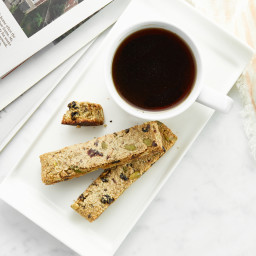
Power Biscotti

{“head_note”:”These crunchy snacks were specially designed to be nutrient-rich down to their last grain-free bite. Rather than grain-based flour, these biscotti are made with homemade sunflower seed flour. Dried fruit, pepitas, and cacao nibs are folded in to offer pops of texture, while pure maple syrup provides subtle sweetness. These biscotti make a fantastic energizing snack or breakfast that you can grab on your way out the door. Don’t forget to decrease the oven temperature to 275\u00b0F (135\u00b0C) after the first bake time or you’ll risk burning the biscotti during the second and third baking rounds. Shared<\/em>\u00a0from\u00a0Blissful Basil by arrangement with BenBella Books. Copyright\u00a0\u00a9 2016, Ashley Melillo. <\/i>The recipe below is lightly edited\u00a0to reflect my own testing process.”,”instructions”:”

    \r\n \t

  1. Preheat the oven to 350\u00b0F (180\u00b0C). Line a large baking sheet with parchment paper.<\/span><\/li>\r\n \t
  2. In a small mixing bowl, whisk together the ground flaxseed and water. Set\u00a0<\/span>aside for 5 minutes to thicken.<\/li>\r\n \t
  3. Meanwhile, add the sunflower seeds to a food processor and process for 45\u201360 seconds, or until you have a coarse flour or fine meal, stopping to pulse several times to ensure even processing. The texture should be flour-like; be careful not to overprocess or you\u2019ll end up with sunflower butter.<\/li>\r\n \t
  4. Transfer the sunflower flour to a large mixing bowl and whisk in the arrowroot and sea salt. Stir in the dried fruit, pepitas, and cacao nibs (if using).<\/li>\r\n \t
  5. Add the maple syrup and vanilla extract to the small mixing bowl with the flaxseed mixture and vigorously whisk to combine. Pour over the dry sunflower mixture, and use a large wooden spoon to mix well for about 30 seconds. At first it will seem like there isn\u2019t enough liquid, but keep stirring until the liquid is evenly dispersed and you have a damp dough.<\/li>\r\n \t
  6. Turn the dough out onto the lined baking sheet, and divide it into 2 equal pieces. Use lightly wet hands to shape and compact the dough into 2 tightly packed rectangles. Each rectangle should be approximately 4 \u00d7 6 inches, and just shy of 1 inch thick.<\/li>\r\n \t
  7. Bake for 18\u201322 minutes, or until the edges are light golden brown and each rectangle feels well set, yet retains a soft indentation when gently pressed. Remove from the oven and cool for about 20 minutes.<\/li>\r\n \t
  8. Meanwhile, decrease the oven temperature to 275\u00b0F (135\u00b0C).<\/li>\r\n \t
  9. Once the biscotti rectangles are mostly cool, use a sharp knife to cut them widthwise into 1-inch-thick slices, pressing straight down and rocking the knife back and forth to slice rather than using a sawing motion. You should have a total of 12\u201314 biscotti, 6\u20137 from each rectangle.<\/li>\r\n \t
  10. Carefully return the biscotti to the lined baking sheet, sliced-side down. Bake for 16\u201318 minutes. Then, carefully flip each biscotti, and bake for another 16\u201318 minutes, or until a light golden brown and crisp to the touch. They\u2019ll continue to crisp as they cool, so keep that in mind when testing for doneness.<\/li>\r\n \t
  11. Carefully transfer the biscotti to a wire cooling rack. Cool completely. Store in an airtight glass container to maintain crispness. They\u2019ll keep for up to 1 week at room temperature, or you can store them in the freezer for a bit longer.<\/li>\r\n<\/ol>“,”foot_note”:”Oven temperatures may vary greatly, so be sure to keep an eye on the biscotti during all three stages of baking to avoid burning it.”}

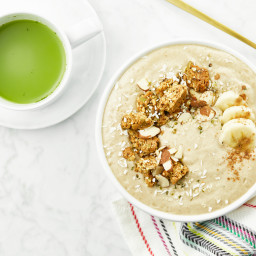
In the Buff Smoothie Bowl

{“head_note”:”I just can’t get enough of this creamy, monochrome smoothie bowl! Packed with protein and healthy fats, it keeps me going all morning long, and its subtle, earthy flavours and thick texture are the perfect base for loading on all kinds of toppings.”,”instructions”:”

    \r\n \t

  1. Add 1 cup (250 mL) of\u00a0almond milk into a high-speed blender, followed by the rest of the ingredients. Blend until smooth. If necessary, add more milk to get the blender going.<\/li>\r\n \t
  2. Pour into a bowl, and add your desired toppings. Serve immediately and enjoy with a spoon!<\/li>\r\n<\/ol>“,”foot_note”:”* Be sure to use a large frozen banana or the texture of the smoothie bowl won’t be thick enough.\r\n\r\n** If you are omitting the protein powder, you can reduce the almond milk to 1 cup (250 mL), and add more from there if needed. I use Sunwarrior Warrior Blend protein powder in \”Natural\”. It’s important to use a neutral-flavoured protein powder so it doesn’t overwhelm the delicate flavours of the smoothie bowl.\r\n\r\n \r\n\r\nIf you want a bit of a kick flavour-wise, try adding some fresh ginger (to taste) to heighten the flavours.”}

Vegan Broccoli and Cheese Soup

{“head_note”:”Like a big, cozy sweater, this soothing soup will help you get through the long winter. It combines my love for broccoli and cheese sauce, while doing without the dairy-based cream or cheese. This is a bit of a fussy soup (think weekend<\/i>, not weeknight) as it involves a few homemade components (cheese sauce, soup, and homemade croutons), so you\u2019ll need an hour start to finish. If you can make the cheese sauce the day before, that\u2019ll help streamline things!\r\n\r\nThis soup is adapted from my 2011 version<\/a>. The cheese sauce is lightly adapted from my cheese sauce in Oh She Glows Every Day.”,”instructions”:”

    \r\n \t

  1. For the cheese sauce: Place the potatoes and carrots in a medium pot and add water to cover. Bring to a boil over high heat, reduce the heat to medium, and simmer uncovered for 10 to 15 minutes, until fork-tender. Drain. <\/li>\r\n \t
  2. While the potatoes and carrots are simmering, add the nutritional yeast, oil, water, lemon juice, salt, garlic, and vinegar into a high-speed blender and set aside.<\/li>\r\n \t
  3. Chop the onions, garlic, celery, broccoli, and potatoes for the soup and set aside. <\/li>\r\n \t
  4. When the simmering potatoes and carrots are fork-tender, drain them and add to the blender. Blend the cheese sauce until smooth, then transfer to a bowl.<\/li>\r\n \t
  5. For the soup: In a large pot, saut\u00e9 the oil, onion, and garlic over medium heat, stirring frequently. Cook for about 3 to 5 minutes.<\/li>\r\n \t
  6. To the pot, add the celery, broccoli, and potatoes and saut\u00e9 for a few minutes more. Now, add the broth, nutritional yeast, cayenne pepper, lemon juice, salt, and pepper. Cover and simmer over medium heat for about 13 to 15 minutes, until the potatoes are fork-tender. Turn off the heat and let the soup sit for a few minutes. Add the chickpea miso.<\/li>\r\n \t
  7. Carefully transfer the soup into a blender (you might have to do this in two batches). Blend until smooth and place back into the pot. <\/li>\r\n \t
  8. Set aside 1\/4 cup (60 mL) of cheese sauce for garnish. Add the rest of the cheese sauce into the soup and stir to combine. Adjust seasonings to taste if desired.<\/li>\r\n \t
  9. Ladle the soup into bowls and swirl in a tablespoon of the reserved cheese sauce into each bowl. Top with Pan-Fried Garlic Croutons, paprika, and parsley, if desired.<\/li>\r\n<\/ol>“,”foot_note”:”* To cut down on cooking time, be sure to dice the potatoes and carrots very small.\r\n\r\n** Refined coconut oil doesn\u2019t have a coconut flavour, which is why I love it in the cheese sauce. Grapeseed oil also has a neutral flavour, but if you don\u2019t have either you can probably get away with a light-tasting olive oil.\r\n\r\n*** I love chickpea miso, it\u2019s light in flavour and often soy-free (be sure to check the label, though). If you can\u2019t find chickpea miso, any light or white miso should do the trick! I like a full 3 teaspoons of chickpea miso in this soup, but depending on the flavour of your miso you might prefer a bit less.\r\n\r\n**** Instead of bread-based croutons, you can top this soup with my Roasted Chickpea Croutons<\/a>.”}

Easy Nut-Free Taco Salad

{“head_note”:”This is my quick and easy taco salad; it\u2019ll only set you back about 15 minutes of prep work, and it\u2019s super satisfying and delicious! The sun-dried tomato\u2013pepita taco crumble adds a lovely taco flavour, as well as satiating protein, fibre, and healthy fats. If you have some on hand, this salad is also great topped with Cashew Sour Cream<\/a> (of course, this would mean adding nuts to the recipe).”,”instructions”:”

    \r\n \t

  1. For the hummus dressing: In a small bowl, stir together the hummus, lemon juice (or vinegar), and salt until smooth. If it\u2019s too thick, add a bit of olive oil to thin it; if it\u2019s too thin, add a bit more hummus and stir again.<\/li>\r\n \t
  2. Prepare the taco crumble: Add the sun-dried tomatoes into a food processor. Process until finely chopped. Now add the pepitas, oil, chili powder, cumin, garlic powder, optional cayenne, and salt, and process for a few seconds until roughly chopped. Adjust seasonings to taste, if desired.<\/li>\r\n \t
  3. Assemble the salad bowls: Grab two large, shallow bowls. Divide the salad ingredients among the two bowls equally, layering each ingredient on top of the romaine (in any order you like), as well as the taco crumble and the hummus dressing. Serve with corn chips or tortilla wedges and sliced lime to drizzle over top.<\/li>\r\n<\/ol>“,”foot_note”:”* To save time, I love buying pre-roasted and salted pepitas to use in this taco crumble.”}

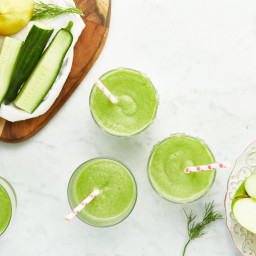
Dill Pickle Smoothie

{“head_note”:”If you are anything like me, you are both intrigued and horrified by this smoothie name. But trust me when I say that this combo of ingredients is surprisingly delightful!\u00a0This savoury and tangy, yet lightly sweet smoothie packs an unexpected flavour punch. It\u2019s so refreshing and oddly addictive, and it\u2019ll make you feel cleansed, light, and energized. This recipe is adapted with permission from The Perfect Blend Cookbook by Tess Masters (Ten Speed Press, 2016).”,”instructions”:”

    \r\n \t

  1. Add all of the ingredients except the ice into a high-speed blender. Blend on high until smooth. (You can add a bit more water, if needed, to get the machine blending.)<\/span><\/li>\r\n \t
  2. Add the ice and blend again until smooth. Taste and adjust the ingredients if desired. Serve cold.<\/li>\r\n<\/ol>“,”foot_note”:””}

Brownie Breakfast Bake

{“head_note”:”This ultra dense brownie bake is about as healthy as it gets! Sweetened with overripe bananas and a small amount\u00a0of pure maple syrup, we think it\u2019s passable for breakfast. Be sure to use very ripe, spotty, almost black bananas for the sweetest flavour. It’s\u00a0great for a healthy snack or breakfast when you want something that feels indulgent without sabotaging your healthy eating plans, and its dense texture makes it quite filling too. I love it topped with Coconut Whipped Cream<\/a>\u00a0(homemade or store-bought) and fresh berries.”,”instructions”:”

    \r\n \t

  1. Preheat the oven to 350\u00b0F (180\u00b0C). Lightly grease 4 small ramekins with oil and place them onto a baking sheet.<\/li>\r\n \t
  2. Add all of the bake ingredients into a food processor and process until smooth, stopping to scrape down the bowl as needed.<\/li>\r\n \t
  3. Divide the batter among the ramekins, adding about 1\/2 cup (125 mL) batter per ramekin.<\/li>\r\n \t
  4. Bake for around 30 to 35 minutes, until the tops slowly spring back when pressed lightly with a finger. The tops will also be lightly cracked.<\/li>\r\n \t
  5. Place the ramekins onto a cooling rack for 30 minutes or so. <\/li>\r\n \t
  6. Using a butter knife, loosen the cake from the edges of the ramekin and pop out onto a plate. Top with coconut whipped cream, nuts, and berries. It’s also lovely spread with nut or seed butter and jam. Leftovers can be wrapped up and stored in the fridge for a few days or in the freezer for a couple weeks or longer.<\/li>\r\n<\/ol>“,”foot_note”:”* Be sure to use overripe, black and spotty bananas for the sweetest flavour.”}

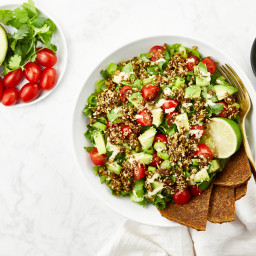
Warm Miso-Garlic Quinoa and Kale Salad

{“head_note”:”I love the contrast of a warm and cool salad, and how comforting it is to eat. In this recipe, I\u2019ve paired freshly cooked quinoa\u2014seasoned to perfection with chickpea miso, fresh garlic, and sesame oil\u2014with a delectable marinated kale salad. The leftovers are just as good, too; I love to cook them in a skillet with a splash of lemon juice and tamari for a saut\u00e9ed version of this salad.”,”instructions”:”

    \r\n \t

  1. Add the quinoa into a small pot along with 1 1\/2 to 1 3\/4 cups (375 to 435 mL) water. Bring to a boil, reduce heat to medium, and cover with a tight-fitting lid. Cook for 13 to 16 minutes, until the quinoa is fluffy and the water is absorbed.<\/span><\/li>\r\n \t
  2. Meanwhile, remove the stems from the kale and compost or discard. Finely chop the kale into 1-inch pieces. Rinse and dry the kale with a salad spinner, and then place it into a large bowl.<\/span><\/li>\r\n \t
  3. With your hands, \u201cmassage\u201d the sesame oil into the kale until it\u2019s thoroughly coated. Now, massage the lemon juice, tamari, tahini, and vinegar into the kale until evenly distributed. <\/span><\/li>\r\n \t
  4. To the cooked quinoa, stir in the garlic, miso, oil, and salt (if using), all to taste.<\/span><\/li>\r\n \t
  5. Toss the warm quinoa with the marinated kale. Top with sesame seeds and optional roasted potato. Serve warm.<\/span><\/li>\r\n<\/ol>“,”foot_note”:”* Chickpea miso is made with chickpeas instead of soybeans. I like South River and Tradition Miso brands. If you don\u2019t have chickpea miso, you can use any white or yellow miso you enjoy the flavour of.\r\n\r\n** I have not tested this marinade with toasted sesame oil (which has a much more robust flavour than untoasted sesame oil), but feel free to experiment if you like!\r\n\r\n*** Because different brands of tamari often differ in flavour, I recommend starting with a couple teaspoons and adding to taste from there. I use South River Sweet-Tasting Brown Rice Tamari.\r\n\r\nMake it soy-free: Use chickpea miso and coconut aminos (instead of tamari). Be sure to check the labels on your products to ensure they are soy-free.\r\n\r\nBoost the protein: If you\u2019re looking to boost the protein beyond what the quinoa and kale provide, I recommend adding tamari roasted chickpeas. Simply drain one (14-ounce\/398 mL) can of chickpeas and toss the chickpeas with a few tablespoons of tamari and a half tablespoon (7.5 mL) of sesame oil. Let it sit in the marinade for 10 minutes, and then roast the chickpeas on a baking sheet lined with parchment paper at 400\u00b0F (200\u00b0C) for 30 minutes, tossing once halfway through.”}

The Balance Wrap

{“head_note”:”I call this the \u201cbalance\u201d wrap because it\u2019s so balanced in terms of fibre, protein, and healthy fats! If you can get your hands on some, I highly recommend trying out grain-free raw flax wraps, which are dehydrated at a low heat and made with a ground flax base. They often contain veggies and seasonings like carrot, parsley, garlic, lemon, red pepper, and onion, and they\u2019re packed with fibre, protein, and omega-3 fatty acids. You can find them in the cooler or freezer section of some grocery stores. Rest assured, though, this wrap will work with any wrap of your choice\u2014spelt or sprouted grain are two other tasty options. I top the wrap with chunks of roasted sweet or yellow potato, hummus, sliced avocado, garlic powder, sriracha, and salt and pepper. You can also add some greens, like romaine lettuce or microgreens, for a crunch.”,”instructions”:”

    \r\n \t

  1. Place a wrap onto a large plate. <\/span><\/li>\r\n \t
  2. Spread on hummus, and <\/span>place the avocados fanned out on top along with the romaine lettuce (if using)<\/span>.<\/span><\/li>\r\n \t
  3. Add a handful of roasted potato, and then garnish everything with Sriracha, garlic powder, salt, pepper, and lime juice (if using), to taste. Wrap it up and serve immediately.<\/li>\r\n<\/ol>“,”foot_note”:”* To roast the potato: Line a baking sheet with parchment paper and preheat the oven to 400\u00b0F (200\u00b0C). Toss the potato chunks with a bit of olive or avocado oil, and then sprinkle with salt and pepper. Roast for 30 to 45 minutes until lightly browned, flipping once through roasting.”}

Miso Veggie Detox Soup

{“head_note”:”This spicy and flavourful veggie-packed broth is bursting with good-for-you ingredients. I like to eat two bowls of this a day when I\u2019m trying to get more veggies in my diet after a period of indulgence. The best part about this soup is that you can change up the vegetables depending on what you have in your fridge (broccoli or cauliflower would be nice \u201cswap-ins\u201d). It\u2019s super versatile! Just try to keep the added veggies to about 9 chopped cups or so.”,”instructions”:”

    \r\n \t

  1. To a large pot, add the oil, onion, and garlic. Stir to combine and saut\u00e9 over medium heat for 3 to 5 minutes, until the onion is translucent.<\/span><\/li>\r\n \t
  2. Now add the chopped celery, sweet potato, potato, zucchini, and pepper, one by one. Stir to combine, and saut\u00e9 for a few minutes.<\/span><\/li>\r\n \t
  3. Stir in the seasonings (turmeric, fresh ginger, cumin, paprika, and cayenne). Cook for a minute longer.<\/span><\/li>\r\n \t
  4. Stir in the tomato paste, and add the broth, half the salt, and pepper. Increase heat to high and bring the soup to a boil. Reduce heat to medium and simmer uncovered for 20 to 30 minutes, until the potatoes are fork-tender. <\/span><\/li>\r\n \t
  5. Remove from heat and stir in the chard until wilted. <\/span><\/li>\r\n \t
  6. Add a ladleful of soup into a bowl and whisk in the miso until it\u2019s fully incorporated. Pour the mixture back into the pot of soup and stir well. Taste and add the rest of the salt, if desired. If you\u2019d like a pop of added brightness, you can add a small squeeze of lemon or white wine vinegar to taste.<\/span><\/li>\r\n \t
  7. This soup will keep in a jar or airtight container in the fridge for up to 5 days, or you can freeze it for 1 to 2 months. <\/span><\/li>\r\n<\/ol>“,”foot_note”:”* If you don\u2019t have any chickpea miso, feel free to swap it for another light-tasting miso and add it to taste.\u00a0Make sure your miso is soy-free if necessary.\r\n\r\nIf you\u2019d like to add a protein-boost, feel free to add beans or lentils of your choice.”}

Restoring Citrus Tonic

{“head_note”:”This tonic is such an energizing and detoxifying tea to treat yourself to in the winter months. I love drinking it first thing in the morning or as an afternoon pick-me-up. Ginger lends a kick of heat, while the citrus\u00a0adds a light sweetness, and the turmeric gives it a beautiful sunny hue. You can store leftovers in the fridge for up to 24 hours and then reheat on the stovetop (or simply drink it chilled in the summer months).”,”instructions”:”

    \r\n \t

  1. Add all of the ingredients into a medium saucepan. <\/span>Place over medium-high heat and bring to a low boil<\/span>. Reduce the heat to medium-low, cover, and simmer for about 4 to 5 minutes.<\/span><\/li>\r\n \t
  2. Strain the mixture using a sieve. Add liquid sweetener, if desired, and serve immediately.<\/span><\/li>\r\n<\/ol>“,”foot_note”:”* Grapefruit lends a tart kick, while orange juice is sweeter and more subtle. If using orange juice, I recommend adding a small squeeze of lemon along with it to give it a slight kick.\r\n\r\n** I prefer the flavour of fresh turmeric, but you can use 1\/2 teaspoon ground turmeric in a pinch.”}