Author Archives: Angela Liddon

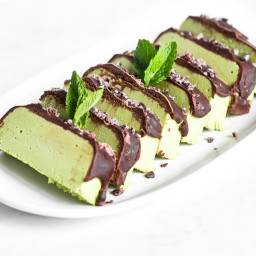
Vegan Peppermint Patty Slice

{“head_note”:”This peppermint patty is a showstopping dessert that’s coloured naturally with spinach\u2014though only you and I will know its nutritious secret! As an added bonus it\u2019ll only set you back 15 minutes of prep. The filling calls for at least 4 hours of freezing time, so I like to whip it up before bed to pop in the freezer overnight. This way, all I have to do the next day is add the ganache on top and freeze it for another 10 minutes. If you\u2019re making this dessert around the holidays, it\u2019s delightful served with a crushed candy cane topping. My standby, year-round topping is raw cacao nibs, which also add a lovely (and nutritious!) crunch. The crunchy topping really completes the dessert, so I don\u2019t recommend skimping on it, and be sure to serve additional cacao nibs or crushed candy cane on top of each slice before serving. Lastly, it\u2019s important to use a very small loaf pan so the dessert has height. I use a 4×8-inch loaf pan by Baker\u2019s Secret. You could also try making individual servings by filling a silicone cupcake mold.”,”instructions”:”

    \r\n \t

  1. Line a small (approximately 4×8-inch) loaf pan or 6-inch cake pan with plastic wrap so the slab will be easy to lift out after freezing. <\/li>\r\n \t
  2. Add all of the filling ingredients (cashew butter, maple syrup, melted oil, almond milk, 1 teaspoon peppermint extract, spinach, and salt) into a high-speed blender. Blend on high until smooth. Make sure no chunks of spinach leaves remain. Taste and add more peppermint extract if desired.<\/li>\r\n \t
  3. Pour the filling into the prepared pan. Place the pan on a flat spot in the freezer and freeze for 4 to 5 hours, until the filling is solid. There\u2019s no need to cover it unless you plan on keeping it in the freezer longer than 8 hours.<\/li>\r\n \t
  4. When the filling is solid, prepare the ganache topping. In a medium pot, combine the chocolate chips, coconut cream (make sure water is drained before adding), and salt. Melt the chips over the lowest heat setting, stirring frequently, until smooth.\u00a0<\/li>\r\n \t
  5. Remove the filling from the freezer and, gripping the plastic wrap as a handle, lift it out of the pan. Flip the filling onto a large plate and peel off the plastic wrap. <\/li>\r\n \t
  6. Pour the ganache over top of the solid filling, starting in the centre, and allow it to cascade down the sides a bit. Immediately scatter the crushed candy cane or cacao nibs all over the ganache. Return it to the freezer, uncovered, and freeze for about 10 minutes, until the ganache is firm.<\/li>\r\n \t
  7. Slice and garnish with fresh mint, if you\u2019re fancy! Sprinkle additional cacao nibs or crushed candy cane on top of each slice and enjoy immediately. Return leftovers to the freezer right away as the dessert does soften as it sits. <\/li>\r\n<\/ol>“,”foot_note”:”* Instead of cashew butter, you can use 1 1\/4 cups (180 g) of soaked raw cashews. Soak them in boiled water for 1 hour, rinse, drain, and add them into a high-speed blender (such as a Vitamix) along with the rest of the ingredients. If your blender has a hard time blending nuts smooth, I suggest that you use the raw cashew butter version instead. You can also use homemade raw cashew butter. To make your own, simply process raw cashews in a heavy-duty food processor until smooth. I don\u2019t recommend using roasted cashew butter as it gives the slice a strong nutty flavour.\r\n\r\n** The intensity of peppermint extracts vary by brand, so 1 1\/2 teaspoons is intended as a guide\u2014please add it slowly to taste.\r\n\r\n*** I only recommend using spinach if your blender is good at blending leafy greens smooth. If your blender tends to leave spinach chunks in smoothies, I would suggest omitting the spinach in this recipe just to make sure you aren\u2019t going to find spinach chunks in the slice. Or see my tip about using a food processor below.\r\n\r\n**** Coconut cream is the solid white cream in a can of full-fat coconut milk. Chill the can overnight before using to ensure the coconut cream is solid. I like to open a mini can (160 mL) of full-fat coconut milk for this recipe; this way, there isn\u2019t a lot left over to use up. The remaining amount is just perfect for throwing into your next smoothie!\r\n\r\n \r\n\r\nNo blender? No problem! If you have a heavy-duty food processor you can make the filling in the processor, just be warned that the spinach doesn\u2019t break down fully (my version had some very fine green speckling resembling mint sugar), and you\u2019ll want to run the processor for a good while to help the spinach break down as much as possible.\r\n\r\n \r\n\r\nIf you don\u2019t have cacao nibs or crushed candy cane on hand, feel free to top the ganache with finely chopped dark chocolate.”}
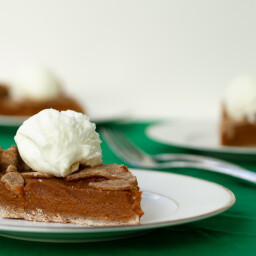
Pumpkin Pie with a Gluten-Free Pecan Crust

{“head_note”:”This pie is\u00a0a bit sweet, buttery, lightly spiced with cinnamon, and enhanced with a bit of salt to bring out the flavours. This crust goes so nicely with the pumpkin pie filling! This crust is very sensitive to changes, so I caution against changing a lot of things in the recipe. Make sure to use certified gluten-free ingredients if you want it to be GF.”,”instructions”:”For the Crust\r\n

    \r\n \t

  • Grease a 9-inch pie dish very well and preheat the oven to 350F. In a blender, process your oats into a very fine flour.<\/li>\r\n \t
  • In a food processor, add 2 cups pecans and process until it starts to clump and oils start to release (about 35 secs), but don\u2019t make pecan butter either. You should be able to make a ball with the pecan dough.<\/li>\r\n \t
  • Melt earth balance with brown rice syrup for about 30 secs in microwave. Stir. Transfer clumpy pecan mixture into a large bowl and mix with the rest of the ingredients. Using your hands, squeeze the dough over and over to combine very well. You should be able to form a ball with it. If it’s too dry add a bit of water.<\/li>\r\n \t
  • Spoon the pecan dough onto pie dish and smooth out evenly. Press down firmly with fingers to form a crust, bringing it up along the sides. Press as firmly as you can. Prick base with fork 12-13 times. Prebake the crust at 350F for 9-12 minutes, watching closely so it doesn’t burn. Remove and cool for 10 mins.<\/li>\r\n<\/ul>\r\nfor filling\r\n
      \r\n \t

    • In a large bowl, whisk together the maple syrup and arrowroot powder (or cornstarch). Now add all ingredients and whisk together, adjusting spices to taste. Add more sweetener if desired.<\/li>\r\n<\/ul>\r\nTo bake\r\n
        \r\n \t

      • Scoop the filling into crust and smooth. Cover crust with crust shield (or tin foil). Bake for 50-55 minutes at 350F. Place on cooling rack for 1 hour. Transfer to fridge to set for a minimum of 3 hours or overnight. (this step is very important!) Do not slice pie until it has set in the fridge for 3 hours minimum.<\/li>\r\n \t
      • Slice with a very sharp knife, very slowly and carefully for best results. A bit of crumbling may occur, but that\u2019s ok because it\u2019s rustic and made from scratch! The main part is it tastes incredible. Yum!<\/li>\r\n<\/ul>“,”foot_note”:””}

Vegan Pumpkin Pie with Rustic Spelt Crust

{“head_note”:”While this spelt crust is anything but classic and flaky it\u2019s one of my favourites simply because it\u2019s easy, there\u2019s no chilling required, and it\u2019s healthier than than most. The crust is quite dense and firm with a hearty, lightly sweet flavour. The filling is quite traditional, however not too sweet, but just right. Serve with non-dairy ice cream or whipped cream and a sprinkle of cinnamon and nutmeg.”,”instructions”:”

    \r\n \t

  • Crust (1): Preheat oven to 425\u00b0F and grab 9-inch pie dish. In a large bowl or stand mixer, mix dry crust ingredients. Pour in milk and melted coconut oil. With an electric mixer, mix just until the dough forms into a few lumps. Do not overmix. The dough should be moist, but not too sticky. If it\u2019s too sticky work in a tiny bit of flour when rolling.<\/li>\r\n \t
  • Crust (2): On a non-stick mat or lightly floured surface, roll out dough until it\u2019s a couple inches wider than the pie dish. Place pie dish on top of dough and trim the edges leaving 1-inch around the edge. Gently roll the dough onto the rolling pin and then unroll over top of dish or just flip the baking mat over with the dish on top. Tuck the edges of the dough under and then crimp\/flute the edge using your fingers (see photos below). Poke 12 fork holes into base and pre-bake the crust for 7 minutes at 425\u00b0F, no pie weights required. Roll out remaining dough and cut shapes with cookie cutters. Cover dough shapes with plastic wrap.<\/li>\r\n \t
  • Filling: In a small bowl or mug, whisk together the maple syrup and arrowroot powder (or cornstarch). In a large bowl, whisk together all ingredients, adjusting spices to taste.<\/li>\r\n \t
  • To bake: Scoop the filling into crust and smooth. Add cut-outs on top. Bake for 45 mins at 350F. Remove and cover crust edges with tinfoil or crust shield. Bake for another 15 mins. Place on cooling rack for 1 hour. Transfer to fridge to set for a minimum of 3 hours or overnight. (this is very important!)<\/li>\r\n<\/ul>“,”foot_note”:”Tips and tricks: 1) The dough should NOT be chilled, but rolled immediately. 2) Using full-fat coconut cream (from the top of the can) yields in a richer and creamier filling (I couldn\u2019t detect the coconut taste much), but feel free to use almond milk. 3) The pie must set in the fridge for a minimum of 3 hours before serving. The longer it chills for, the more it firms up.”}

Cheesy Lentil Bolognese Casserole

{“head_note”:”Our family is in love with this cheesy, creamy, and hearty casserole! Traditional bolognese is made with a meat-based sauce, but my version uses lentils and mushrooms for a high fibre, immune-boosting twist. It\u2019s great served with a simple salad of marinated greens (for a quick homemade dressing, try my Shake-and-Go Balsamic Vinaigrette from Oh She Glows Every Day<\/em>), saut\u00e9ed kale, or my Crowd-Pleasing Vegan Caesar Salad and some crusty fresh bread. Divine! Here are some time-saving tips: if you\u2019re looking for a head-start on meal prep, the cheese sauce can be made a couple days in advance and refrigerated in an airtight container. You can also prepare the entire casserole in advance: simply follow the recipe through step #9 (stop before baking!), wrap it up, refrigerate, and then cook as-is one to two days later as directed in step #10. Imagine coming home to this casserole ready to bake at the end of a long day! Nothing is better. This recipe is adapted from my Fusilli Lentil-Mushroom Bolognese in Oh She Glows Every Day<\/em>.”,”instructions”:”

    \r\n \t

  1. Oil a very large casserole dish (approx. 10\” x 14\”) and set aside. Preheat the oven to 400<\/span>\u00b0<\/span>F (200<\/span>\u00b0<\/span>C).<\/span><\/li>\r\n \t
  2. Prepare the cheese sauce. While the potatoes and carrots simmer for the cheese sauce, start on steps 3 and 4.<\/span><\/li>\r\n \t
  3. Bring a large pot of water to a boil and cook the pasta according to package instructions. Be sure not to overcook it. Drain and set aside.<\/span><\/li>\r\n \t
  4. Meanwhile, in a large dutch oven or pot (about 5 quarts), add the oil, onion, and garlic. Stir and add a pinch of salt. Saut\u00e9 over medium heat for about 3 to 5 minutes, until the onion is softened and translucent. <\/span><\/li>\r\n \t
  5. Stir in the mushrooms, oregano, basil, and thyme, and cook for another 7 to 9 minutes over medium-high heat until the water cooks off.<\/span><\/li>\r\n \t
  6. Add the marinara sauce, drained lentils, and tahini. Stir until combined. Now add the cooked pasta and continue stirring until it\u2019s coated in the lentil-veggie mixture. <\/span><\/li>\r\n \t
  7. Taste and season with salt, pepper, and red pepper flakes (if using). Stir in the kale, if desired. Turn off the heat.<\/span><\/li>\r\n \t
  8. Spoon all of the pasta mixture into the prepared casserole dish and spread it out evenly. <\/span><\/li>\r\n \t
  9. Pour the cheese sauce over top and spread it out with the back of a spoon until it covers the entire surface. Garnish with paprika (it adds a beautiful pop of red), more herbs, and black pepper, if desired.<\/span><\/li>\r\n \t
  10. Bake the casserole uncovered for 15 to 20 minutes, until heated through. (If you\u2019re baking the casserole straight from the fridge, bake it for 25 to 30 minutes as it\u2019ll take longer to heat up). Serve immediately with a generous sprinkle of Cashew-Garlic Parmesan on top of each portion. Leftovers can be refrigerated in an airtight container for up to 5 days. The leftovers are just as delicious chilled! <\/span><\/li>\r\n<\/ol>“,”foot_note”:”* If your sliced mushrooms are on the thicker side, dice them up before adding to the pot\u2014they\u2019ll cook faster. The same is true if you\u2019re using whole mushrooms: the smaller you slice them the quicker they\u2019ll cook. If you are a big mushroom fan like I am, you may want to consider doubling the amount listed above.\r\n\r\n \r\n\r\n** If using fresh herbs, measure 2 teaspoons (10 g) of each.\r\n\r\n \r\n\r\n*** If the casserole is going to sit in the fridge for a couple days before you cook it, feel free to stir in an extra 1\/2 (125 mL) to 3\/4 cup (180 mL) of marinara sauce. This isn\u2019t absolutely necessary, but helps counteract any moisture loss while sitting in the fridge.\r\n\r\n \r\n\r\nMake it gluten-free: use gluten-free pasta and cook as directed.\r\n\r\n \r\n\r\nMake it kid-friendly: process the mushrooms in a food processor until minced. The mushrooms will be virtually undetectable, but your meal will still retain their immune boosting benefits!”}

All-Purpose Vegan Cheese Sauce

{“head_note”:”Here it is: my favorite vegan \u201ccheese\u201d sauce that not only tastes amazing, but can also be used in a wide variety of dishes! Who knew that just a few simple ingredients could create such a silky, decadent, and pourable sauce? No, the recipe isn\u2019t quite a dead ringer for traditional cheese sauce, but we think it\u2019s delicious in its own right. This pairs perfectly with my Chili Cheese Nachos<\/a> or Mac and Peas recipes from Oh She Glows Every Day<\/i>, but is just as good heated up and used as a nacho dip for salsa, guacamole, or refried beans. It\u2019s also fantastic drizzled over roasted or steamed broccoli or cauliflower.”,”instructions”:”

    \r\n \t

  1. Soak the cashews in a bowl of water overnight. Drain and rinse. (For a quick-soak method, bring a small pot of water to a boil and turn off the heat. Add the cashews to the hot water and soak for 30 to 60 minutes. Drain and rinse.)<\/li>\r\n \t
  2. Add potatoes and carrots to a small pot and cover with water. Bring to a boil, reduce heat to medium, and simmer uncovered for 10 to 15 minutes until fork tender. Drain. Alternatively, you can steam the veggies until cooked through.<\/li>\r\n \t
  3. Add all ingredients except hot sauce to a high-speed blender and blend until smooth. (See my tip for a food processor option.) If the mixture is too thick, a splash of water or oil can help it along. Sample the sauce and adjust seasonings as desired. Add Sriracha (or other hot sauce) as preferred, if you\u2019d like to give the cheese a spicy kick! The sauce will keep for up to one week refrigerated in an airtight container.<\/li>\r\n<\/ol>“,”foot_note”:”* If your blender has a hard time blending cashews smooth, you may omit them (or try using a tablespoon of raw cashew butter instead!).\r\n\r\n \r\n\r\n** To cut down on cooking time, be sure the potatoes and carrots are diced finely.\r\n\r\n \r\n\r\n*** If you don\u2019t have either of these oils on hand, a light-tasting olive oil should do the trick. Be sure not to use virgin coconut oil as it can impart a coconut flavour in the sauce (unless you\u2019re down with that of course!). Refined coconut oil has no flavour.\r\n\r\n \r\n\r\nIf you don\u2019t have a high-speed blender, a heavy-duty food processor will work in a pinch. Note that you may have to process the mixture for several minutes, and keep in mind that if you use cashews they won\u2019t fully break down like they do in a Vitamix, resulting in a slightly more textured sauce.\r\n\r\n \r\n\r\nMake it nut-free: simply omit the cashews. The sauce won\u2019t be quite as rich, but still tastes great. You can also add an extra tablespoon of nutritional yeast if omitting the cashews.”}

Make-Ahead Roasted Butternut Squash Casserole

{“head_note”:”This is a handy make-ahead version of one of my all-time favourite fall and winter side dishes showcasing the best of cold weather produce. See my tips below on how you can prep the casserole ingredients a couple days beforehand, so they\u2019re ready to come together effortlessly at meal-time (just be sure to leave yourself about an hour to cook it, though). Sometimes, when I\u2019m feeling wild, I like to double the vegan parmesan because it\u2019s just so good!”,”instructions”:”

    \r\n \t

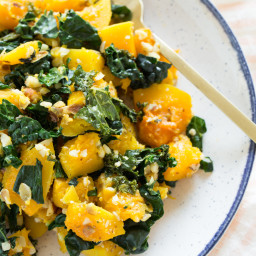
  1. Grease an extra-large casserole dish with oil and set aside. <\/span><\/li>\r\n \t
  2. Peel the squash. Thinly slice off the bottom and top and then slice through the middle lengthwise to make two halves. Remove seeds with a spoon. Chop the two halves into 1-inch chunks and place into the oiled casserole dish. (Time-saving tip: buy a couple pounds of pre-chopped fresh butternut squash from the produce section of the grocery store. This was a major game-changer in the Liddon household, let me tell ya!.)<\/span><\/li>\r\n \t
  3. Add the minced garlic, parsley, oil, and salt into the casserole dish and toss with squash until combined (hands or a spoon both work well for this step!). Do not add the kale yet.<\/span><\/li>\r\n \t
  4. Cover the casserole dish with tinfoil and pop it into the fridge.<\/span><\/li>\r\n \t
  5. Place the chopped kale into a tightly sealed zip bag (being sure to squeeze any air out beforehand) or a small airtight container and refrigerate.<\/span><\/li>\r\n \t
  6. For the parmesan: Place all of the Almond-Pepita Parmesan ingredients into a mini food processor and pulse together until coarsely ground. Transfer the mixture into a zip bag or small container before placing it in the fridge. All three casserole components can be stored in the fridge for 2 to 3 days.<\/span><\/li>\r\n \t
  7. When ready to cook the casserole, remove all prepped ingredients from the fridge. Poke a few air holes into the tinfoil covering the casserole dish.<\/span><\/li>\r\n \t
  8. Preheat oven to 400\u00b0F (200\u00b0C).<\/span><\/li>\r\n \t
  9. Place the covered casserole dish in the oven and bake for about 45 to 50 minutes, until the squash is fork tender.<\/span><\/li>\r\n \t
  10. Carefully remove the squash from the oven and reduce heat to 350\u00b0F (180\u00b0C). Remove the tinfoil (be careful as some steam might escape from the dish as you do). Stir the chopped kale into the squash until combined. Sprinkle all of the parmesan over top of the squash. Bake for another 6 to 10 minutes, uncovered, until the nuts are lightly toasted and the kale has wilted. Watch closely so you don\u2019t burn either the nuts or kale. Serve warm, seasoning with salt and pepper to taste.<\/span><\/li>\r\n \t
  11. Leftovers will keep refrigerated in an airtight container for about 5 days. To reheat, simply scoop the squash into an oiled skillet and heat over medium, stirring frequently, until heated through. Season to taste, and enjoy!<\/span><\/li>\r\n<\/ol>“,”foot_note”:”* I doubled the original amount of kale for extra green power!\r\n\r\n** Feel free to swap in any nuts or seeds you prefer! There are endless possibilities. Pecans (which are used in the original version) are lovely, too.\r\n\r\nMAKE IT NUT-FREE: Swap the almonds for more pepitas.\r\n\r\nThe total bake time your squash requires will depend on how fresh it is, how small you chop the squash, and how hot your oven runs, so you can start checking it after 35 to 40 minutes.”}

Ultimate Flourless Brownies for Two

{“head_note”:”This two-serving brownie is fudgy and dense with a firm edge, and thanks to the almond butter base, there isn\u2019t a stitch of flour! The nuttiness of the almonds and chopped dark chocolate enhance its rich chocolate flavour. This is a fantastic dessert when you want a decadent treat without being taunted by a pan of leftover brownies in the kitchen. (But if you do, see the full-sized brownie and caramel recipes in my second cookbook, Oh She Glows Every Day.<\/i>)”,”instructions”:”

    \r\n \t

  1. Preheat the oven to 350\u00b0F (180\u00b0C) and place the oven rack in the middle position. Lightly grease a 4-inch ramekin (or two small, 3-inch ramekins) with oil.<\/span><\/li>\r\n \t
  2. In a medium mixing bowl, whisk together the ground flax and water. Let it sit for a couple of minutes.<\/span><\/li>\r\n \t
  3. To the flax mixture, add the salt, baking soda, maple syrup, vanilla, and arrowroot starch; whisk vigorously until smooth. <\/span><\/li>\r\n \t
  4. Add the cocoa powder and sugar; stir with a spoon until combined. The batter will be very thick.<\/span><\/li>\r\n \t
  5. Stir in the almond butter and chopped chocolate until thoroughly combined. Mix the dough for 30 to 60 seconds, until you can\u2019t see any \u201cribbons\u201d of almond butter in the dough. <\/span><\/li>\r\n \t
  6. Scoop the dough into the prepared ramekin(s). Press down on the dough with your fingers until even and smooth. <\/span><\/li>\r\n \t
  7. Place the ramekin(s) directly onto the rack, and bake for about 22 to 25 minutes, until the brownie has risen nicely, but is still soft to the touch. When it\u2019s ready, the middle will still look a bit underdone. A toothpick inserted into the middle <\/span>won\u2019t <\/span><\/i>come out clean. Shortly after removing from the oven, the middle will sink, but this is all normal. Pinky swear!<\/span><\/li>\r\n \t
  8. Place the ramekin(s) on a cooling rack for about 25 to 30 minutes. <\/span><\/li>\r\n \t
  9. Meanwhile, prepare the Magic No-Cook Caramel Sauce. Add all of the caramel sauce ingredients into a mini food processor, and process until smooth. Or you can simply add it to a small bowl and beat it with an electric mixer. Transfer to a small jar.<\/span><\/li>\r\n \t
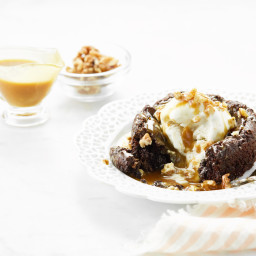
  10. You can serve the brownie in the ramekin, or you can slide a knife around the edge and carefully pop it onto a plate. Serve it with a scoop of ice cream (totally optional), a drizzle of caramel sauce, and a small pinch of coarse sea salt. I like to scatter on some toasted walnuts for a little crunch, too.<\/span><\/li>\r\n \t
  11. Any leftover brownie (I doubt you\u2019ll have any, though!) can be stored in an airtight container in the fridge for a few days. You can also wrap the cooled brownie individually in tin foil and place it into an airtight container or bag in the freezer for 3 to 4 weeks. If you have leftover caramel sauce, it\u2019ll keep in an airtight container in the fridge for a week or so.<\/span><\/li>\r\n<\/ol>“,”foot_note”:”* The coconut nectar has a slightly tangy flavour which is why it works well in this caramel sauce, but if you don\u2019t have any on hand feel free to use maple syrup in its place. It\u2019ll work just fine!\r\n\r\nThe caramel sauce makes 1\/4 cup (60 mL). If you don’t want that much, you can cut the recipe in half and whisk everything by hand in a small bowl.”}

Make-Ahead Thanksgiving Panzanella

{“head_note”:”Since this is quite an involved recipe, I like to prepare a few aspects of this panzanella the day before to save time and mess on the day of a special event, such as Thanksgiving. By doing a bit of advance prep (about 30 minutes the day before), all you have to do on the day is bake the squash and bread, then toss it all together just before serving. I like to serve this recipe warm, so I time the cooking so that the squash and bread come out of the oven just before our planned mealtime. This recipe is adapted from The First Mess Cookbook<\/i> (2017) by Laura Wright. Reprinted by permission of Penguin Canada, a division of Penguin Random House Canada Limited.”,”instructions”:”

    \r\n \t

  1. The day before (steps 1-4)<\/strong>: Make the dressing: In a small jar, place the balsamic vinegar, minced garlic, maple syrup, Dijon mustard, olive oil, salt, and pepper. Screw on the lid and shake to combine. Chill in the fridge.<\/span><\/li>\r\n \t
  2. Slice the sourdough bread into 1-inch cubes until you have 4 cups. Place into a large bag or container and leave it on the counter.<\/span><\/li>\r\n \t
  3. Slice each squash down the middle, lengthwise. With a spoon, scrape out all of the seeds and discard them. Slice the squash into 1\/4-inch \u201chalf-moon\u201d slices, and place them into a large zip bag, bowl, or container. Mince the rosemary and thyme and add it to the squash. Chill the squash and herbs in the fridge (covering, if necessary).<\/span><\/li>\r\n \t
  4. In a separate zip bag or container, place the sliced kale, chopped celery, and pomegranate seeds. Chill in the fridge (covering, if necessary).<\/span><\/li>\r\n \t
  5. The next day (steps 5-8):<\/strong> About 15 minutes before you begin, remove the dressing and squash from the fridge and place them on the counter so that they can come to room temperature. Position two racks near the centre of the oven. Preheat the oven to 400<\/span>\u00b0<\/b>F<\/span> (200<\/span>\u00b0<\/b>C<\/span>), and line two extra-large baking sheets with parchment paper. <\/span><\/li>\r\n \t
  6. Spoon the squash and herbs onto one of the baking sheets. Add a tablespoon of oil and toss until the squash is thoroughly coated. Sprinkle generously with salt and pepper. Roast the squash for about 30 to 38 minutes, until nicely brown on the bottoms. (There\u2019s no need to flip halfway through baking unless you want them evenly browned.)<\/span><\/li>\r\n \t
  7. While the squash is roasting, spread the cubed sourdough onto the remaining baking sheet and toss it in a couple teaspoons of oil. When you have 10 to 15 minutes left of the squash\u2019s roasting time, place the sourdough in the oven with the squash and continue roasting for 10 to 15 minutes. The bread should feel lightly toasted when it\u2019s ready, but it shouldn\u2019t look brown.<\/span><\/li>\r\n \t
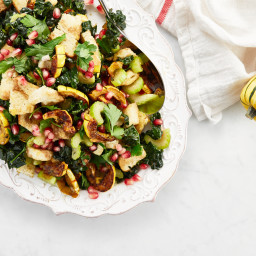
  8. While the squash and sourdough are roasting, place the kale, celery, pomegranate seeds, and dressing into a large serving bowl. When the squash and bread are finished cooking, add them into the bowl, and toss well, until combined. Season the panzanella with more salt, to taste, if desired. Serve warm with a garnish of celery or parsley leaves scattered on top. This recipe is best enjoyed immediately, or within a couple of hours of preparing.<\/span><\/li>\r\n<\/ol>“,”foot_note”:””}

Warming Rainbow “Pad Thai”

{“head_note”:”While not an authentic Pad Thai by any stretch of the imagination, this playful vegan spin is absolutely delicious! Crunchy vegetables like julienned carrots and zucchini, and thinly sliced red pepper and cabbage are lightly saut\u00e9ed and coated in a rich and creamy Thai-inspired almond butter sauce. It\u2019s light and energizing while providing warmth and staying power, thanks to the healthy fats and protein. If you prefer, you can also serve this completely raw (skip the saut\u00e9) during warmer summer months.”,”instructions”:”

    \r\n \t

  1. For the dressing: Place the garlic in a mini food processor and process until finely chopped. Add the rest of the dressing ingredients and process until smooth. If you don\u2019t have a mini processor you can simply whisk the ingredients together by hand until smooth, just be sure to mince the garlic first. The consistency of the dressing may seem too thin at first, but it will thicken as it sits. Taste the dressing, and adjust any ingredients if desired. Set aside.<\/span><\/li>\r\n \t
  2. For the \u201cPad Thai\u201d: Prep the carrots, zucchini, pepper, and cabbage, and place in a large wok along with the sesame oil. Add the frozen edamame and toss until everything is coated in the oil. <\/span>Saut\u00e9<\/span> the veggies over medium to high heat for about 5 minutes, until lightly softened, but still a bit crunchy. Make sure the edamame has heated through. After cooking, add some of the dressing (reserving some for later as you may not need it all) and toss to combine until heated through, or you can serve the dressing separately, drizzled on top just before serving. Be sure not to overcook the veggies.<\/span><\/li>\r\n \t
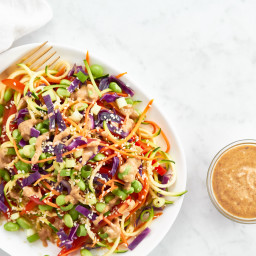
  3. Serve the mixture on plates or in bowls, and top with the dressing (if you haven\u2019t already added it to the mixture), green onion, hemp hearts, and sesame seeds. Lightly season the mixture with a dash or two of salt before serving.<\/span><\/li>\r\n<\/ol>“,”foot_note”:”* You should have 2 cups (500 mL) each<\/strong> of julienned\/spiralized carrots and zucchini.\r\n\r\n** Try chopped tofu instead of edamame for a fun twist!\r\n\r\nBe sure to use gluten-free tamari if you need this recipe to be gluten-free.”}

Pumpkin Spice Latte

{“head_note”:”I don’t have an espresso machine, so I find the easiest way to make an authentic-tasting latte at home is to simply buy a few shots of espresso at the local coffee shop. I’ve tried using strong coffee as a substitute for espresso and I find it misses that incredibly rich, deep, and flavorful espresso flavour which I think is key for a latte. That said, feel free to experiment with strong coffee, too (you may want to increase the amount of coffee to at least a half cup or more). Lastly, I discovered that you can create super creamy and frothy almond milk by adding the heated milk into a small French press and pumping the plunger vigorously for 30 to 60 seconds . (Note: Be very careful as it can explode!) This may be an option if you don\u2019t have a milk frother.”,”instructions”:”

    \r\n \t

  1. For the Pumpkin Spice Syrup: Whisk together all syrup ingredients in a medium pot over medium heat. Simmer for about 5 to 6 minutes, stirring frequently, until smooth and slightly thickened. Remove from heat. Once cool, pour leftovers into a jar and secure lid.<\/span><\/li>\r\n \t
  2. Prepare the espresso or pick some up from a local coffee shop.<\/span><\/li>\r\n \t
  3. Add milk into a small pot. Heat over medium and bring to a simmer. Immediately remove from heat. Froth the milk using a milk frother or a French press. Tip: I use my French press to froth the milk. Simply add the heated milk into the press and secure lid (make sure it\u2019s closed and not vented). Pump the plunger vigorously for about 30 to 60 seconds. Be careful, as the hot milk can shoot out.<\/span><\/li>\r\n \t
  4. Pour hot espresso into a mug. Top with all of the frothy milk. Add 3 to 4 teaspoons of the syrup, to taste, and gently stir to combine. Top with a dash of cinnamon or pumpkin pie spice, and Coconut Whipped Cream, if desired. Serve immediately. The syrup will keep in an airtight container in the fridge for at least 2 weeks, most likely longer. You can use it in regular coffee, too, or try stirring it into a bowl of hot oatmeal for a seasonal twist!<\/span><\/li>\r\n<\/ol>“,”foot_note”:”*If your pumpkin puree is on the grainy side (some brands are more than others), it might benefit from a quick blend or puree in the blender or food processor before using.”}